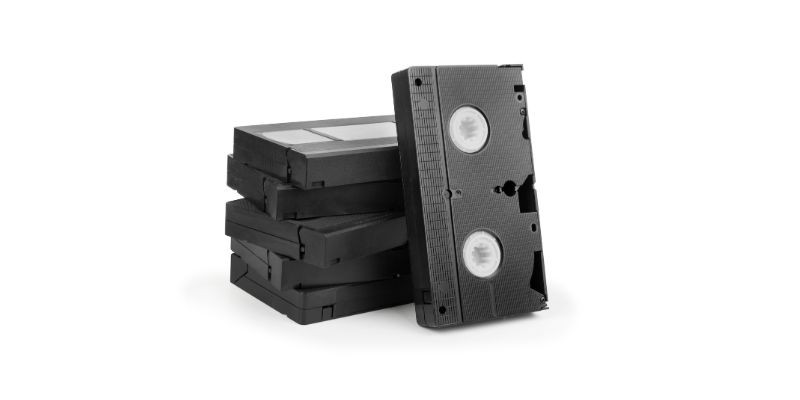
To convert video cassette to digital, you can use a digital converter or video capture device connected to a computer. It allows you to transfer the content of VHS tapes to a digital format like DVD or digital files.
This DIY option is suitable for tech-savvy users and can be done through a camcorder, VHS VCR, or a computer running on Mac or Windows. Additionally, you can find various tutorial videos on platforms like YouTube that provide step-by-step instructions on converting VHS tapes to digital.
By following these methods, you can preserve and enjoy your old video cassette collection in a digital format.
Step 1: Gathering The Necessary Equipment
How to Convert Video Cassette to Digital
Converting your precious video cassette tapes to digital format can help preserve your memories for future generations. To begin the conversion process, you will need to gather the necessary equipment. Below is a list of equipment you will need for this project.
List of equipment required for converting video cassette to digital
| Equipment | Description |
|---|---|
| Digital converter (video capture device or capture card) | A device that connects your VCR or camcorder to your computer, allowing you to transfer the analog video signal to a digital format. |
| VCR or camcorder | The device that plays your video cassette tapes. Make sure it is compatible with the digital converter you choose. |
| Computer | A Mac or Windows PC with sufficient storage space to store the digital files. |
| Video editing software | Software that allows you to edit and enhance your digital videos. |
| USB cables | To connect your digital converter to your computer. |
| Blank DVDs or external hard drive | To store your digitized video files. |
Now that you know what equipment is required, let’s briefly discuss the importance of video capture devices.
Introduction to video capture devices and their importance
Video capture devices, also known as digital converters or capture cards, are essential for converting video cassette tapes to digital format. These devices act as mediators between your VCR or camcorder and your computer, facilitating the transfer of analog video signals to a digital format that can be stored, edited, and shared on modern devices.
Video capture devices come in various forms and connect to your computer through USB or Firewire ports. Some devices can be directly connected to a VCR or camcorder, while others require a computer as an intermediary. It is important to choose a video capture device that is compatible with your VCR or camcorder, as well as your computer operating system.
When selecting a video capture device, consider factors such as resolution support, compatibility with both analog and digital formats, and ease of use. Reading reviews and doing thorough research will help you find the best video capture device that suits your needs.
By using a video capture device, you can convert your video cassette tapes to a digital format quickly and efficiently, ensuring your precious memories are preserved for years to come.
Step 2: Setting Up The Video Capture Device
Once you have your video capture device ready, it’s time to set it up and connect it to your computer. This step is crucial in ensuring a smooth and efficient transfer process.
How to connect the video capture device to your computer
Connecting your video capture device to your computer is a straightforward process. Follow the steps below:
- Start by locating the USB cable that came with your video capture device. Plug one end of the cable into the device’s USB port.
- Next, locate an available USB port on your computer. Plug the other end of the USB cable into the USB port on your computer.
- Ensure that the device is securely connected to your computer. You should hear a sound or see a notification indicating that a new device has been detected.
That’s it! Your video capture device is now connected to your computer and ready for configuration.
Configuring the video capture software for optimal performance
Before you start capturing your video tapes, it’s essential to configure the video capture software on your computer for optimal performance. Follow these steps:
- Launch the video capture software on your computer. You can usually find it in your computer’s programs or applications folder.
- Once the software is open, navigate to the settings or preferences menu.
- Adjust the settings according to your preferences. This may include selecting the desired video format, resolution, frame rate, and audio settings.
- Make sure to check the documentation or user manual of your video capture device for any specific software settings or recommendations.
- Once you have configured the settings, click ‘Apply’ or ‘Save’ to save the changes.
It’s important to note that the optimal settings may vary depending on the specifications of your video capture device and the desired output quality. Experiment with different settings to find the best configuration for your needs.
With your video capture device connected and the software properly configured, you’re now ready to start converting your video cassette tapes to digital format. In the next step, we’ll guide you through the actual video capture process.
Step 3: Capturing The Video Cassette
Proper Handling of Video Cassettes to Prevent Damage
Before you start capturing the video cassette, it is essential to handle it properly to prevent any damage. Video cassettes are delicate and can be easily damaged if not handled with care. Here are a few tips to ensure proper handling:
- Handle the cassette by its edges to avoid touching the tape inside.
- Avoid exposing the cassette to extreme temperatures or humidity, as it can cause potential damage.
- Keep the cassette away from magnetic fields such as speakers or other electronic devices to prevent data loss.
- Store the cassettes in a cool, dry place, preferably in a protective case or sleeve to prevent dust accumulation or scratches.
Starting the Capturing Process and Adjusting Settings
Once you have properly handled the video cassette, it’s time to start the capturing process and adjust the settings for optimal results. Follow these steps:
- Connect your video cassette player to your computer using a video capture device or capture card. These devices facilitate the transfer of analog signals from the cassette to your digital files.
- Launch the video capturing software on your computer, such as OBS or Elgato Capture, depending on the device you are using.
- Select the appropriate input source in the software, usually labeled as the video capture device.
- Ensure that the software settings are adjusted correctly. Check the resolution, frame rate, and encoding settings to match the quality you desire for the digital copy.
- Start the video cassette player and cue the cassette to the desired starting point for capturing.
- Press the record button in the capturing software to initiate the recording process.
- Monitor the capturing process to ensure that the video is being recorded smoothly, free from glitches or interruptions.
- Once the capturing is complete, stop the recording and save the digital file to a designated location on your computer.
Remember, adjusting the settings and monitoring the capturing process allows you to achieve the best possible digital copy of your video cassette. Take your time and make sure everything is set up correctly before initiating the recording.
Step 4: Editing And Enhancing The Captured Video
Introduction to video editing software
Once you have successfully digitized your video cassette and transferred it to your computer, the next step is to edit and enhance the captured video. Video editing software allows you to trim, cut, merge, and add various effects to your footage, ensuring a polished and professional end result. There are several video editing software options available, both free and paid, catering to different skill levels and requirements. From basic editing tools to advanced features like color correction and special effects, video editing software provides endless possibilities to bring your captured memories to life.
Enhancing the quality of the captured video through editing techniques
Editing techniques enable you to improve the quality of the captured video, ensuring a visually appealing and engaging final product. Here are some techniques that can help you enhance the quality of your footage:
1. Trim and cut
Using video editing software, you can easily trim and cut unnecessary footage from your video. This allows you to remove any unwanted sections, such as blank screens or mistakes, and ensure that the final video flows smoothly.
2. Merge and transition
Video editing software also allows you to merge different clips together and add smooth transitions between them. This enables you to arrange your footage in a logical and cohesive manner, creating a seamless viewing experience for your audience.
3. Color correction
Color correction is a powerful tool that enables you to adjust and enhance the color balance of your video. You can make your footage appear more vibrant and visually appealing by adjusting parameters such as brightness, contrast, saturation, and hue.
4. Add effects and filters
Video editing software offers a wide range of effects and filters that can be applied to your footage. From artistic filters that transform your video into a vintage or black and white look, to special effects like slow motion or time-lapse, these features allow you to add a creative touch to your video.
5. Audio editing
In addition to visual editing, video editing software also provides the capability to edit and enhance the audio of your video. You can adjust the volume, remove background noise, add music or voiceovers, and synchronize the audio with the video for a seamless viewing experience.
By utilizing these editing techniques and features, you can transform your captured video into a high-quality and visually stunning digital format. Whether you are creating a personal video montage or preparing a professional presentation, video editing software is an essential tool in the digital conversion process.
Step 5: Saving And Organizing The Digitized Videos
Now that you have successfully converted your video cassette tapes to digital format, it is time to save and organize your newly digitized videos. This step is crucial for easy access and playback, ensuring that you can enjoy your nostalgic memories whenever you want.
Choosing the appropriate file format for the digitized videos
When saving your digitized videos, it is important to choose the appropriate file format. This will ensure compatibility with various devices and video players. Here are some popular file formats for digital videos:
- MP4: An MPEG-4 video file format that offers good video quality and compression. It is widely supported and compatible with most devices and operating systems.
- AVI: An Audio Video Interleave file format that allows for high-quality videos. However, the file sizes can be larger compared to other formats.
- MKV: A Matroska file format that supports multiple audio and video streams, making it ideal for videos with multiple language options or subtitles.
- MOV: A file format commonly used by Apple devices and QuickTime media player. It offers good quality and compatibility with Mac systems.
Consider the specific requirements of your devices and choose the file format that best suits your needs. Keep in mind that some devices may have limitations or specific preferences for playing digital videos.
Organizing the digitized videos for easy access and playback
To ensure easy access and playback of your digitized videos, it is essential to organize them properly. Here are some tips to help you stay organized:
- Create folders: Organize your videos into folders based on categories, such as family events, vacations, or specific years. This will make it easier to locate and browse through your videos.
- Naming conventions: Use descriptive and consistent file names for your videos. Include relevant information such as the event, date, or people involved. This will make it easy to search for specific videos in the future.
- Add metadata: Metadata is additional information about your videos, such as title, tags, or descriptions. Adding metadata will further enhance organization and searchability of your videos.
- Backup your videos: Make sure to create backups of your digitized videos to prevent any loss of precious memories. Consider storing backups on external hard drives, cloud storage, or DVDs.
By implementing these organization strategies, you can ensure that your digitized videos are easily accessible and enjoyable for years to come. Saving and organizing your digitized videos is the final step in the process of converting video cassette tapes to digital format. By choosing the appropriate file format and organizing your videos effectively, you can preserve your memories and relive them with ease. So, go ahead and start digitizing your video cassette tapes to create a digital library of cherished moments!

Credit: suzyquilts.com
Step 6: Backing Up The Digitized Videos
Once you have successfully converted your video cassettes to digital format, it is crucial to back up your precious memories. Backing up the digitized videos ensures that you have multiple copies stored in different locations, providing protection against loss or damage.
Importance of backing up digitized videos
Backing up your digitized videos is essential for several reasons. Firstly, it safeguards your memories from unforeseen disasters such as fire, flood, or theft. Losing your original video cassettes can be devastating, but having a backup copy gives you peace of mind.
Secondly, digital files can be vulnerable to corruption or deletion due to technological glitches or human error. By creating backups, you have additional copies to rely on in case your primary file becomes corrupted or accidentally deleted.
Lastly, as technology advances, the formats and storage options for digital files may change. By backing up your digitized videos onto multiple mediums, you ensure that you can access them in the future, even if the current technology becomes obsolete.
Different backup options and strategies for preserving the digitized videos
There are several backup options and strategies available to preserve your digitized videos. Here are some popular methods:
External Hard Drives
Investing in an external hard drive is an excellent option for backing up your videos. These portable devices offer large storage capacities and are easily connected to your computer. Simply copy the digitized videos onto the external hard drive and store it in a safe place.
Cloud Storage
Cloud storage services like Google Drive, Dropbox, or iCloud allow you to store your videos securely on remote servers. This option provides an added layer of protection as your files are stored off-site. Additionally, cloud storage allows you to access your videos from multiple devices.
DVDs or Blu-rays
If you prefer physical media, you can burn your digitized videos onto DVDs or Blu-ray discs. This option is convenient for those who want to have a tangible backup and can be easily stored in a DVD case or binder.
Network Attached Storage (NAS)
A NAS system is a centralized storage solution that connects to your home network. It allows you to create a personal cloud, giving you the flexibility to access and backup your videos from multiple devices within your network.
Online Video Platforms
If you plan on sharing your videos with family and friends or want an additional backup option, consider uploading them to online video platforms like YouTube or Vimeo. These platforms offer privacy settings, allowing you to control who can view your videos.
Remember, the key to effective backup is redundancy – having multiple copies stored in different locations or mediums. By implementing a combination of these backup options and strategies, you can ensure the long-term preservation and protection of your digitized videos.
Step 7: Sharing And Enjoying The Digitized Videos

Uploading the digitized videos to online platforms
Once you’ve successfully converted your video cassettes to a digital format, it’s time to share your precious memories with family and friends. One of the easiest ways to do this is by uploading your videos to online platforms. Let’s explore how you can do this. First, you’ll need to choose which online platform you want to use. There are various options available, including YouTube, Vimeo, and Dailymotion. Each has its own unique features and audience, so you can choose the platform that suits your needs best. To upload your videos, follow these simple steps:
- Create an account or sign in to your existing account on the chosen online platform.
- Click on the “Upload” button, usually located in the top right corner of the homepage.
- Select the video file from your computer that you want to upload.
- While the video is uploading, you can add a title, description, and tags to make it easier for others to find.
- Once the upload is complete, you can choose whether you want to make the video public or private.
- Click on the “Publish” or “Save” button to finalize the uploading process.
How to enjoy the digitized videos on various devices
Now that you have digitized your video cassettes and uploaded them online, it’s time to enjoy your videos on various devices. Whether you prefer watching on your computer, smartphone, or television, here’s how you can easily access your digitized videos.
- Computer: You can simply visit the online platform where you uploaded your videos and play them directly from there. Alternatively, you can download the videos to your computer and watch them using a media player like VLC or Windows Media Player.
- Smartphone or tablet: Most online platforms have their own mobile apps, which you can download from the App Store or Google Play Store. Once downloaded, sign in to your account and you’ll have access to all your uploaded videos.
- Television: If you have a smart TV, you can use the built-in apps to access the online platform where you uploaded your videos. Simply open the app, sign in to your account, and start streaming your videos on the big screen.
By following these steps, you can easily upload and enjoy your digitized videos on various devices. Whether you want to relive cherished memories or share them with loved ones, converting video cassettes to digital format opens up a world of possibilities. Start preserving and enjoying your precious moments today!
Frequently Asked Questions For How To Convert Video Cassette To Digital
How Do I Convert Old Home Video Tapes To Digital?
To convert old home video tapes to digital, you’ll need a digital converter or a video capture device. These can be connected to your computer or used with a camcorder/VHS VCR. Capture the video using the software provided and save it to your computer.
How Can I Transfer Video Cassette Tapes To My Computer?
To transfer video cassette tapes to your computer, you can use a digital converter or a video capture device. Connect the cassette player or VCR to the converter and your computer, then use capture software to transfer the video.
How Can I Convert Vhs To Dvd At Home?
To convert VHS to DVD at home, you’ll need a digital converter or video capture device. Connect your VCR or camcorder to your computer and use capture software to transfer the video. Follow step-by-step tutorials on platforms like YouTube or seek professional assistance from conversion services.
How Do I Convert 8Mm Video Tapes To Digital?
To convert 8mm video tapes to digital, use a digital converter or capture card connected to your computer. Launch the capture software, turn on your camcorder or VCR, insert the tape, and click on the video option.
Conclusion
Converting video cassette tapes to digital format is a valuable process that allows you to preserve and enjoy your old memories. By following the right steps and utilizing the appropriate tools, you can easily transfer your VHS tapes to a digital format like DVD or digital files.
One option is to use a digital converter, also known as a video capture device or capture card. This device can work directly with your camcorder or VHS VCR, or it can run through your Mac or Windows PC computer.
There are also various video conversion software available that enable you to capture and edit your VHS tapes before transferring them to digital format. Whichever method you choose, it’s important to have the necessary hardware and software in place for a successful conversion.
With the right tools and techniques, you can ensure that your precious memories are digitized and preserved for future generations to enjoy.