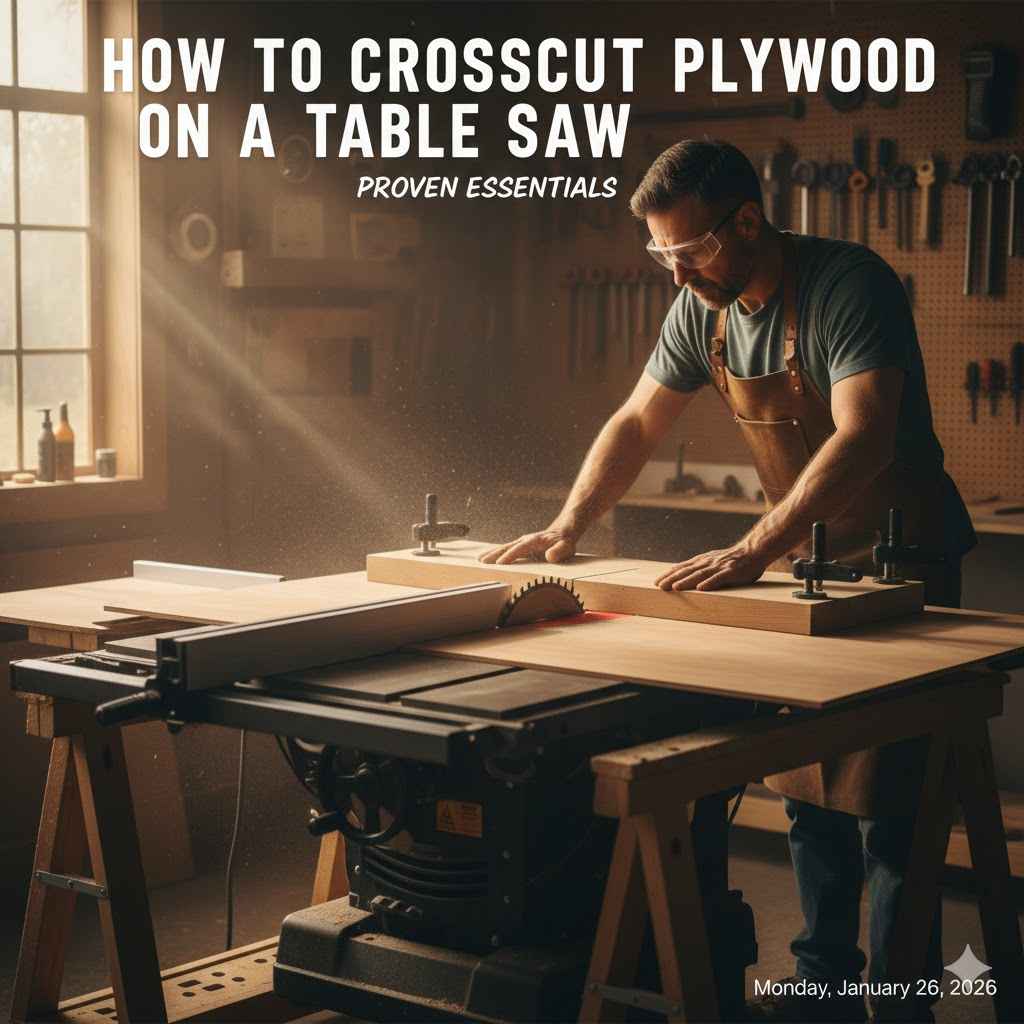
To crosscut plywood on a table saw, first ensure your blade is sharp and has a high tooth count to prevent tear-out. Use a crosscut sled or a miter gauge for accuracy and support. Set the blade height just above the wood surface. Support the plywood securely and guide it smoothly through the blade for a clean, straight cut.
Struggling with large sheets of plywood on your table saw? You are not alone. It can feel like wrestling an octopus. The wood chips and splinters. The cut edge looks ragged. It’s a common frustration for many new woodworkers. You bought that plywood for a beautiful project, not to create a pile of expensive firewood. Don’t worry, there is a simple and safe way to get perfect cuts every time. I’ll show you the essential steps to turn that unwieldy sheet into a clean, project-ready piece.
Why Crosscutting Plywood Is a Unique Challenge
You might think wood is wood. But plywood is a different beast compared to a solid board. It’s made of thin layers, or “plies,” of wood veneer glued together. The grain direction of each layer is turned 90 degrees to the one below it. This engineering trick is what makes plywood so strong and stable.
However, it also creates our biggest problem: tear-out. When your saw blade cuts across the top layer of wood grain, it can lift and tear the fibers instead of shearing them cleanly. This leaves a nasty, splintered edge that looks unprofessional and can ruin your project’s dimensions. This is especially common on the top face of the plywood where the blade exits the cut.
The second challenge is sheer size and weight. A full 4×8 foot sheet of 3/4-inch plywood can weigh over 70 pounds. Trying to push that giant board across a small table saw is awkward and unsafe. It can wobble, tip, or bind on the blade, leading to a crooked cut or a dangerous kickback. Getting a straight, square crosscut requires control, and you can’t have control if you’re struggling just to hold the material. That’s why we need a solid plan and the right setup.

Essential Tools and Materials for Clean Crosscuts
Having the right gear makes all the difference. You don’t need the most expensive tools, but you do need the correct ones for a safe and clean job. Think of this as your pre-flight checklist. Getting everything ready beforehand means you can focus entirely on making a great cut when the time comes.
Here’s a breakdown of what you’ll need to get started:
| Item | Why You Need It |
|---|---|
| Table Saw | The heart of the operation. Any standard contractor or cabinet saw will work. |
| Plywood Blade | This is critical. Look for a blade with 60 to 80 teeth (or more) and an Alternate Top Bevel (ATB) tooth design for the cleanest cuts. |
| Safety Glasses | Non-negotiable. Protect your eyes from dust and debris at all times. |
| Hearing Protection | Table saws are loud. Earmuffs or earplugs will protect your hearing long-term. |
| Push Sticks or Push Blocks | Keep your hands safely away from the saw blade, especially on narrower cuts. |
| Tape Measure | For accurate measurements. Remember the old rule: measure twice, cut once. |
| Pencil or Marking Knife | A sharp pencil is fine, but a marking knife gives you a more precise line and helps prevent tear-out. |
| Carpenter’s Square | Essential for drawing a perfectly square line across your plywood. |
| Crosscut Sled (Recommended) | A DIY or store-bought sled is the best tool for safe, accurate crosscuts on large or small pieces. |
| Miter Gauge | Comes with your table saw. It works for smaller pieces but can be less stable for large sheets. |
| Infeed/Outfeed Supports | Roller stands or a dedicated support table are crucial for managing full sheets of plywood. |
| Painter’s Tape | A simple but effective trick to reduce tear-out on the top surface. |
Safety First: Your Workshop Mantra
Before we even think about turning the saw on, let’s talk about safety. A table saw is an amazing tool, but it demands respect. Following these rules isn’t about being overly cautious; it’s about being smart so you can enjoy woodworking for years to come. Your well-being is more important than any project.
Personal Protective Equipment (PPE)
Your safety starts with you. Never operate a table saw without the proper gear. This is the absolute minimum:
- Eye Protection: Always wear safety glasses or goggles. A stray wood chip can cause serious and permanent eye damage.
- Hearing Protection: The high-pitched whine of a table saw can damage your hearing over time. Use earmuffs or foam earplugs.
- Dust Mask: Plywood contains glues and binders that you don’t want to breathe. A simple N95 mask is a good idea, especially for long cutting sessions.
What not to wear is just as important. Avoid loose clothing, hanging drawstrings, jewelry, or gloves, as these can get caught in the spinning blade.
Know Your Saw
Every table saw is a bit different, but the core safety features are universal. Make sure you know where they are and how they work on your machine.
- Blade Guard: This is the clear plastic cover over the blade. It’s there to prevent accidental contact with the blade. Use it whenever possible.
- Riving Knife or Splitter: This metal fin sits just behind the blade. It prevents the wood from pinching the blade after the cut, which is a primary cause of dangerous kickback. Ensure it is aligned properly with your blade.
- Anti-Kickback Pawls: These are small, toothed arms on the blade guard assembly that dig into the wood to stop it from flying back at you if a kickback starts.
- On/Off Switch: Know exactly where it is so you can shut the machine off quickly without looking. Many saws have a large “paddle” switch you can turn off with your knee.
Before each use, do a quick check. Make sure the blade is tight, the riving knife is aligned, and the guard moves freely. A few seconds of prevention is worth a lifetime of regret.
Step-by-Step: How to Crosscut Plywood on a Table Saw
Alright, with our tools gathered and our safety mindset in place, it’s time to make a cut. Follow these steps carefully, and don’t rush. Smooth and steady wins the race.
Step 1: Break Down the Plywood First (If Necessary)
Trying to crosscut a full 4×8 sheet of plywood on a table saw is often impractical and unsafe, especially if you’re working alone. It’s better to break it down into a more manageable size first. You can do this with a circular saw and a straightedge guide on the floor. Get the piece close to your final dimension, leaving a little extra (about 1/4 inch) to trim off cleanly at the table saw.
Step 2: Measure and Mark Your Cut Line
Accuracy starts here. Use your tape measure to mark the desired length of your piece. Make at least two marks, one near each edge of the board.
Next, use your carpenter’s square to connect these marks with a straight line. Place the handle of the square firmly against the factory edge of the plywood to ensure your line is a perfect 90 degrees. A sharp pencil works, but for the cleanest cut, use a utility knife to lightly score the line. This pre-cuts the top wood fibers and is a great first defense against tear-out.
Step 3: Set Up Your Table Saw
Now, let’s get the saw ready. This setup is crucial for a clean, square cut.
- Install the Right Blade: Make sure your high-tooth-count plywood blade is installed. Ensure the saw is unplugged when changing blades!
- Set Blade Height: Raise the blade so the top of one tooth is just slightly higher than the thickness of your plywood—about 1/8 of an inch. A lower blade height results in a cleaner “downward” shearing action on the bottom face, reducing tear-out there.
- Use a Crosscut Sled or Miter Gauge:
Crosscut Sled (Best Method): A crosscut sled is a jig that slides in the miter slots of your table saw. The plywood rests on the sled, not the saw table. This gives you amazing support and guarantees a square cut every time. Simply place your plywood on the sled, align your cut line with the edge of the sled’s fence, and slide the entire assembly through the blade.
Miter Gauge (Good Method): If you don’t have a sled, use the miter gauge that came with your saw. Press the plywood firmly against the face of the miter gauge. For wider pieces, you can attach a longer auxiliary fence (a straight piece of scrap wood) to the miter gauge for better support.
- Move the Rip Fence: Get the rip fence completely out of the way. Never use the miter gauge and the rip fence at the same time for a crosscut. If the wood gets trapped between the blade and the fence, it can cause a violent kickback.
Step 4: Support Your Workpiece
Even a smaller piece of plywood needs support. You want the board to be perfectly flat and stable throughout the entire cut. Use roller stands or a dedicated outfeed table to support the wood as it passes over and beyond the blade. The support should be level with your saw’s table.
Step 5: Make the Cut
It’s go time. Double-check that your path is clear and your hands are in a safe position.
- Turn on the saw and let it get up to full speed.
- Using your crosscut sled or miter gauge, guide the plywood toward the blade with a smooth, steady motion. Don’t force it. Let the blade do the work.
- Keep your hands well away from the blade. Use a push stick if your hands would come within 6 inches of the blade path.
- Push the piece completely past the blade. The offcut piece should be free to fall away or rest on the outfeed table.
- Turn off the saw and wait for the blade to come to a complete stop before you retrieve your workpiece or the offcut.
And that’s it! You’ve just made a clean, safe, and accurate crosscut on plywood.
The Pro Secret: How to Get Zero Tear-Out
Even with the right blade and good technique, you might see some minor splintering. If you need a flawless, razor-sharp edge for a fine woodworking project like cabinetry, here are a few extra tricks the pros use.
1. Use a Zero-Clearance Insert (ZCI)
A ZCI is a replacement for the standard throat plate around your saw blade. You make it yourself by raising the spinning blade through a blank insert. The result is a slot that has no gap around the blade. This supports the wood fibers right up to the edge of the cut, preventing them from being torn out from below. It’s one of the single best upgrades you can make to your table saw for cut quality.
2. The Painter’s Tape Trick
This is a wonderfully simple and effective technique. Apply a strip of high-quality painter’s tape along your cut line on the top face of the plywood. Press it down firmly. Mark your line on top of the tape. When you make the cut, the tape helps hold the top wood fibers in place, preventing them from lifting and splintering. Just peel it off when you’re done for a surprisingly clean edge.
3. Score the Cut Line Deeply
We mentioned this earlier, but it’s worth repeating. Using a sharp utility knife and a square, make two or three firm passes to score your cut line. This severs the top layer of wood fibers cleanly before the saw blade even gets there. The saw blade then just clears out the wood below your scored line, leaving a perfect edge.
Comparing Tear-Out Prevention Methods
Not sure which method to use? Here’s a quick comparison to help you decide.
| Method | Effectiveness | Effort Level | Best For |
|---|---|---|---|
| Plywood Blade | High | Low (One-time setup) | All plywood cuts. This is the foundation. |
| Zero-Clearance Insert | Very High | Medium (Requires making the insert) | Achieving the absolute cleanest cut possible. |
| Painter’s Tape | Medium-High | Low | Quick projects where you need a clean top edge without much fuss. |
| Scoring the Line | High | Medium | Visible edges on fine furniture or cabinet parts. |
For the ultimate clean cut, you can even combine these methods. A plywood blade, a zero-clearance insert, and scoring the line will give you an edge that looks like it was cut with a laser.
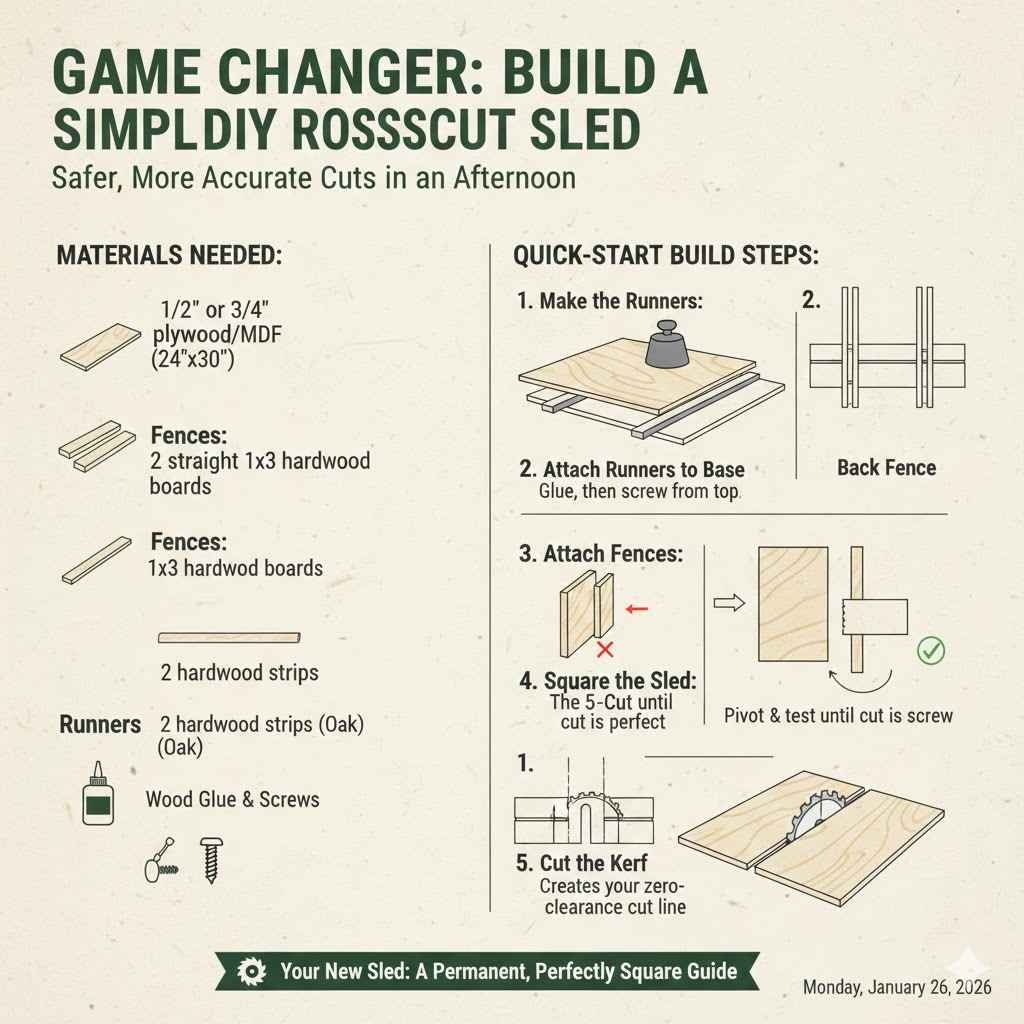
Game Changer: Build a Simple DIY Crosscut Sled
If you plan to do any amount of woodworking, a crosscut sled is not a luxury—it’s a necessity. It’s safer and far more accurate than a miter gauge for almost any crosscutting task. It supports the wood on both sides of the blade, prevents tear-out on the back side, and makes cutting small pieces much safer. You can build a simple, effective sled in an afternoon with scrap wood.
Materials Needed:
- Base: A flat piece of 1/2″ or 3/4″ plywood or MDF, about 24″ x 30″.
- Fences: Two straight, sturdy pieces of hardwood or high-quality plywood for the front and back fences (e.g., 1×3 boards). The back fence (the one farthest from you) needs to be perfectly square to the blade.
- Runners: Two hardwood runners that fit snugly into your table saw’s miter slots without any wiggle. Oak is a great choice.
- Wood Glue and Screws
Quick-Start Build Steps:
- Make the Runners: Mill your hardwood runners to fit perfectly in the miter slots. They should slide smoothly with no side-to-side play. You can use the “coin trick” to set the height just below the table surface.
- Attach Runners to the Base: Place the runners in the miter slots. Apply glue to the top of the runners, then carefully place your plywood base on top. Add some weight and let the glue dry. This ensures the runners are perfectly parallel. Afterwards, add a few countersunk screws from the top for strength.
- Attach the Fences: Screw the front fence to the front of the sled base. Then, attach the back fence with just one screw.
- Square the Sled: This is the most critical step. Make a test cut on a piece of scrap wood. Flip one of the cut pieces over and place the two cut edges together. If you see any gap, your fence is not perfectly square. Adjust the fence, pivot it on the one screw, add a second screw, and test again. Repeat until the cut is perfect, then secure the fence with several more screws. A great resource for this technique is the “5-Cut Method,” which guarantees incredible accuracy.
- Cut the Kerf: With the sled fully assembled, carefully raise the spinning blade through the base and back fence. This creates your zero-clearance cut line.
Your new sled is now a permanent, perfectly square guide for all your crosscuts. It’s one of the most useful and rewarding jigs you can build for your shop.
Frequently Asked Questions (FAQ)
What is the best table saw blade for crosscutting plywood?
The best blade has a high tooth count and an Alternate Top Bevel (ATB) or High Alternate Top Bevel (Hi-ATB) tooth grind. Look for a blade with 60 to 80 teeth designed specifically for plywood or fine finishing. This produces a much cleaner cut with less tear-out than a standard combination blade.
How can I handle a full 4×8 sheet of plywood by myself?
It’s safest to break it down into a smaller, manageable piece on the floor first. Lay a piece of rigid foam insulation on the ground to support the plywood and prevent blade damage. Then, use a circular saw with a straightedge guide to make your initial cuts. This method is much safer than trying to balance a full sheet on a table saw alone.
Can I crosscut plywood without a crosscut sled?
Yes, you can use the miter gauge that came with your table saw. For better support on wider pieces, screw a straight piece of scrap wood (an auxiliary fence) to your miter gauge. However, a crosscut sled will always provide superior accuracy, support, and safety, making it a highly recommended upgrade.
Why is my cut not perfectly straight?
A non-straight cut is usually caused by the wood not being held firmly against a guide. If using a miter gauge, make sure you are keeping constant pressure against the fence throughout the cut. If the wood drifts away, the cut will be crooked. This is another reason a crosscut sled is so effective; it locks the wood in place.
How high should the table saw blade be for cutting plywood?
For the cleanest cut, the blade should be set just high enough for the gullet (the valley between the teeth) to clear the top of the wood. A good rule of thumb is to have the top of a blade tooth about 1/8 inch higher than the surface of your plywood. This shallow angle of attack helps reduce tear-out.
What is the difference between a rip cut and a crosscut?
A rip cut is a cut made along the length of a board, parallel to the wood grain. This is typically done using the table saw’s rip fence as a guide. A crosscut is a cut made across the width of a board, perpendicular to the wood grain. This is done using a miter gauge or a crosscut sled.
Your Next Step to Perfect Plywood Projects
There you have it—the essential guide to making clean, accurate, and safe crosscuts in plywood on your table saw. It might seem like a lot of steps at first, but once you go through the process, it becomes second nature. The key is to be methodical: start with a plan, use the right tools, and always prioritize safety.
Remember, the difference between a frustrating experience and a rewarding one often comes down to a few simple techniques. Using a sharp plywood blade, supporting your material, and building a simple crosscut sled will completely transform your work. You’ll spend less time sanding splintered edges and more time building with perfectly cut pieces.
So, grab that sheet of plywood. Measure with confidence, set up your saw with care, and make your cut. You have the knowledge to do it right. Welcome to a new level of precision in your woodworking journey.