
Trimming a door with a circular saw might seem tricky. But with the right steps, it’s easy.
Sometimes, doors don’t fit perfectly. They might scrape the floor or not close properly. Trimming the door can fix this. A circular saw is a great tool for this job. It makes clean, straight cuts. In this guide, you will learn how to trim a door with a circular saw.
We will cover the tools you need and the steps to follow. With patience and care, you can do it yourself. Let’s get started on making your door fit perfectly.
Credit: www.expressdoorsdirect.co.uk
Introduction To Trimming Doors
Trimming a door can seem challenging for beginners. But with the right tools, it becomes easy. One essential tool is the circular saw. This guide will help you understand why trimming a door is necessary. We will also explore the benefits of using a circular saw for this task.
Why Trim A Door?
Doors may need trimming for various reasons. New flooring can raise the floor level, making the door too long. Warped or swollen doors may not close properly. Sometimes, a door might need adjusting to improve its fit within the frame. Trimming ensures the door functions well and looks good.
Benefits Of Using A Circular Saw
A circular saw offers precision. It provides a clean cut, which is essential for a neat finish. The tool is also powerful. This makes it easier to cut through thick or dense wood. Circular saws are versatile. They can be used for other home improvement projects as well. Using a circular saw can save time and effort. It is a practical tool for any DIY enthusiast.
Credit: www.expressdoorsdirect.co.uk
Tools And Materials Needed
Prepare for door trimming with a circular saw by gathering essential tools. A circular saw, a straight edge guide, measuring tape, and safety gear are crucial for this task.
When it comes to trimming a door with a circular saw, having the right tools and materials is crucial. Without the correct gear, you risk damaging the door or injuring yourself. Let’s break down what you will need to get started.
Essential Tools
First and foremost, you will need a circular saw. Make sure it has a sharp blade suitable for cutting wood. A dull blade can cause splintering and uneven cuts.
You’ll also need a straight edge or a guide to ensure your cuts are precise. This could be a long level or a specially designed saw guide.
A tape measure is essential for marking where you need to cut. Accuracy matters here, so double-check your measurements.
Safety Gear
Safety should always be a priority. Wear safety goggles to protect your eyes from sawdust and debris.
Ear protection is also important, as circular saws can be quite loud.
Don’t forget to wear a dust mask to avoid inhaling any fine particles. Gloves can also protect your hands, but make sure they are snug so they don’t get caught in the saw.
Materials Required
You will need the door you intend to trim, of course. It’s best to work on a solid, flat surface to stabilize the door.
Have some painter’s tape on hand. This can be applied along the cut line to minimize splintering.
Finally, keep a pencil or a marker for making your measurements and cut lines clearly visible.
Have you ever found yourself halfway through a project only to realize you’re missing a key tool? It’s frustrating, right? That’s why planning ahead and gathering everything you need is so important.
What tools and materials do you often forget until the last minute?
Preparing The Door
To trim a door with a circular saw, start by measuring and marking the cut line. Use painter’s tape to prevent splintering.
Before you start trimming your door with a circular saw, proper preparation is key. Taking the time to measure and mark your door accurately will make the cutting process smoother and more precise. Let’s dive into the steps you need to take to get your door ready.
Measuring The Door
First, measure the height and width of the door opening. Use a tape measure for this task. Make sure to measure twice to ensure accuracy.
Check the door for any existing hardware, like hinges or handles. You need to account for these when measuring. If you need to trim the bottom, measure from the bottom up to avoid cutting into the hardware.
Measuring correctly will save you a lot of headaches later. Imagine cutting your door only to find it doesn’t fit! It’s a scenario you definitely want to avoid.
Marking The Cut Line
Once you have your measurements, it’s time to mark the cut line. Use a pencil and a straightedge or a ruler for this task. Draw a clear, straight line across the door where you need to cut.
Double-check your line to make sure it’s accurate. A small mistake here can lead to a crooked cut. You don’t want to ruin a perfectly good door due to a rushed marking.
If you’re trimming a significant amount, consider using painter’s tape along the cut line. This can help prevent the wood from splintering. It’s a small step that can make a big difference in the final look.
Are you ready to make your door fit perfectly? The prep work might seem tedious, but it’s crucial for a clean cut. Now that your door is marked and measured, you can move on to the cutting process with confidence.
Setting Up The Circular Saw
Set up the circular saw to trim a door by ensuring the blade depth matches the door’s thickness. Secure the door, mark the cut line, and use a straight edge as a guide for a clean cut.
Setting up the circular saw properly is crucial for successfully trimming a door. This setup ensures your cuts are clean and precise, avoiding any damage to the door or the saw itself. Let’s dive into the specifics to get your circular saw ready for the job.
Choosing The Right Blade
Choosing the right blade can make all the difference. You should opt for a fine-tooth blade, ideally one designed for cutting wood or laminate. This type of blade provides smoother cuts and reduces the risk of splintering.
Always check the blade’s condition before starting. A dull blade can cause uneven cuts and may damage the door. Replace it if necessary to ensure optimal performance.
Adjusting The Saw Depth
Adjusting the saw depth is another critical step. Set the depth to slightly more than the thickness of the door. This prevents the blade from cutting too deep and damaging the work surface beneath the door.
You can usually find the depth adjustment lever or knob on the side of the saw. Test the depth on a scrap piece of wood to ensure accuracy.
Double-check your settings before you start cutting. This small step can save you from costly mistakes and ensure your door trimming project goes smoothly.
Have you ever started a project only to realize halfway through that your tools weren’t set up correctly? Taking these preliminary steps ensures you avoid those frustrating moments.
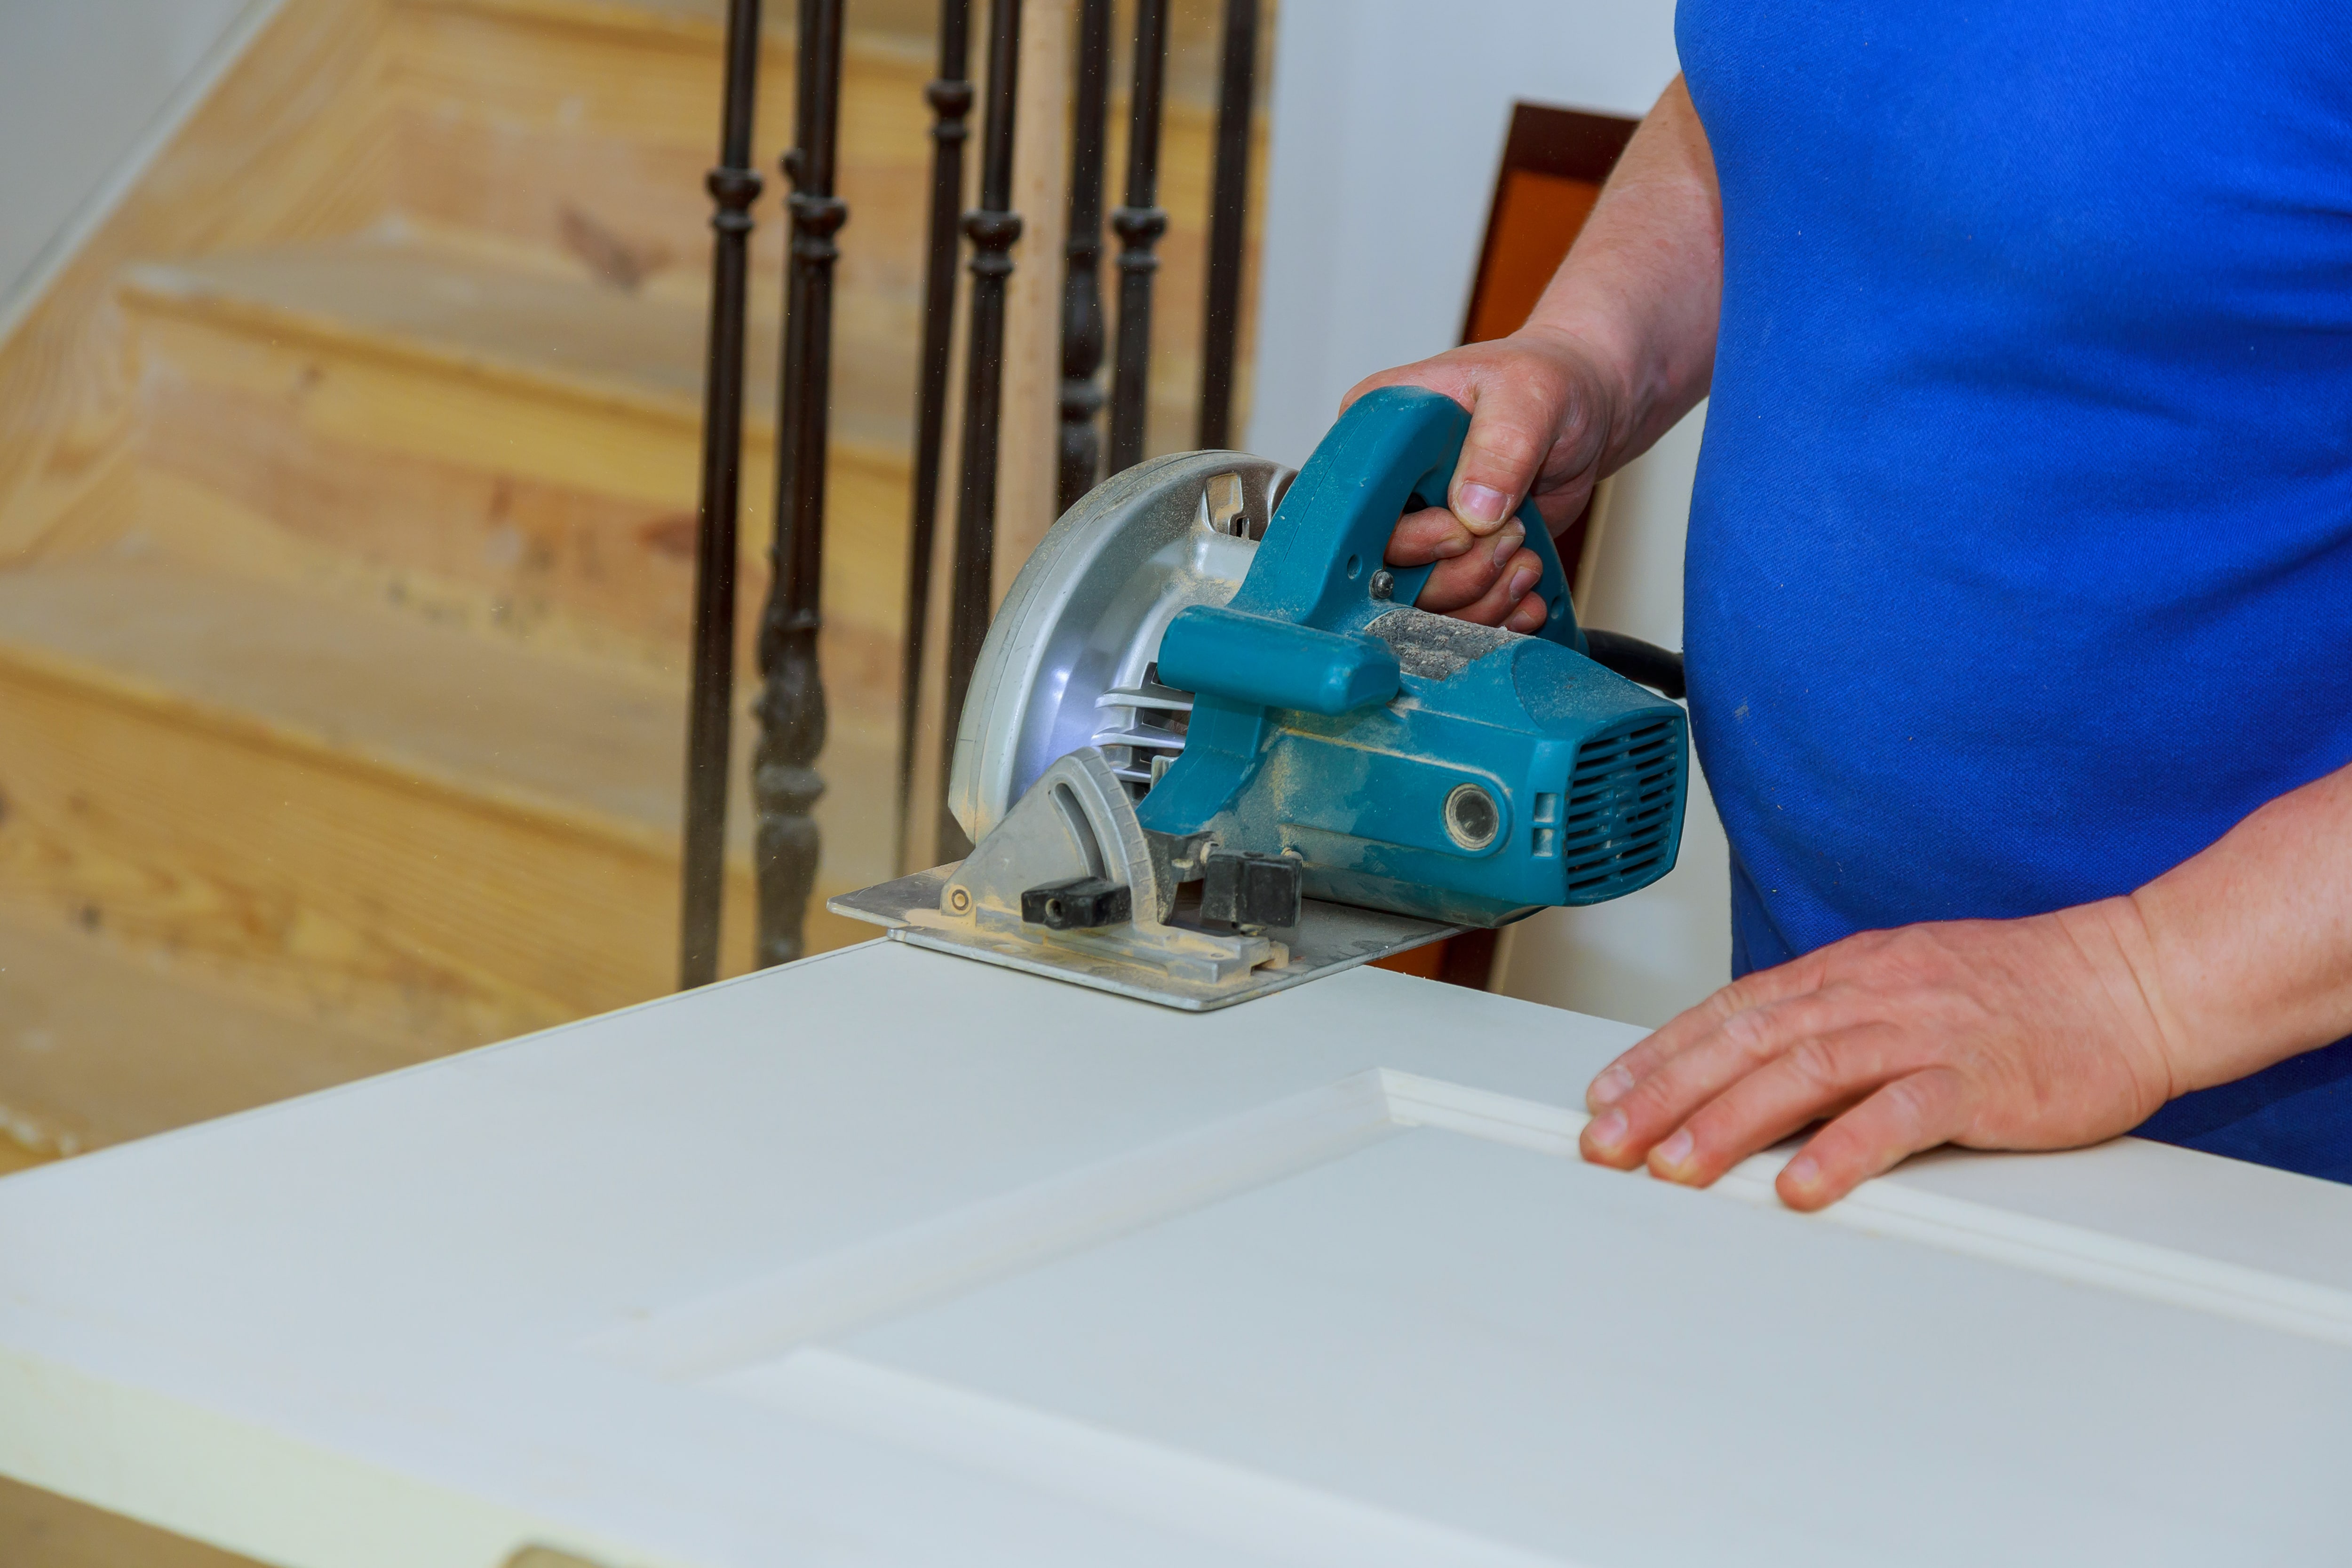
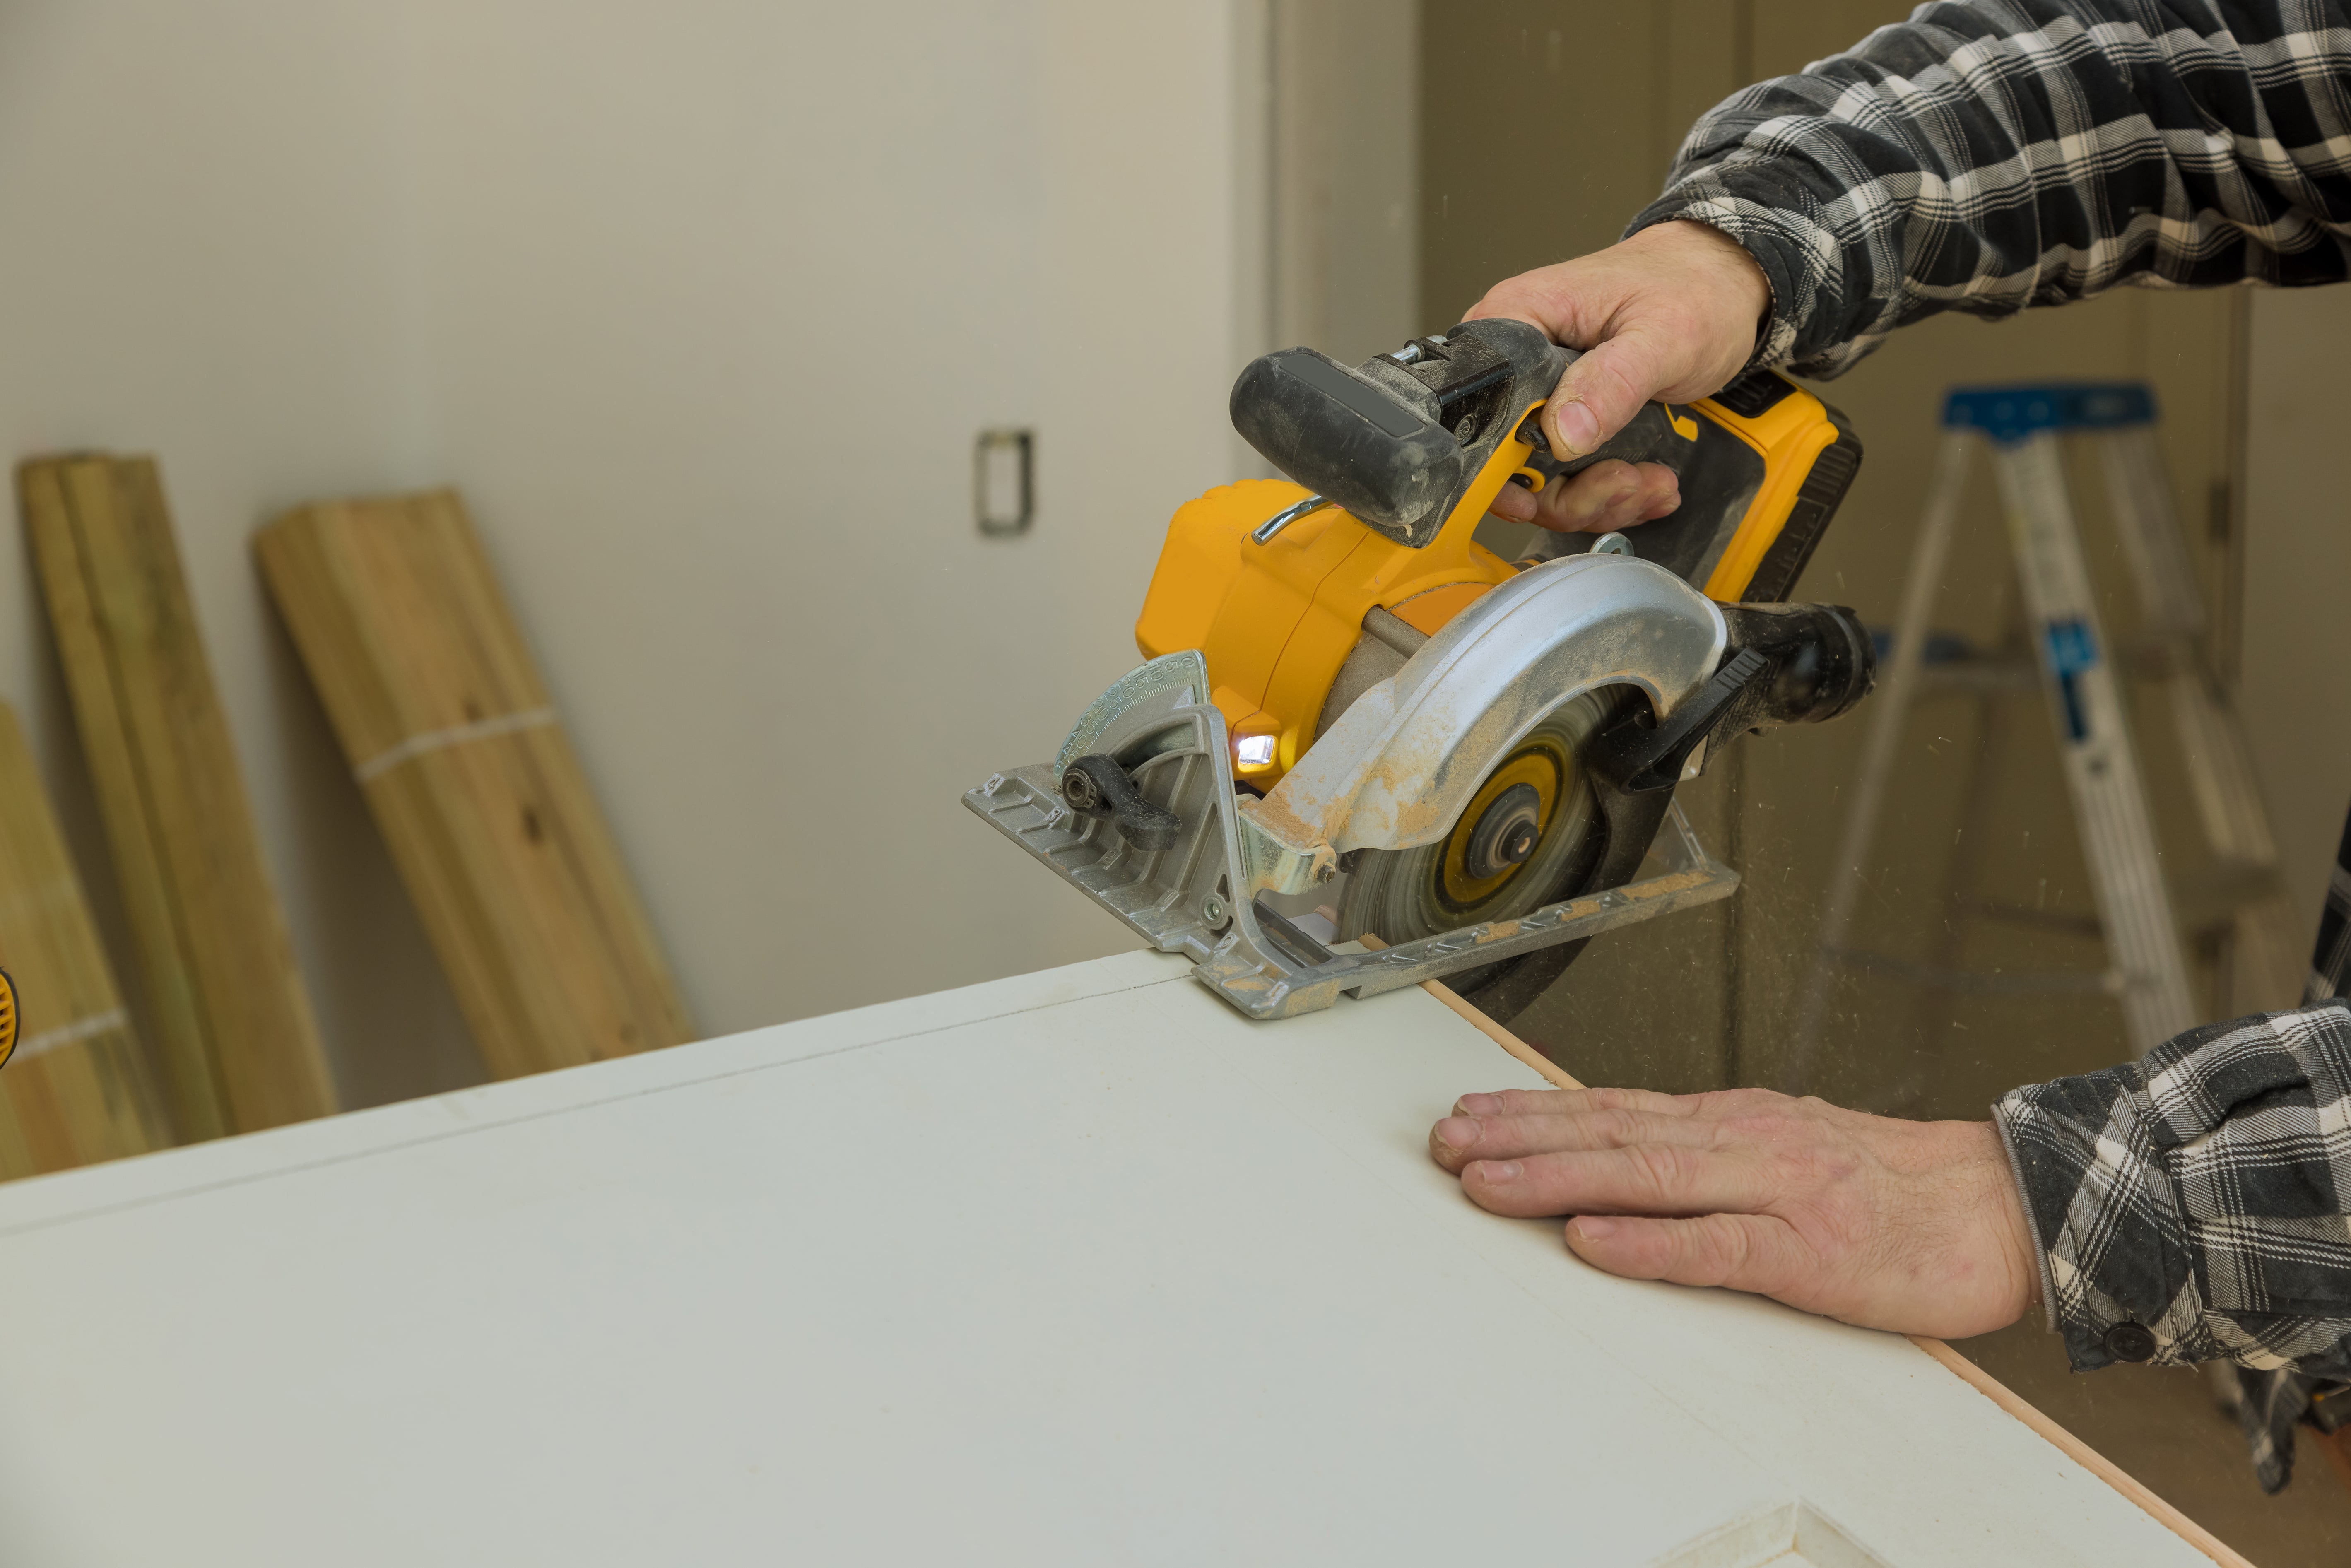
Making The Cut
Trimming a door with a circular saw ensures a precise fit. Measure carefully, mark the cut line, and use clamps to secure the door. Guide the saw steadily along the line for a clean finish.
Trimming a door with a circular saw can seem daunting, but it’s a practical skill that can save you time and money. The key is to make precise and clean cuts without damaging the door. Let’s break down the process into manageable steps.
Securing The Door
Start by removing the door from its hinges and placing it on a stable workbench or sawhorses. Stability is crucial to ensure a straight cut. Use clamps to secure the door firmly, preventing it from shifting during the cut.
Double-check the measurements before making any cuts. Measure twice, cut once is a golden rule here. Mark your cut line with a pencil and use a straight edge to guide you.
Starting The Cut
Set the depth of your circular saw blade to slightly more than the thickness of the door. This prevents the blade from binding and ensures a clean cut.
Position the saw at the edge of the door, aligning the blade with your marked line. Start the saw and let it reach full speed before beginning the cut. This reduces the chances of the blade catching on the wood.
Finishing The Cut
Move the saw steadily along the line, keeping it straight and steady. Let the saw do the work—apply gentle pressure but don’t force it.
As you near the end of the cut, slow down to maintain control and avoid splintering the wood. Once the cut is complete, sand the edges smooth for a professional finish.
Have you ever tried trimming a door yourself? What challenges did you face, and how did you overcome them? Share your experiences in the comments below!

Credit: m.youtube.com
Smoothing The Edges
Learn how to trim a door with a circular saw for a smooth fit. Follow these steps to achieve clean edges effortlessly.
Smoothing the edges after trimming a door with a circular saw is crucial for a polished finish. Without this step, your door might look rough and unfinished, detracting from your home’s overall aesthetic. Let’s delve into how you can achieve smooth edges effortlessly.
Using Sandpaper
Using sandpaper is one of the simplest ways to smooth the edges of your trimmed door. Choose a medium-grit sandpaper to start.
Wrap the sandpaper around a sanding block for better control and even pressure. This ensures you don’t accidentally gouge the wood.
Sand along the edge in a consistent motion. Pay attention to any rough spots. Move to a finer grit sandpaper to finish.
Checking For Smoothness
After sanding, it’s essential to check for smoothness. Run your fingers along the edge to feel for any rough patches.
Don’t rely solely on sight; your sense of touch is more sensitive to imperfections. If you find any rough areas, go back with the sandpaper.
Repeat the process until the edge feels uniformly smooth. This step is key to achieving a professional look.
To make the process more engaging, think of the sanding as a meditative practice. It’s a chance to perfect your handiwork and add a personal touch to your home. Have you ever noticed how a smooth finish can transform a simple door into a piece of art?
By focusing on these details, you ensure that your DIY project doesn’t just meet but exceeds expectations. What’s your secret for achieving smooth edges?
Reinstalling The Door
Reinstalling the door is the final step in trimming a door with a circular saw. This process ensures your door functions well. It also completes the look of your room. Below are the steps to reinstall your door properly.
Hanging The Door
Start by aligning the door with the hinges. Hold the door steady and insert the hinge pins. Use a hammer gently if needed. Ensure the door is level and secure.
Testing The Fit
Close the door to check the fit. Look for gaps and tight spots. The door should close smoothly without sticking. Open and close the door several times to test its movement.
Tips And Troubleshooting
Learn how to trim a door with a circular saw. Measure and mark the cut line, then make a smooth, controlled cut. Always use safety gear and follow the saw’s instructions.
Trimming a door with a circular saw can be a great way to ensure a perfect fit, but it comes with its own set of challenges. Whether you’re a seasoned DIYer or just starting out, knowing some tips and troubleshooting methods can save you a lot of headaches. This section will provide you with valuable insights to avoid common mistakes and make your door trimming project a success.
Common Mistakes
One common mistake is cutting the door without proper support. This can lead to inaccurate cuts and even damage to the door. Always use sawhorses or a sturdy table to support the door fully.
Another frequent error is not measuring correctly. Always measure twice and cut once. It’s a simple rule but it’s easy to overlook when you’re in a rush. Double-check your measurements to avoid costly mistakes.
Using a dull blade can ruin your project. A sharp blade ensures clean cuts and reduces the chance of splintering. Make sure to check the blade condition before starting your work.
Additional Tips
Use painter’s tape to mark your cut line. This not only helps you see where to cut but also minimizes splintering on the door’s surface. It’s a small step that makes a big difference.
Consider using a guide to keep your cuts straight. A straight edge or a piece of wood clamped to the door can serve as an effective guide. This ensures your cuts are precise and reduces the margin for error.
Always wear safety gear. Safety glasses and ear protection are essential. You’d be surprised how much sawdust and noise a circular saw can produce. Protect yourself to work efficiently.
Have you ever tried cutting just a tiny bit and found it more challenging than expected? Sometimes it’s easier to remove the door and lay it flat. This gives you better control and stability, making the trimming process smoother.
Lastly, don’t rush. Take your time, especially if you’re new to using a circular saw. It’s better to go slow and get it right than rush and ruin the door.
What challenges have you faced while trimming a door? Share your experiences and let’s learn together.
Frequently Asked Questions
Can You Use A Circular Saw To Trim A Door?
Yes, you can use a circular saw to trim a door. Ensure you use a straight edge guide for accuracy.
What Tool Is Best To Trim A Door?
The best tool to trim a door is a circular saw. It ensures precise, clean cuts. Always use a straightedge guide.
What’s The Best Way To Trim The Bottom Of A Door?
Use a door trimmer or circular saw to trim the bottom of a door. Measure accurately and cut slowly for a smooth edge. Sand the cut area for a clean finish.
Can You Cut 2 Inches Off A Door?
Yes, you can cut 2 inches off a door. Use a saw and ensure a straight, clean cut.
Conclusion
Trimming a door with a circular saw is easier than you think. Always measure carefully. Use the right blade. Secure the door firmly. Cut slowly to avoid mistakes. Safety should be your top priority. Follow these steps, and your door will fit perfectly.
Practice makes perfect. Soon, you’ll be trimming doors like a pro. Happy woodworking!