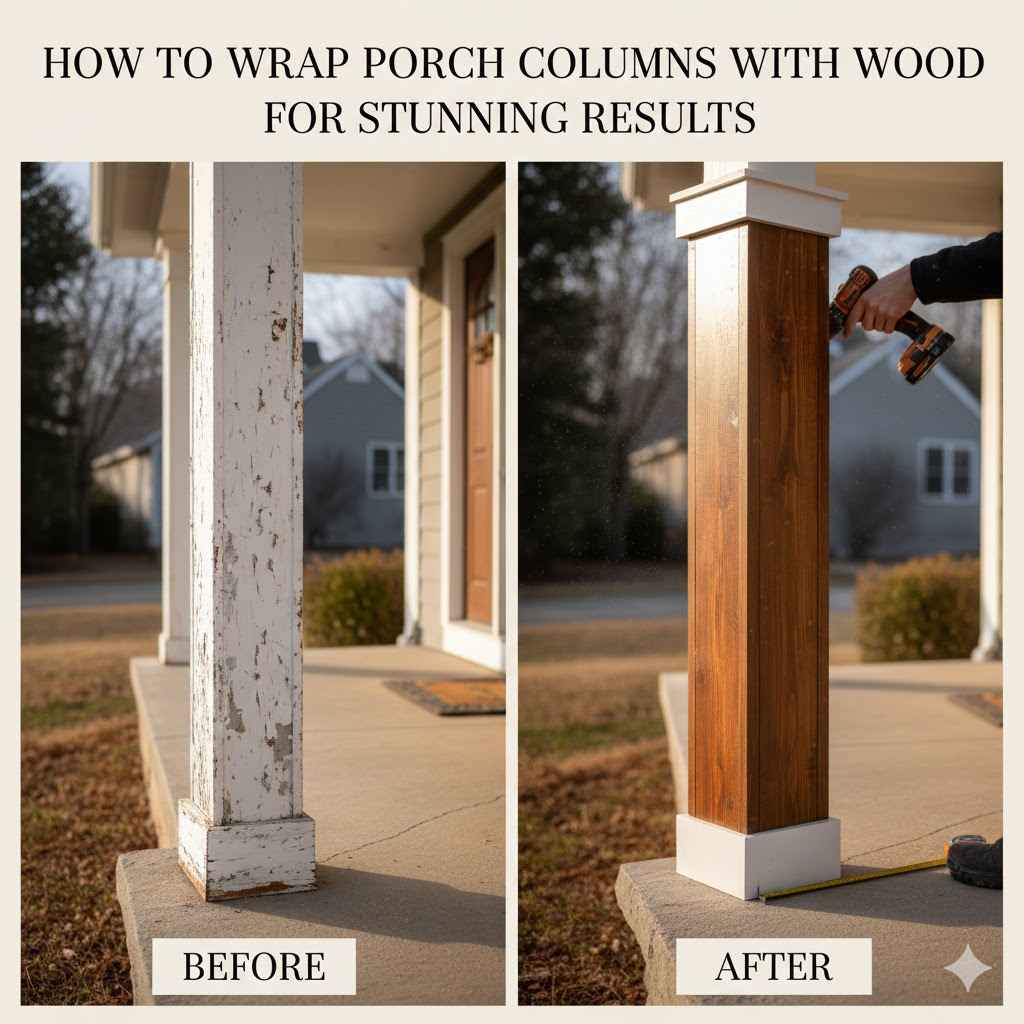
Wrapping porch columns with wood is a straightforward DIY project that dramatically boosts curb appeal. The process involves measuring your existing posts, building a four-sided wood box to slide over them, and securing it in place. Finishing with trim, caulk, and paint or stain creates a durable, high-end custom look that completely transforms your home’s entrance.
Are your front porch columns looking a little thin or dated? Maybe they are plain metal posts or pressure-treated 4x4s that just don’t do your home justice. You see beautiful, substantial columns on other homes and assume it’s a job for expensive contractors. But I’m here to tell you a secret: creating that gorgeous, custom look is one of the most rewarding and achievable DIY projects you can do. It’s a weekend upgrade that makes a huge impact.
Don’t worry if you’re new to woodworking. This project doesn’t require complex skills or fancy tools. With a bit of planning and some simple cuts, you can turn those boring posts into stunning architectural features. In this guide, I’ll walk you through every step, from picking the right wood to applying the final coat of paint. Let’s get started and give your porch the makeover it deserves!
Why Wrap Your Porch Columns with Wood?
Before we grab our tools, let’s talk about why this project is so popular and worthwhile. It’s more than just a cosmetic fix; wrapping your columns offers several great benefits that add real value to your home.
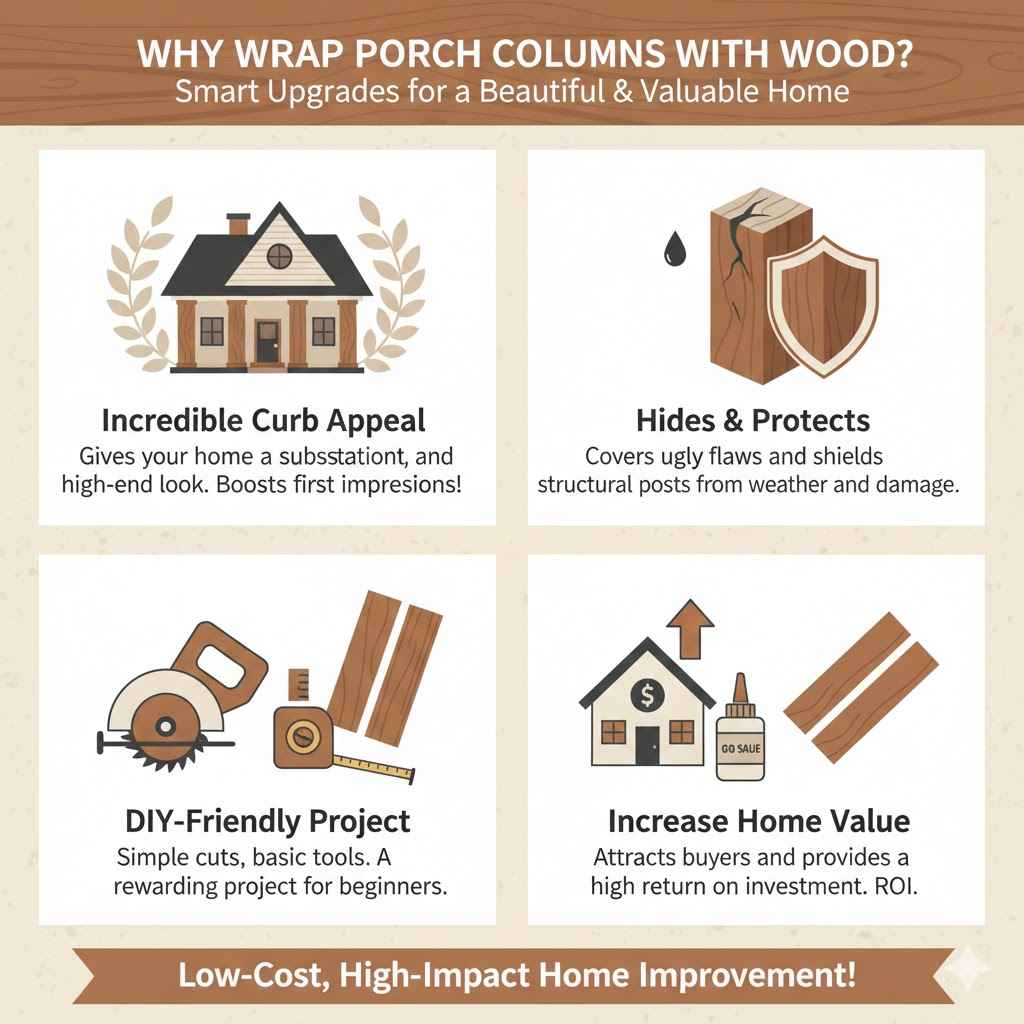
1. Incredible Curb Appeal
This is the number one reason most people take on this project. Wrapping thin posts with wood gives them visual weight and presence. It makes your porch look more substantial, custom, and welcoming. Whether you’re aiming for a classic Craftsman, modern farmhouse, or rustic style, wood-wrapped columns can be tailored to fit your vision perfectly. It’s one of the fastest ways to make your home look more expensive and thoughtfully designed.
2. Hides Imperfections and Protects Existing Posts
Do your current posts have cracks, peeling paint, or ugly metal brackets? A wood wrap covers all of that up instantly. You get a clean, flawless surface without having to do extensive repairs on the old post. Furthermore, the wood wrap acts as a protective shield for the structural post underneath. It helps guard the load-bearing column against rain, sun, and physical damage, potentially extending its life.
3. A Very DIY-Friendly Project
While the results look professional, the process is surprisingly simple. At its core, you are just building a four-sided box. The cuts are mostly straight, and the assembly uses basic techniques with wood glue and nails or screws. It’s a fantastic project for a beginner looking to build skills and confidence. You get a huge visual reward for a manageable amount of work.
4. Increases Home Value
Curb appeal directly translates to home value. An inviting and well-maintained exterior makes a strong first impression on potential buyers. Upgrades like beautifully finished porch columns show pride of ownership and attention to detail. It’s a relatively low-cost project that can provide a significant return on your investment when it’s time to sell.
Choosing the Right Wood for Your Columns
The type of wood you choose is the most important decision you’ll make. Your columns are outside, exposed to everything Mother Nature throws at them. You need a material that can handle moisture, temperature changes, and sunlight. Let’s look at the best options for beginners.
Understanding Your Choices
You have several great materials to pick from, each with its own pros and cons. Think about your budget, your climate, and whether you want to paint or stain the final product.
- Cedar: This is a fantastic choice for outdoor projects. Cedar is naturally resistant to rot and insects, which means it will last a long time without needing chemical treatments. It’s lightweight, easy to cut, and has a beautiful grain if you want to stain it. The main downside is that it’s a bit more expensive than pine.
- Pine Boards (Primed): Common pine is affordable and easy to find at any home improvement store. For outdoor use, you should look for boards that are already primed. This gives them a head start in protection. Pine is not naturally rot-resistant, so it absolutely must be kept well-painted and caulked to last. It’s a great budget-friendly option if you are diligent with finishing.
- Pressure-Treated Wood: This wood has been chemically treated to resist rot and insects, making it very durable for outdoor use. However, it can be heavy, is often still wet when you buy it, and may shrink or warp as it dries. It also needs to dry completely before you can paint or stain it, which could take weeks or even months.
- PVC Trim Boards: PVC isn’t wood, but it’s an excellent alternative. It’s a plastic material that is completely waterproof and will never rot, warp, or be eaten by insects. It’s easy to cut and assemble just like wood and holds paint beautifully. The main drawbacks are its higher cost and the fact that it doesn’t look like natural wood if you want a stained finish.
Here is a simple table to help you compare your options:
| Material | Pros | Cons | Best For |
|---|---|---|---|
| Cedar | Naturally rot and insect resistant, lightweight, beautiful for staining. | More expensive than pine. | A durable, long-lasting solution, especially if you want a natural stained look. |
| Primed Pine | Affordable, readily available, easy to work with. | Must be kept perfectly painted and sealed to prevent rot. | Budget-conscious DIYers who plan to paint their columns and can keep up with maintenance. |
| Pressure-Treated Pine | Very durable, excellent rot and insect resistance. | Heavy, can warp as it dries, must wait a long time to finish. | Projects where maximum durability is the top priority and you have time to let it dry. |
| PVC Trim | Completely waterproof, will never rot, stable and low maintenance. | Most expensive option, cannot be stained for a natural wood look. | Homeowners in very wet climates who want a “set it and forget it” painted finish. |
What Size Wood Should You Use?
Most people use 1-inch thick boards (which are actually about 3/4-inch thick). Common board widths for this project are 1×6, 1×8, or 1×10, depending on how “chunky” you want your final columns to look. A good rule of thumb is to make the final wrapped column look balanced with the scale of your porch. A larger porch might need wider boards to look right.
Essential Tools and Materials List
Having everything ready before you start makes any project go smoother. You don’t need a professional workshop for this, but a few key tools will make your life much easier. Here’s what you’ll need.
Tools
- Tape Measure: The most important tool! Accuracy is key.
- Pencil: For marking your cuts.
- Speed Square or Combination Square: To ensure your lines and cuts are perfectly straight and square.
- Miter Saw (or Circular Saw with a Guide): A miter saw is ideal for making clean, straight, and angled cuts. A circular saw can work, but you’ll need a straightedge guide for accuracy.
- Drill/Driver: For driving screws and pre-drilling holes.
- Brad Nailer (or Hammer and Finish Nails): A brad nailer is much faster and easier for assembling the boxes and attaching trim.
- Level: A 2-foot or 4-foot level is essential for making sure your columns are perfectly plumb (vertically straight).
- Caulk Gun: For applying construction adhesive and sealant.
- Safety Gear: Don’t forget your safety glasses, hearing protection (especially with power saws), and dust mask.
Materials
- Wood Boards: Your chosen material (Cedar, Pine, PVC, etc.) in the desired width. Calculate the total length you need plus about 15% extra for mistakes.
- Trim and Molding: Base and cap molding to give your columns a finished look.
- Construction Adhesive: A high-quality exterior-grade adhesive is crucial for a strong bond.
- Wood Shims: To fill gaps and ensure a snug fit around the existing post.
- Fasteners: Exterior-grade screws or galvanized finish nails that are long enough to go through your boards.
- Exterior Wood Filler: To fill nail holes and any small gaps.
- Exterior-Grade Caulk: A paintable, waterproof caulk is essential for sealing all seams against moisture.
- Exterior Primer: Use a high-quality primer, especially if you chose raw pine.
- Exterior Paint or Stain: Choose a finish designed to hold up to the elements.
Safety First: Your Pre-Project Checklist
Before you make your first cut, let’s quickly cover safety. Your well-being is more important than any project. Following a few simple rules will keep you safe and confident in the workshop.
- Wear Your PPE: PPE stands for Personal Protective Equipment. Always wear safety glasses to protect your eyes from sawdust and debris. When using power saws, wear hearing protection. A dust mask is also a good idea to avoid breathing in fine wood dust.
- Know Your Tools: Read the manual for your power tools. Understand how they work and what their safety features are. Never disable a safety guard on a saw. For more detailed information on power tool safety, you can reference resources like the Occupational Safety and Health Administration (OSHA) guidelines.
- Work in a Clean Space: A cluttered workspace is a dangerous one. Keep your area clean and free of trip hazards like extension cords and scrap wood.
- Secure Your Workpiece: Always make sure the wood you are cutting is held firmly in place. Never try to hold a small piece by hand while cutting it. Use clamps when necessary.
- Porch Post Integrity: Before you start, give your existing porch posts a good shake. Make sure they are structurally sound. If a post is rotted or wobbly, it must be replaced by a professional before you attempt to wrap it. This project is purely cosmetic; the wrap does not add structural support.
Step-by-Step: How to Wrap Porch Columns with Wood
Alright, it’s time for the fun part! We’re going to break this down into simple, manageable steps. Just take it one step at a time, and you’ll see great results.
Step 1: Measure Everything (Twice!)
This is the classic rule of woodworking for a reason: “Measure twice, cut once.” Incorrect measurements are the source of most frustrations. Here’s what to measure:
- Measure the Post Height: Measure the distance from the porch floor to the beam or ceiling your post supports. Do this for each post, as porches can settle and heights may vary slightly. Write this number down.
- Measure the Post Width and Depth: Measure the width of your existing post. If it’s a standard 4×4, it will actually be about 3.5 inches by 3.5 inches. If it’s a 6×6, it will be about 5.5 inches by 5.5 inches. Measure both the width and depth just to be sure.
- Calculate Your Box Dimensions: Now, decide how big you want your final column to be. Let’s say you have a 3.5″ x 3.5″ post and you’re using 1×6 boards (which are 0.75″ thick and 5.5″ wide).
Your front and back pieces will be the full width of the board: 5.5 inches.
Your side pieces will need to fit between them. The calculation is: (Width of post) + (Thickness of front board) + (Thickness of back board).
In our example: 3.5″ + 0.75″ + 0.75″ = 5 inches.
So, you will need two boards cut to 5.5″ wide and two boards cut to 5″ wide for each column.
This method creates simple butt joints at the corners, which is perfect for beginners. When you caulk and paint, the seams will disappear.
Step 2: Prepare Your Existing Columns
Before you can add the new wrap, you need to make sure the old column is ready. Scrape off any peeling paint or dirt. If there are any protruding nails, screws, or old brackets, remove them so you have a flat surface to work with. There is no need to sand it down perfectly, as it will be covered up.
Step 3: Cut and Assemble Your Column Wraps
Now you’ll use your measurements to cut the boards and build the boxes that will become your new columns.
- Cut Boards to Length: Using your miter saw or circular saw, cut all four boards for one column to the height you measured in Step 1. Make sure your cuts are perfectly straight and square.
- Rip Boards to Width (If Necessary): Based on your calculations, you may need to “rip” two of your boards to a narrower width. A table saw is the best tool for this. If you don’t have one, some home improvement stores can make these cuts for you for a small fee. In our example, we would rip two of the 1×6 boards down to 5 inches wide.
- Assemble a Three-Sided Box: It’s much easier to assemble three sides on the ground first, then add the fourth side once it’s around the post.
Take one wide piece (front) and two narrow pieces (sides).
Run a bead of exterior construction adhesive along the edge of a side piece.
Press it against the inside edge of the front piece, forming an “L” shape. Make sure the edges are flush.
Use your brad nailer to secure the corner with a few nails.
Repeat the process for the other side piece to form a “U” shape.
Let the adhesive on this U-shaped assembly dry for a bit before moving on. This will make it more stable and easier to handle.
Step 4: Attach the Wood Wraps to Your Columns
This is where your new column comes to life. It requires a bit of patience to get everything perfectly straight and snug.
- Test Fit the Wrap: Slide your three-sided “U” wrap around the existing post. It should fit with a little bit of room to spare.
- Plumb and Shim: Place your level on the face of the wrap. Adjust it until it is perfectly plumb (vertically straight). You will likely have gaps between the old post and your new wrap. Gently tap wood shims into these gaps to hold the wrap in place and make it tight. Put shims near the top, middle, and bottom on all sides.
- Attach the Fourth Side: Apply construction adhesive to the edges of your U-shaped wrap. Place the final board in position to close the box. Use your brad nailer to nail it securely to the side pieces.
- Secure the Wrap: To be extra secure, you can drive a few long exterior screws through the wrap, through the shims, and into the structural post. This ensures it won’t move. Be sure to countersink the screws so you can hide them with wood filler later.
Step 5: Add Trim and Finishing Touches
The trim is what gives your columns that professional, finished look. It hides the top and bottom seams and adds architectural detail.
- Cut Your Base Trim: Using your miter saw set to a 45-degree angle, cut your base molding pieces to wrap around the bottom of the column. This creates clean, mitered corners.
- Attach the Base Trim: Apply construction adhesive to the back of your trim pieces and attach them to the column with your brad nailer.
- Cut and Attach the Top Trim: Repeat the process for the top of the column. You can use crown molding for a more decorative look or a simple flat trim for a modern style.
Step 6: Caulk, Prime, and Paint (or Stain)
This final step is crucial for durability and a flawless look. Do not skip it!
- Fill Holes: Use exterior wood filler to fill all the nail and screw holes. Once it’s dry, give it a light sanding so it’s smooth.
- Caulk All Seams: This is the most important part for weatherproofing. Using your caulk gun, apply a thin, continuous bead of paintable exterior caulk to every single seam: the four corners of the column, and where the trim meets the column and the floor/ceiling. Smooth the bead with your finger or a wet rag for a clean line. According to the U.S. Department of Energy, sealing air leaks is a key part of weatherizing your home, and the same principle applies here to keep water out.
- Prime: Apply one to two coats of high-quality exterior primer. Primer helps the paint stick better and provides an extra layer of protection for the wood.
- Paint: Once the primer is dry, apply at least two coats of high-quality exterior paint. If you chose to stain, apply your stain and then follow up with several coats of an exterior-grade clear sealant like a marine varnish to protect it from UV rays and moisture.
Common Mistakes to Avoid
Even simple projects have a few common pitfalls. Here are a few things to watch out for to ensure your project goes smoothly.
- Inaccurate Measurements: As we said, this is the #1 issue. Double-check every measurement before you make a single cut.
- Using Interior-Grade Materials: Do not use interior caulk, glue, or paint. They will fail quickly when exposed to weather, leading to rot and peeling paint. Spend the extra couple of dollars on exterior-rated products.
- Skipping the Caulk: Caulk is your column’s best defense against water. Unsealed seams will let moisture in, causing the wood to swell and rot from the inside out. Be meticulous with your caulking.
- Not Shimming Properly: If the wrap is loose around the post, it can shift over time. Shims make it solid and secure. Make sure it’s tight and doesn’t rattle before you add the final side.
- Painting Treated Wood Too Soon: If you use pressure-treated wood, you must let it dry out completely. Painting it while it’s still wet will trap moisture, and the paint will bubble and peel off within a year.

Frequently Asked Questions (FAQ)
Here are answers to some of the most common questions about wrapping porch columns.
How much does it cost to wrap a porch column in wood?
The cost varies widely based on the material you choose. A single column wrap using affordable primed pine might cost $50-$75 in materials. Using premium cedar or PVC could cost $150-$250 or more per column. Your final cost depends on the size of your columns and the materials you select.
What is the best wood to use to wrap porch posts?
For durability and low maintenance, Cedar and PVC are the best choices. Cedar is excellent if you want a natural or stained wood look, while PVC is the ultimate choice for a painted finish that will never rot. Primed pine is the best budget option if it’s installed and maintained correctly.
Can you wrap a round metal column with wood?
Yes, you can. The process is the same. You will build a square box around the round column. You’ll just need to use more shims to fill the larger gaps between the round post and the square interior of your wrap to make it secure.
Do you have to remove the old porch post?
No, you should not remove the old post. The existing post is the structural support holding up your roof. The wood wrap you are building is purely decorative and slides over the top of the existing structural post.
How long does this project take?
For someone with basic DIY skills, you can likely wrap two or three columns over a weekend. Day one would be for measuring, cutting, and assembly. Day two would be for filling holes, caulking, and applying the first coats of primer and paint.
Should I paint or stain my wood columns?
This is a personal style choice. Paint offers the best protection against the elements, especially for less rot-resistant woods like pine. A high-quality exterior paint job can last for years. Staining is a great option for beautiful woods like cedar, but it typically requires more frequent maintenance (re-coating every 2-3 years) to keep it protected from the sun and rain.
Is it better to use nails or screws?
Both can work. A brad nailer is fast and leaves small holes that are easy to fill. Screws provide stronger holding power. A good method is to use construction adhesive for the primary bond, brad nails to hold it together while the glue dries, and a few well-placed screws to secure the wrap to the structural post for long-term stability.
Conclusion: Step Back and Admire Your Work
Congratulations! You’ve turned your plain, boring porch posts into beautiful, custom architectural features. By taking it one step at a time, you’ve not only added incredible curb appeal and value to your home but you’ve also built confidence and learned a valuable new skill. It’s a project that looks impressive but is completely achievable for a determined beginner.
Every time you pull into your driveway or relax on your porch, you’ll feel a sense of pride knowing you did that yourself. You took simple boards and turned them into something strong, beautiful, and lasting. Now, sit back, relax, and enjoy the stunning results of your hard work.