To change microphone setting Windows 10, first make sure your microphone is connected to your PC. Then, select Start > Settings > System > Sound.
In the Sound settings, go to the Input section and choose your microphone from the options provided. Setting up and adjusting your microphone on Windows 10 is essential for clear and high-quality audio recording or communication. Whether you’re using a headset for gaming, video conferencing, or recording podcasts, properly configuring your microphone settings ensures optimal performance.
We will guide you through the process of changing your microphone settings on Windows 10. Following these steps will enable you to select and test your microphone to ensure it is working correctly. By fine-tuning the microphone volume and sensitivity, you can achieve the best audio experience and avoid any issues with your microphone.

Credit: www.startech.com
Selecting The Right Microphone For Windows 10
When it comes to recording audio on your Windows 10 device, selecting the right microphone is crucial. The right microphone can make a significant difference in the quality of your recordings, whether you are a content creator, podcaster, or simply someone who enjoys voice chatting with friends.
Consider your recording needs and environment
Before diving into the different types of microphones available, it’s important to consider your recording needs and environment. Ask yourself questions like:
- Will you be recording in a controlled studio environment or in a noisy room?
- Do you need a microphone for solo recordings or for capturing multiple voices?
- Will you be recording vocals, instruments, or both?
- Do you need a portable microphone for on-the-go recording?
By understanding your recording needs and environment, you can narrow down your choices and make an informed decision.
USB vs. XLR microphones
When it comes to connectivity, you’ll come across two main types of microphones: USB and XLR.
USB microphones are plug-and-play devices that connect directly to your computer’s USB port. They are user-friendly and don’t require any additional equipment to get started. They are perfect for beginners or those who are looking for a hassle-free setup.
XLR microphones, on the other hand, use the XLR connector and require an audio interface or mixer to connect to your computer. This setup provides more versatility and allows for professional-grade audio recording. XLR microphones are commonly used in professional studios or by experienced audio enthusiasts.
Condenser vs. dynamic microphones
When it comes to the microphone’s internal technology, you’ll come across two main types: condenser and dynamic microphones.
Condenser microphones are highly sensitive and capture sound with great detail and accuracy. They are ideal for capturing vocals, acoustic instruments, and studio recordings. However, they can be more sensitive to background noise and require phantom power to operate.
On the other hand, dynamic microphones are more rugged and can handle high sound pressure levels. They are great for stage performances, live recordings, and environments with high background noise. Dynamic microphones are often more affordable and do not require any additional power.
Selecting the right microphone for Windows 10 involves considering your recording needs and environment, as well as understanding the differences between USB and XLR microphones and condenser and dynamic microphones. Take your time to research and test different options to find the perfect microphone that suits your requirements and delivers exceptional audio quality for all your recording endeavors.
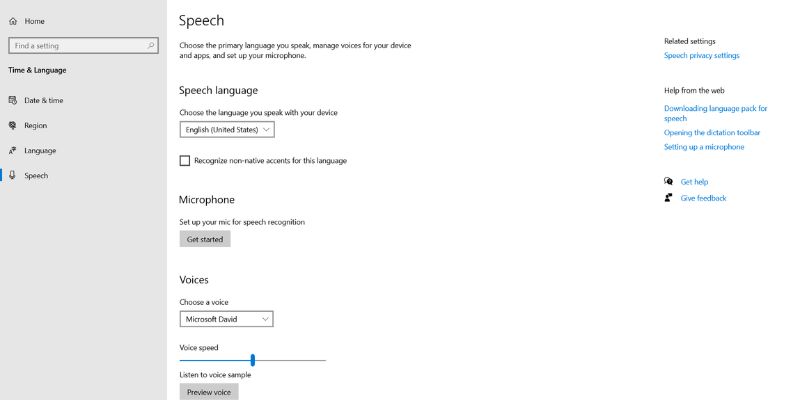
Configuring Microphone Settings In Windows 10
Accessing the Sound Settings
To configure your microphone settings in Windows 10, you first need to access the Sound settings. Here’s how you can do it:
- Click on the Start menu in the bottom left corner of your screen.
- Select “Settings” from the menu.
- In the Settings window, click on “System.”
- From the options on the left, click on “Sound.”
Choosing the Input Device
Once you have accessed the Sound settings, it’s time to choose the input device. This is where you can select the specific microphone you want to use. Here’s how you can do it:
- In the Sound settings window, scroll down to the “Input” section.
- Under “Choose your input device,” select the microphone you want to use from the drop-down menu.
Adjusting the Microphone Volume
Now that you have chosen the input device, you can adjust the microphone volume to ensure it’s at the right level. Here’s how you can do it:
- In the Sound settings window, under the “Input” section, click on the “Device properties” link.
- A new window will open. Here, you can adjust the microphone volume using the slider under the “Input volume” section.
- Speak into the microphone and adjust the volume until it reaches the desired level.
Enhancing Sound Quality with Advanced Settings
If you want to further enhance the sound quality of your microphone, Windows 10 offers advanced settings that you can configure. Here’s how you can access them:
- In the Sound settings window, under the “Input” section, click on the “Device properties” link (if you haven’t already).
- In the new window that opens, click on the “Additional device properties” link.
- A new window titled “Microphone Properties” will appear. Here, you can adjust various settings like microphone boost, noise suppression, and more to enhance the sound quality according to your preferences.
By following these simple steps, you can easily configure your microphone settings in Windows 10, ensuring optimal sound quality and performance.
Test Microphone Windows 10
To test your microphone on Windows 10, you can use the built-in Sound settings. Here’s how you can do it:
- Open Sound Settings:
- Right-click on the speaker icon in the taskbar (usually located at the bottom right corner of your screen).
- Select “Open Sound settings” from the menu.
- Access Input Devices:
- In the Sound settings, scroll down to the “Input” section.
- Select Microphone:
- Under the Input section, you should see a list of input devices. Find and select your microphone from the list.
- Test Microphone:
- Once your microphone is selected, you will see a blue bar moving as you speak into the microphone. This indicates that the microphone is picking up sound.
- Adjust Microphone Level:
- You can also adjust the microphone volume level by using the “Device properties” link under the selected microphone. This allows you to fine-tune the sensitivity of your microphone.
- Use Voice Recorder:
- Additionally, you can use the built-in Voice Recorder app to test your microphone. Simply open the Voice Recorder app, start a new recording, and speak into your microphone. Play back the recording to ensure that the microphone is working properly.
By following these steps, you can test your microphone and ensure that it is functioning correctly on your Windows 10 system. If you encounter any issues, you may need to check your microphone connections, drivers, or consult the microphone’s documentation for troubleshooting tips.
Troubleshooting Common Microphone Issues In Windows 10
Microphone issues can be frustrating when you’re trying to communicate online or record audio. If you’re facing problems with your microphone in Windows 10, don’t worry, you’re not alone. In this section, we’ll discuss some common microphone problems and how to fix them.
Microphone not picking up sound
If your microphone is not picking up any sound, it can be due to various reasons. Here are some steps you can take to troubleshoot this issue:
- Make sure you have allowed access to the microphone in your Windows 10 settings.
- Check if the microphone is muted; if you’re using a headset, make sure the mute switch on the cord is not activated.
- Speak loud enough into the microphone or adjust the microphone volume in your computer settings.
Following these steps should help you determine the cause of your microphone not picking up sound and resolve the issue.
Fixing microphone connection problems
If you’re experiencing microphone connection problems, try the following steps:
- Ensure that your microphone is properly connected to your PC.
- Restart your computer to refresh the system’s settings and drivers.
By ensuring the proper connection and restarting your computer, you can often resolve microphone connection issues in Windows 10.
Ensuring microphone access and permissions
To ensure that your microphone has the necessary access and permissions in Windows 10, you can follow these steps:
- Select Start, then select Settings > System > Sound.
- In the Sound settings, go to Input and select the microphone that you want to use.
- Speak into the microphone and check if the input volume is showing any activity.
By following these steps, you can ensure that your microphone has the proper access and permissions, allowing it to function correctly in Windows 10.
If you’re still experiencing microphone issues after troubleshooting, it might be helpful to consult the Microsoft Support website or seek professional assistance to resolve the problem.
Microphone Privacy Settings Windows 10 Not Working
If you’re experiencing issues with microphone privacy settings on Windows 10, there are several steps you can take to troubleshoot the problem. Here are some general suggestions:
- Check Microphone Hardware:
- Ensure that your microphone is properly connected to your computer.
- If it’s an external microphone, try using a different USB port or a different cable.
- If you’re using a built-in microphone, make sure it’s not physically blocked or damaged.
- Update Audio Drivers:
- Ensure that your audio drivers are up to date. You can update drivers through the Device Manager.
- Right-click on the Start menu, select “Device Manager,” find your audio device, right-click, and choose “Update driver.”
- Privacy Settings:
- Go to Settings > Privacy > Microphone.
- Ensure that the “Allow apps to access your microphone” toggle switch is turned on.
- Scroll down to the list of apps and make sure the specific app you’re having trouble with has permission to access the microphone.
- Check Application Settings:
- Some applications have their own microphone settings. Check the settings within the specific application to ensure it has the necessary permissions.
- Windows Troubleshooter:
- Open Settings and go to Update & Security > Troubleshoot.
- Run the “Recording Audio” troubleshooter.
- Restart Audio Service:
- Press Win + R to open the Run dialog, type “services.msc,” and press Enter.
- In the Services window, find “Windows Audio” and “Windows Audio Endpoint Builder.”
- Right-click on each and select “Restart.”
- Check for Windows Updates:
- Make sure your operating system is up to date by checking for Windows updates.
- Antivirus and Firewall:
- Sometimes, antivirus or firewall settings can interfere with microphone access. Temporarily disable your antivirus and firewall to see if it makes a difference.
- Reset Privacy Settings:
- If all else fails, you can try resetting your privacy settings. Go to Settings > Update & Security > Recovery. Under Reset this PC, click “Get started” and choose “Keep my files.” This will reinstall Windows 10 but keep your personal files.
If the issue persists after trying these steps, you may need to consider more advanced troubleshooting or seek assistance from Microsoft support.
Additionally, check the support forums for your specific microphone or computer model, as others may have encountered and solved similar issues.
Microphone Driver Windows 10
Frequently Asked Questions On Microphone Setting Windows 10
How Do I Change My Microphone Settings On Windows 10?
To change your microphone settings on Windows 10, follow these steps:
1. Connect your microphone to your PC.
2. Click on Start, then go to Settings.
3. Open the Sound settings.
4. Select your microphone from the Input options.
5. Adjust the microphone volume as needed.
6. Test your microphone to ensure it’s working properly.
7. Make any additional adjustments in the Sound Control Panel if required.
How Do I Find My Microphone Settings On Windows 10?
To find your microphone settings on Windows 10, follow these steps:
1. Click on the Start menu and go to Settings.
2. In the Settings window, click on System.
3. In the System settings, select Sound.
4. Under Sound settings, navigate to the Input section.
5. Choose the microphone you want to adjust from the available options.
6. Speak into the microphone and observe the input volume level to test it.
7. Make any necessary adjustments to the microphone settings as needed.
How Do I Access My Microphone Settings?
To access your microphone settings on Windows 10:
1. Select Start > Settings > System > Sound.
2. In the Input section, choose the microphone you want to use.
3. Adjust the input volume to your preference.
4. Test your microphone by speaking into it to ensure it is working properly.
Why Is My Mic Not Picking Up My Voice?
If your mic isn’t picking up your voice, try these steps:
1. Check mic connection and ensure it’s allowed access.
2. Make sure you aren’t muted or adjust mic volume in settings.
3. Speak louder or increase mic sensitivity in computer settings.
Conclusion
To ensure optimal performance and clear audio quality, it is essential to properly configure your microphone settings in Windows 10. By following the step-by-step instructions provided in this blog post, you can easily select your input device, adjust the volume, and troubleshoot any microphone-related issues you may encounter.
To access your microphone settings, simply navigate to the Sound settings in the Control Panel or from the Start menu. From there, you can choose your input device and adjust the volume according to your preferences. If you have any trouble, make sure you have allowed access to the microphone and that it is not muted.
By properly configuring your microphone settings, you can ensure that your voice is heard loud and clear during calls, recordings, or any other audio-related tasks. So, take the time to adjust and test your microphone to make sure Windows is recognizing and utilizing it effectively.
Remember, a well-configured microphone enhances your overall audio experience, ensuring that your voice is heard with utmost clarity. So, go ahead and optimize your microphone settings for a seamless audio experience on Windows 10!