
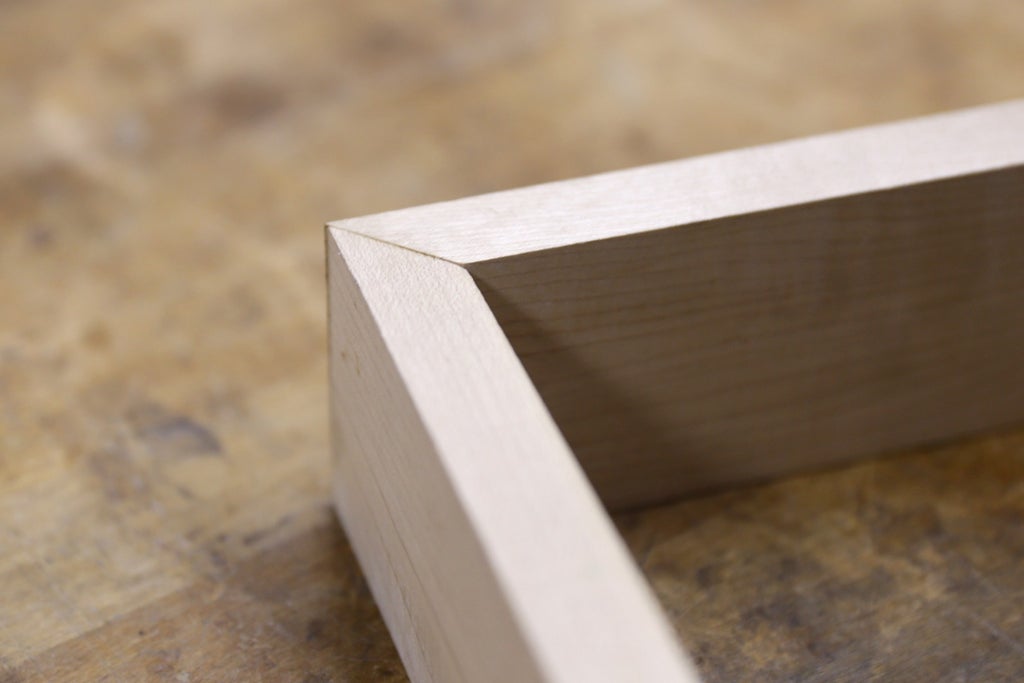
Beveling wood is a key skill in woodworking. It adds charm and function to your projects.
Learning how to bevel wood can transform your woodworking tasks. This technique involves cutting the wood at an angle, creating a sloped edge. Whether you are building furniture or crafting decorative pieces, beveling can provide smooth, elegant finishes. Understanding the right tools and methods is crucial.
With practice, you can achieve clean, precise bevels that enhance both the look and feel of your work. This guide will help you master the basics and offer tips to refine your beveling skills. Ready to get started? Let’s dive in and explore the art of beveling wood together.
Credit: www.instructables.com
Introduction To Beveling Wood
Beveling wood is an essential woodworking technique that can transform your projects. It involves cutting the edge of a piece of wood at an angle other than 90 degrees. This technique not only enhances the aesthetics but also improves the functionality of your wood pieces.
I remember the first time I beveled a piece of wood for a picture frame. It added a professional touch that was simply unmatched. Have you ever tried beveling wood? If not, it’s time to dive in and learn more about it.
Importance Of Beveling
Why is beveling wood so important? First, it significantly improves the visual appeal. Beveled edges create a smooth transition and add a touch of elegance to any piece.
Besides aesthetics, beveling can also enhance the structural integrity of your projects. It allows for smoother joints and better fitting pieces, which is crucial for creating sturdy furniture and other wood items.
Imagine working on a wooden tabletop. A beveled edge can prevent splinters and make it more comfortable to use. This small adjustment can make a big difference in your woodworking projects.
Basic Tools Required
To bevel wood, you don’t need a lot of fancy tools. A few basic ones will get you started. A table saw is a must-have. It’s precise and can handle various angles.
If you prefer manual tools, a block plane can also do the job. It’s great for smaller projects and provides excellent control over the beveling process.
Don’t forget safety gear! Always wear safety glasses and gloves to protect yourself. A dust mask is also recommended, as beveling can create a lot of fine wood dust.
Ready to start beveling? Gather your tools, and let’s turn those plain edges into something extraordinary!

Credit: www.youtube.com
Choosing The Right Wood
Choosing the right wood is crucial for beveling. Ensure the wood is smooth and free from knots. This allows for clean, precise cuts and an even bevel.
Choosing the right wood is crucial for achieving a clean and professional bevel. Different types of wood have distinct characteristics that can affect the final outcome of your project. Understanding these differences can help you make informed decisions and avoid unnecessary frustration.
Types Of Wood
Selecting the appropriate type of wood for beveling depends on your project’s needs. Softwoods like pine and cedar are easier to work with and are ideal for beginners. They are less dense, making them easier to shape and cut.
On the other hand, hardwoods such as oak, maple, and walnut are more durable and offer a more refined finish. Although harder to work with, they provide a more polished look, which is perfect for high-quality furniture or decorative pieces.
Consider the wood’s application. Softwoods are great for casual, everyday projects, while hardwoods are best for items that need to withstand wear and tear.
Wood Grain Considerations
The grain of the wood significantly impacts the beveling process. Straight grain wood is easier to bevel because it offers consistent resistance, reducing the chance of splintering. Curly or interlocked grain can be challenging but offers a unique aesthetic if handled carefully.
Pay attention to the direction of the grain. Always bevel along the grain to avoid tear-out and achieve a smoother finish. This technique not only ensures a cleaner cut but also extends the life of your tools.
Take a moment to feel the wood’s surface. If it feels rough or uneven, it might be worth sanding it down before starting your beveling work. This small step can save you a lot of time and effort in the long run.
Have you ever tried working with a wood type that didn’t turn out as expected? Share your experiences or challenges. Engaging with the community can lead to valuable insights and tips!
Essential Tools And Equipment
Beveling wood requires a few essential tools. A sharp chisel, a block plane, and a sanding block are crucial. Use these tools to create smooth, angled edges.
When it comes to beveling wood, the right tools can make all the difference. Whether you are a seasoned woodworker or a beginner, having the essential tools and equipment will ensure your projects come out smooth and precise. Let’s dive into the must-have tools you’ll need to get started.
Hand Tools
Hand tools are perfect for those who prefer a more traditional approach. They give you greater control and a more tactile experience. Some of the essential hand tools for beveling wood include:
- Bevel Gauge: This tool helps you measure and replicate angles accurately. It’s adjustable, so you can set it to any angle you need.
- Chisels: A sharp chisel can help you carve out precise bevels. Make sure you have a variety of sizes.
- Block Plane: Ideal for smoothing and shaving off thin layers of wood. It’s excellent for creating clean bevel edges.
Using hand tools might take a bit more time, but the craftsmanship and control you gain are worth it. I once crafted a beveled edge using only a chisel and a block plane, and the satisfaction was unparalleled.
Power Tools
If you’re looking for speed and efficiency, power tools are your go-to. They can help you achieve precise bevels in a fraction of the time. Here are some essential power tools for beveling wood:
- Table Saw: With an adjustable blade, a table saw is perfect for making consistent bevel cuts. Just set the blade to your desired angle.
- Router: This versatile tool can be fitted with a bevel bit, allowing you to create smooth bevel edges quickly.
- Belt Sander: Great for refining and smoothing beveled edges. It’s especially useful for larger pieces of wood.
Power tools can be intimidating at first, but once you get the hang of them, they can significantly speed up your workflow. Imagine finishing a beveled edge in minutes rather than hours.
Do you prefer the precision of hand tools or the speed of power tools? Each has its own advantages, and sometimes the best approach is a combination of both.
Preparing The Wood
Before you start beveling wood, it’s essential to prepare the wood properly. Proper preparation ensures that your bevels are clean, precise, and professional-looking. This section will guide you through the necessary steps to get your wood ready for beveling, focusing on measuring and marking, and clamping techniques.
Measuring And Marking
Accurate measurements are crucial. Use a good quality ruler or tape measure to get precise dimensions. Mark your measurements clearly with a pencil or chalk.
Ensure your markings are visible but not too dark. This prevents confusion during cutting. Double-check your measurements to avoid mistakes.
Personal tip: I once misread a measurement and ended up with a piece too short. Double-checking saved me from wasting more material.
Clamping Techniques
Clamping stabilizes the wood, ensuring it doesn’t move while you’re working on it. Use strong, reliable clamps for the best results.
Position the clamps evenly. Uneven pressure can warp the wood and ruin your bevel. Experiment with different clamping positions for the best stability.
Personal tip: I found using two clamps at opposite ends works best for long pieces. It keeps the wood stable and secure.
Have you ever thought about how a simple clamp can make or break your project? Proper clamping is an underrated skill that can significantly improve your woodworking.
Hand Beveling Techniques
Hand beveling wood is a rewarding skill. It allows for precise control and a smooth finish. With a few simple tools, you can achieve beautiful beveled edges. Here, we explore two effective hand beveling techniques.
Using A Block Plane
A block plane is a versatile tool. It’s perfect for beveling edges. To start, adjust the blade to a shallow angle. This helps to remove thin shavings of wood. Hold the block plane firmly with both hands.
Place the plane at the edge of the wood. Push it forward along the grain. Use steady, even strokes. Check your progress often. This ensures you achieve the desired bevel. A block plane is easy to control. It provides a smooth, even finish.
Using A Chisel
A chisel is another useful tool for beveling wood. Select a sharp chisel for best results. Hold the chisel at a slight angle to the wood’s edge. Use a mallet to tap the chisel gently.
Work along the edge in small sections. Remove thin slices of wood with each tap. Check the bevel frequently. This helps maintain a consistent angle. A chisel allows for detailed work. It’s great for small or intricate bevels.
Power Tool Beveling
Beveling wood can transform your woodworking projects, giving them a polished, professional look. Power tools make this task easier, faster, and more precise. Whether you’re a seasoned carpenter or a DIY enthusiast, using a router or a table saw can help you achieve that perfect bevel.
Using A Router
A router is a versatile tool for beveling wood. It allows you to create clean, precise edges. First, choose the right bit for your bevel. The bit’s shape determines the angle and finish of the bevel. Secure your wood piece firmly to prevent movement.
Start the router and run it along the edge of the wood. Keep a steady hand and maintain an even speed. This ensures a smooth finish. Adjust the depth of the cut if necessary. Repeat the process until you achieve the desired bevel.
Have you ever tried using a router for beveling? It’s surprisingly straightforward. With a little practice, you’ll get the hang of it and enjoy the precision it offers.
Using A Table Saw
A table saw is another powerful tool for beveling wood. It’s ideal for long, straight edges. Adjust the saw blade to the bevel angle you need. Ensure the wood is securely clamped to prevent any accidents.
Slowly feed the wood through the saw, keeping your hands clear of the blade. Use a push stick for extra safety. This method creates consistent bevels along the entire length of the wood. Consider using a featherboard to keep the wood steady.
Ever wondered why professionals prefer table saws for beveling? It’s all about precision and control. You can achieve perfect angles with minimal effort.
What’s your preferred method for beveling wood? Trying different tools can help you find the one that suits your style and projects best.
Finishing The Beveled Edge
Perfecting the beveled edge of your wood project can elevate its appearance. It involves careful sanding and applying the right finish. This ensures your work looks professional and polished. Let’s dive into the steps needed for a smooth and beautiful beveled edge.
Sanding Techniques
Sanding the beveled edge is crucial. Start with a coarse grit sandpaper. This removes rough spots and evens out the surface. Gradually move to finer grit sandpapers. This smooths the wood further and prepares it for finishing. Sand along the grain to avoid scratches.
Use a sanding block for better control. A power sander can also be used for larger projects. Always check your progress and adjust your pressure. Light, even strokes work best. Wipe away dust with a clean cloth before moving to the next grit.
Applying Finish
Choose a finish that suits your wood type and project. Options include varnish, stain, or oil. Apply the finish using a brush or cloth. Follow the wood grain for an even coat. Let the first coat dry completely. This might take a few hours depending on the finish.
Once dry, lightly sand the beveled edge again. This smooths out any raised grain or rough spots. Apply a second coat of finish. Repeat the process until you achieve the desired look. Always allow the final coat to dry fully before handling your project.
Common Mistakes And How To Avoid Them
Beveling wood can be a rewarding project, but it’s easy to make mistakes that can ruin your hard work. Understanding these common mistakes and learning how to avoid them can save you time and frustration. Here are some pitfalls to watch out for and tips to keep your bevels looking sharp and professional.
Uneven Edges
One common issue when beveling wood is ending up with uneven edges. This usually happens if you don’t maintain a consistent angle throughout your cuts. A slight shift in your hand can make a noticeable difference.
To avoid this, always use a guide or a jig to keep your angle steady. A simple homemade jig can work wonders. Practice on scrap wood before working on your main project. This will help you develop a feel for maintaining a consistent angle.
Double-check your measurements. Accurate marking is crucial. Use a sharp pencil or a marking knife for precision. Mistakes here can lead to uneven edges that are tough to correct later.
Tear Out Issues
Tear out is another common problem, especially with softer woods. This occurs when the wood fibers tear instead of cutting cleanly, leaving a rough, splintered edge.
Using a sharp blade is essential. Dull blades are more likely to tear the wood fibers. Change your blade or sharpen it regularly.
Consider the direction of the wood grain. Always cut in the direction of the grain to minimize tear out. If you must cut against the grain, use a sacrificial board to support the cut and reduce splintering.
Lastly, take your time. Rushing through cuts increases the risk of tear out. Slow and steady wins the race here. You’ll get cleaner, more precise bevels by working methodically.
Have you experienced any of these issues while beveling wood? How did you overcome them? Share your tips and tricks in the comments below!
Advanced Beveling Techniques
Learn how to bevel wood with advanced techniques. These methods create smooth edges and detailed designs. Perfect for woodworking projects.
Beveling wood can add a professional touch to your projects. Once you’ve mastered the basics, you might want to delve into advanced beveling techniques to enhance your skills further. These techniques can make your work stand out and add unique, intricate details that catch the eye.
Compound Bevels
Compound bevels combine two angles to create a more complex cut. This technique is often used in carpentry for making precise joints or detailed frames.
To achieve compound bevels, you will need a miter saw that allows for adjustments on both axes. Set the blade to the first angle, then adjust the table to the second angle.
It might seem intimidating at first, but with practice, you’ll find it straightforward. Imagine constructing a picture frame with corners that fit perfectly. Compound bevels can make that happen.
Decorative Bevels
Decorative bevels add an artistic touch to your woodworking projects. These bevels are not just functional but also enhance the visual appeal of your work.
Using tools like a router or a chisel, you can create intricate designs along the edges of your wood pieces. Experiment with different patterns and depths to find what suits your project best.
Have you ever seen a beautifully beveled edge on a piece of furniture and wondered how it was done? That’s the magic of decorative bevels. They turn ordinary wood into a work of art.
Advanced beveling techniques can seem challenging, but they are incredibly rewarding. What unique designs will you create with your newfound skills?

Credit: www.instructables.com
Safety Tips
Beveling wood can be an enjoyable activity, but safety comes first. Taking proper precautions ensures you work without risking injury. Let’s explore essential safety tips to keep you safe while beveling wood.
Protective Gear
Wearing the right protective gear is crucial. Always wear safety goggles to protect your eyes from wood chips. Dust masks prevent inhalation of fine particles. Gloves offer a better grip and protect your hands. Use ear protection to avoid hearing damage from loud tools.
Safe Handling Practices
Using tools correctly reduces the risk of accidents. Always keep your workspace clean to avoid tripping hazards. Ensure your tools are in good condition. Dull blades can slip and cause injuries. Always cut away from your body. Secure the wood properly before you start beveling. This prevents the wood from moving unexpectedly. Follow the tool’s instruction manual for safe operation.
Frequently Asked Questions
What Tool Is Used To Bevel Wood?
A woodworker uses a beveling tool called a hand plane or a router to bevel wood edges accurately.
How To Make A Bevel On Wood?
To make a bevel on wood, mark the desired angle, secure the wood, and use a hand plane or power tool. Ensure even pressure and smooth strokes for a clean edge.
How Do You Get A Beveled Edge?
To get a beveled edge, use a hand plane or a router. Sand the edge smoothly afterward.
What Tool Is Used To Bevel The Edges?
A beveling tool or edge beveler is used to bevel the edges of materials like leather, wood, or metal.
Conclusion
Beveling wood adds a professional touch to any project. Follow these steps carefully. Practice on scrap pieces first. This helps you get a feel for the tools. Remember to measure and mark your wood accurately. Use safety gear like goggles and gloves.
Take your time for a clean, smooth bevel. Proper technique makes a big difference. Now, you can create beautiful beveled edges with confidence. Happy woodworking!