
Buffing wood by hand is a rewarding task. It enhances the wood’s natural beauty and adds a personal touch.
Buffing wood by hand may seem like a challenge, but it’s quite simple with the right steps. Hand buffing gives you control and precision that machines can’t match. Plus, it’s a great way to connect with your project on a deeper level.
You’ll need patience and some basic supplies like sandpaper, a soft cloth, and a good wood polish. With these tools, you can transform any wooden surface into a smooth, shiny masterpiece. In this guide, we’ll walk you through the process step by step, ensuring you achieve professional results. Ready to learn how to buff wood by hand? Let’s get started!
Introduction To Hand Buffing Wood
Hand buffing wood is an age-old technique. It brings out the natural beauty of wood. This method requires no power tools. Instead, it uses elbow grease and patience. Many woodworkers prefer hand buffing. They believe it gives a more personal touch to their work. Let’s dive into the benefits and materials needed for hand buffing wood.
Benefits Of Hand Buffing
Hand buffing offers several advantages. It allows for greater control over the process. You can focus on specific areas that need more attention. Hand buffing is also quieter. No loud machines to disturb the peace. This method is safer. There is less risk of damaging the wood with power tools. It can be therapeutic. The repetitive motion can be calming and rewarding.
Materials Needed
You will need a few basic materials. Sandpaper with various grits is essential. Start with coarse grit and move to finer grits. A soft cloth is needed for applying polish. You will also need wood polish or wax. Choose one that suits your wood type. A buffing pad or sponge can help. These make the job easier and more effective. Gloves are optional but recommended. They protect your hands during the process.

Credit: www.youtube.com
Choosing The Right Wood
Selecting the best wood is essential for hand buffing. Smooth surfaces and even grain yield better results. Choose wisely for a flawless finish.
Choosing the right wood can make or break your hand-buffing project. The type of wood and its grain play a crucial role in the final outcome. Let’s dive into the details to help you make an informed decision.
Types Of Wood
Different woods offer varying levels of hardness, color, and texture.
– Softwoods like pine and cedar are easier to sand but may not hold up well over time. They are great for smaller projects or items that won’t face much wear and tear.
– Hardwoods such as oak, maple, and walnut are more durable and provide a rich finish. These are ideal for furniture or items that need to withstand frequent use.
Consider the end use of your project. Choose a wood that aligns with its intended function and aesthetic.
Wood Grain Considerations
The grain pattern affects both the appearance and the ease of buffing.
– Straight grain is easier to work with and offers a uniform look. Ash and cherry often have straight grains, making them popular choices for beginners.
– Interlocked or wavy grain can add visual interest but may require more effort to buff smoothly. Woods like mahogany often have these complex patterns.
Pay attention to the grain direction while sanding. Sanding with the grain reduces scratches and ensures a smooth finish.
Have you ever noticed how some wooden items look flawless while others seem rough? That’s often due to grain considerations.
Understanding these nuances can save you time and improve your results. Do a bit of research and maybe even experiment with a few types before committing to your main project.
Have you already chosen a wood type? If so, how do you think its grain will affect your buffing process?
Your insights and experiences will help you achieve that perfect finish.
Preparing Your Workspace
Before buffing wood by hand, prepare your workspace. A clean, organized area ensures safety and efficiency. Proper preparation helps avoid mistakes and saves time.
Safety Measures
Wear safety goggles to protect your eyes from dust. Use a dust mask to avoid inhaling particles. Keep a first aid kit nearby for minor injuries. Ensure good lighting to see your work clearly.
Organizing Tools And Materials
Gather all necessary tools and materials before starting. Place sandpaper, cloths, and polishing compounds within reach. Use a sturdy table or workbench for stability. Keep your workspace clean to avoid confusion and ensure a smooth process.
Initial Sanding Process
Buffing wood by hand can be a rewarding and meticulous process, especially during the initial sanding phase. This step sets the foundation for a smooth and polished finish. Let’s dive into how you can effectively approach the initial sanding process.
Selecting Sandpaper Grit
Choosing the right sandpaper grit is crucial. It’s like picking the right tool for the job. Start with a coarser grit, such as 80 or 100, to remove any rough patches or old finishes.
Gradually move to finer grits, like 150 or 220. This helps smooth out the surface. The finer the grit, the smoother the finish.
If you skip this step, you might end up with a rough texture that’s difficult to fix later.
Proper Sanding Techniques
Using the right sanding techniques ensures you achieve the best results. Sand in the direction of the wood grain to avoid scratches and a rough finish.
Apply even pressure. Too much pressure can create dents or uneven surfaces, while too little might not smooth the wood effectively.
Think of sanding as a gentle, gradual process. Rushing can lead to mistakes and an imperfect finish.
Have you ever started sanding and wondered if you’re doing it right? It’s common to feel unsure. The key is patience and consistency.
Take regular breaks to inspect your progress. Are you seeing an even smoothness? If not, adjust your technique or grit.
Remember, the initial sanding process is about setting a solid foundation. By choosing the right grit and using proper techniques, you pave the way for a beautifully buffed wood finish.
Applying Wood Conditioner
Applying wood conditioner is a key step in achieving a smooth, even finish on your wood projects. It prepares the wood to absorb stain evenly and prevents blotchiness. This step can make a huge difference in the quality of your finished piece.
Why Use A Conditioner
Wood conditioner helps the wood absorb stain more evenly. This is especially important for softwoods like pine or fir. These woods can absorb stain unevenly, leading to blotchy finishes. A conditioner creates a barrier that controls this absorption.
Even hardwoods can benefit from a conditioner. It helps to highlight the natural grain and beauty of the wood. This step ensures your wood piece looks its best.
Application Methods
Applying wood conditioner is simple. Start by sanding your wood surface. Use fine-grit sandpaper for a smooth finish. Clean off any dust before you apply the conditioner.
Use a clean cloth or brush to apply the conditioner. Work in the direction of the wood grain. Apply a thin, even coat. Let it sit for 10-15 minutes. Wipe off any excess with a clean cloth.
Allow the conditioner to dry according to the manufacturer’s instructions. This usually takes about 30 minutes. Once dry, you can apply your stain. The conditioner will help the stain go on smoothly and evenly.
Buffing Techniques
Buffing wood by hand can bring out its natural beauty. It’s a satisfying process that requires patience and the right technique. This section will cover different buffing methods to achieve a smooth, polished finish.
Using Buffing Pads
Buffing pads are essential tools for hand buffing wood. Choose a pad that suits the wood type. Soft pads work well for delicate surfaces. Harder pads are better for tough wood. Attach the pad to a handle for better control.
Apply a small amount of buffing compound to the pad. Rub the pad in circular motions on the wood surface. Start with light pressure and gradually increase. This helps spread the compound evenly.
Buffing pads come in various materials. Foam pads are gentle and good for final polishing. Wool pads are rougher and ideal for initial buffing. Always test a small area first to ensure the pad doesn’t damage the wood.
Hand Buffing Motions
Hand buffing requires specific motions for best results. Circular motions are effective for spreading the compound. They help avoid streaks and uneven spots. Move your hand in small circles, covering the entire surface.
Linear motions are also useful. They are good for large, flat areas. Move your hand back and forth in straight lines. Keep the pressure consistent to avoid uneven buffing.
Alternate between circular and linear motions. This ensures thorough coverage and a smooth finish. Pay attention to the wood grain. Buffing along the grain can enhance the wood’s natural look.
Use firm, but gentle pressure. Too much force can damage the wood. Take your time and be patient. Hand buffing is a slow process, but the results are worth it.
Applying Finish
Applying finish to wood is a crucial step. It enhances the wood’s natural beauty and provides protection. Hand buffing wood might seem daunting, but with the right approach, it’s straightforward. Let’s delve into the process of applying a finish to wood by hand.
Types Of Wood Finish
There are various types of wood finishes available. Each has its unique benefits and uses.
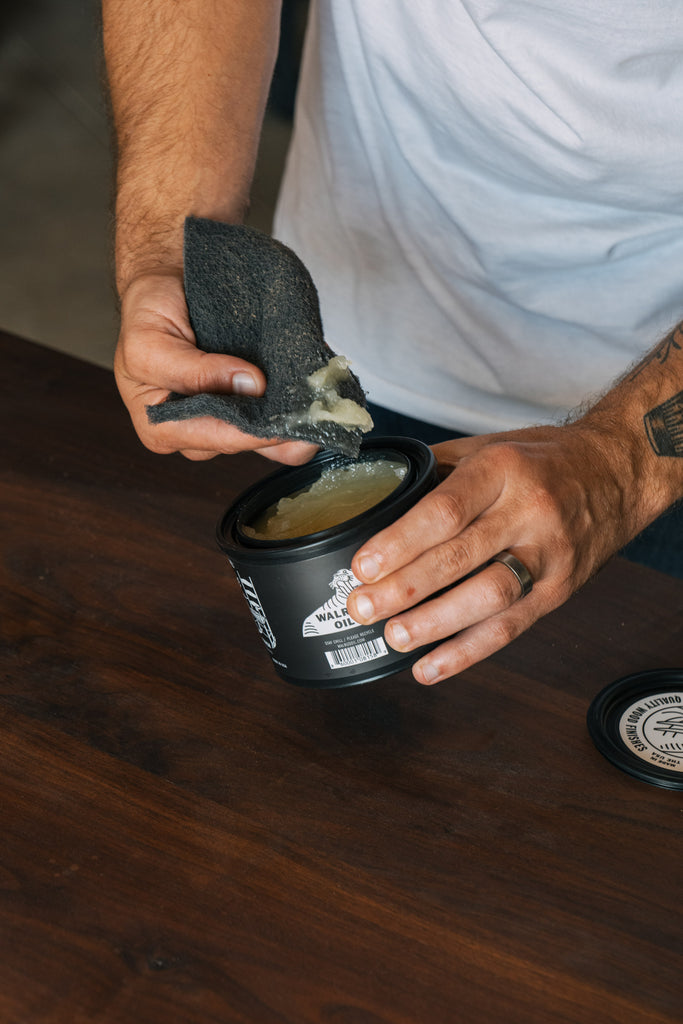
Oil Finishes: Oil finishes penetrate deep into the wood, providing a natural look. They are easy to apply and maintain.
Lacquer: Lacquer dries quickly and offers a durable, high-gloss finish. It is often used for furniture.
Shellac: Shellac is a natural finish that dries quickly. It adds a warm tone to the wood.
Varnish: Varnish provides a hard, protective surface. It is ideal for surfaces exposed to wear and tear.
Application Tips
Applying finish by hand requires patience and precision. Here are some tips to get the best results.
First, ensure the wood is clean and smooth. Sand the surface with fine-grit sandpaper. Remove all dust with a tack cloth.
Next, apply a thin coat of finish using a clean, lint-free cloth. Work with the grain of the wood. Avoid applying too much finish at once.
Allow the first coat to dry completely. This may take several hours or overnight. Lightly sand the surface with fine-grit sandpaper before applying the next coat.
Repeat the process for additional coats. Two or three coats are often sufficient. Each coat enhances the wood’s beauty and protection.
Finally, allow the finish to cure fully. This can take several days. Be patient for the best results.
Credit: walrusoil.com
Final Touches
Buffing wood by hand brings out its natural beauty. Use sandpaper, then a soft cloth for a smooth finish. This simple method enhances the wood’s shine and texture.
The final touches are the most rewarding part of buffing wood by hand. This stage is where your hard work pays off, and your piece truly shines. It’s crucial to take your time and do it right.
Inspecting For Imperfections
Inspect your work under good lighting. Look closely for any missed spots or uneven areas.
Run your fingers gently over the surface. Your sense of touch can find imperfections your eyes might miss.
If you find any rough patches, use fine sandpaper to smooth them out. Always sand in the direction of the wood grain.
Polishing The Surface
Choose a high-quality wood polish or wax. Apply it sparingly with a clean, soft cloth.
Rub in small, circular motions. This ensures an even application and a beautiful finish.
Let the polish sit for a few minutes. Then, buff the surface with a dry cloth to bring out the shine.
Have you ever polished a piece of wood and stepped back to see your reflection? It’s a moment of pride and satisfaction.
Remember to clean your tools and workspace. A tidy area can make your next project even more enjoyable.
By following these steps, you can achieve a professional-looking finish. Your hand-buffed wood will stand out for its smoothness and shine.
What’s your favorite part of woodworking? Is it the crafting, or seeing the final polished piece? Share your thoughts in the comments below.
Maintenance Tips
Hand-buffing wood brings out its natural shine. Use fine-grit sandpaper in circular motions. Finish with a soft cloth and wood polish for a smooth surface.
Buffing wood by hand gives it a beautiful shine and a smooth finish. However, maintaining that polished look requires regular care. Here are some essential tips to keep your buffed wood looking its best.
Cleaning the Buffed Wood
Keeping your buffed wood clean is crucial. Dust can settle on the surface and dull its shine. Use a soft cloth to wipe the wood regularly.
Avoid using harsh chemicals. Instead, opt for mild, wood-friendly cleaners. A mixture of water and vinegar can work wonders.
Pay attention to corners and crevices. Dust tends to accumulate in these areas. A small brush can help reach these tricky spots.
Long-term Care
To ensure your buffed wood remains stunning, follow these long-term care tips. Apply a protective wax every few months. This helps maintain the shine and adds a layer of protection.
Consider the environment. Too much moisture or direct sunlight can damage the wood. Place your furniture away from windows and humid areas.
Regularly inspect the wood for scratches or dents. Address these issues promptly to prevent further damage. You can use a touch-up pen or a small amount of wax to fix minor imperfections.
Have you ever noticed how well-maintained wood adds warmth to a room? The time invested in care truly pays off. What steps will you take to preserve your buffed wood’s beauty?
Remember, a little effort goes a long way in maintaining that elegant shine.

Credit: walrusoil.com
Frequently Asked Questions
Can You Buff Wood By Hand?
Yes, you can buff wood by hand. Use fine-grit sandpaper, a soft cloth, and apply even pressure for a smooth finish.
What Is The Best Way To Buff Wood?
The best way to buff wood is to use fine-grit sandpaper, followed by applying a high-quality wood polish or wax.
What Is The Difference Between Buffing And Polishing Wood?
Buffing smooths wood surfaces by removing imperfections. Polishing enhances the wood’s shine and gives it a finished look.
How To Smooth A Wood Surface By Hand?
To smooth a wood surface by hand, use coarse sandpaper first. Gradually switch to finer grits. Sand in the direction of the grain. Finally, wipe with a damp cloth to remove dust.
Conclusion
Buffing wood by hand can be rewarding and satisfying. The process is simple. Gather your tools, prepare the surface, and work with patience. You’ll achieve a smooth and shiny finish. Anyone can do it with practice. Remember to take your time.
Enjoy the craft of working with wood. The result is worth the effort. Happy buffing!