
To repair a sticky wood finish, start by cleaning the surface with mild soap and water. If the stickiness persists, use a mixture of vinegar and water to break down the residue.
Wood furniture can develop a sticky finish over time. This often happens due to the buildup of polish, oil, or other substances. It can make your beautiful wood pieces look dull and feel unpleasant. But don’t worry, you can fix it.
In this guide, you’ll learn simple steps to restore your wood’s finish. You don’t need to be a professional to handle this. With a few common household items, you can bring back the shine and smooth feel of your wood furniture. Ready to make your wood look and feel new again? Let’s get started!
Identifying Sticky Wood Finish
One of the most frustrating things for any wood furniture owner is dealing with a sticky finish. It can make your beautiful wooden pieces look dull and feel unpleasant to the touch. Identifying the root cause of the sticky wood finish is the first step to fixing it. Let’s dive into how you can spot and understand this issue.
Common Causes
Sticky wood finishes often occur because of improper application or aging of the finish. If a finish isn’t allowed to dry properly, it can remain tacky. Additionally, exposure to heat and humidity can break down the finish over time, leading to a sticky feel.
Another common cause is the buildup of dirt and oils. This is especially true for frequently touched surfaces like tabletops and armrests. Using the wrong cleaning products can also leave residues that make the finish sticky.
Signs To Look For
A sticky wood finish usually feels tacky or gummy to the touch. You might notice that dust and debris easily stick to the surface. It can also make cleaning a chore, as wiping it down seems to make it even stickier.
In some cases, you might see a dull or uneven sheen on the wood surface. This can be a sign that the finish is breaking down. If you notice any of these signs, it’s time to consider repairing the finish.
Have you ever struggled with a sticky wood finish on your furniture? Share your experiences and what solutions worked for you. Identifying the problem is the first step to restoring your wood pieces to their former glory.
Essential Tools And Materials
Repairing sticky wood finish requires specific tools and materials. Sandpaper, mineral spirits, and a soft cloth are essential. Also, ensure you have a good quality wood polish.
Repairing a sticky wood finish can be a rewarding DIY project. It’s crucial to have the right tools and materials to ensure a smooth and successful process. Whether you’re dealing with an old table or a cherished cabinet, knowing what you need can make all the difference.
Required Tools
Start with the basics. You will need a few essential tools to get the job done.
A good-quality sanding block or electric sander will help you remove the sticky residue efficiently.
Safety goggles and gloves are non-negotiable. Protecting your eyes and hands from dust and chemicals is crucial.
Keep a clean cloth handy. You’ll use it to wipe away dust and apply products.
Best Products
Choosing the right products is vital for repairing sticky wood finishes.
A high-quality wood cleaner is your first step. It will help remove grime and prepare the surface for further treatment.
Mineral spirits work wonders. They dissolve sticky residue without damaging the wood.
Consider using a wood conditioner. It restores the wood’s natural oils, enhancing its beauty and durability.
Polyurethane or varnish will give your wood a fresh, protective finish. Ensure you pick a product suitable for your wood type.
Have you ever been frustrated by a sticky finish on your favorite piece of furniture? I once spent an entire afternoon trying various methods before I found the right tools and products. It was a game-changer.
What tools and products have you used for wood repair? Do you have any tips or tricks? Share your thoughts in the comments below!
Preparing The Work Area
Clear the work area of any clutter to begin the sticky wood finish repair. Lay down a protective cover to prevent damage.
Repairing a sticky wood finish can seem daunting, but the key is to start with a well-prepared work area. A properly prepped space ensures a smoother repair process and better results. Here’s how you can set up your work area effectively.
Cleaning The Surface
Begin by wiping down the wood surface with a soft cloth to remove dust and debris.
Use a mild dish soap mixed with warm water for a more thorough clean.
Gently scrub the surface in circular motions, and make sure to dry it completely afterward.
A clean surface allows you to see the extent of the stickiness and ensures that no dirt is trapped under the new finish.
Protecting Surroundings
Cover the floor and any nearby furniture with a drop cloth or old sheets.
This prevents accidental spills and splatters from causing damage.
Use painter’s tape to secure the edges of the cloth, ensuring it stays in place.
Consider setting up your workspace in a well-ventilated area, like a garage with the door open or an outdoor space.
Adequate ventilation helps to disperse any fumes from cleaning agents or finishes you might use.
Taking the time to clean the surface and protect your surroundings makes the repair process much smoother. Have you ever skipped these steps and regretted it later? Proper preparation is key to achieving a professional-looking result.
Credit: www.rockler.com
Removing Old Finish
Repairing a sticky wood finish starts with removing the old finish. This step is crucial as it prepares the surface for a new, smooth finish. There are different methods to remove old finish effectively. Let’s explore these methods to ensure your wood piece looks its best.
Sanding Techniques
Sanding is a straightforward way to remove old finish. Use sandpaper to gently rub the surface. Start with coarse-grit sandpaper to break down the sticky finish. Gradually switch to finer grits for a smooth surface. Ensure you sand in the direction of the wood grain. This helps avoid scratches and uneven surfaces.
Using Chemical Strippers
Chemical strippers are another effective method. These products break down the old finish. Apply the stripper evenly across the wood surface. Wait for it to soften the finish, usually around 15 minutes. Use a plastic scraper to remove the softened finish. Always wear protective gloves and work in a well-ventilated area.
Applying New Finish
Fixing a sticky wood finish involves cleaning the surface and applying a fresh coat. Sand the wood lightly. Then, use a suitable finish to restore its shine.
Applying a new finish to a sticky wood surface can seem daunting, but it’s a straightforward process if you break it down. Whether you’re restoring a cherished piece of furniture or a modern wooden table, following the right steps ensures a smooth, durable finish. Let’s dive into the details, starting with selecting the appropriate finish and then moving on to how to apply it effectively.
Choosing The Right Finish
Selecting the right finish is crucial. You want something that not only looks good but also protects the wood.
Consider the environment where the wood piece will be used. For instance, if it’s a dining table, you might need a finish that can withstand spills and stains.
There are various finishes to choose from, such as polyurethane, lacquer, and shellac. Each has its pros and cons. Polyurethane offers durability and water resistance, making it ideal for high-traffic areas.
Lacquer dries quickly and gives a glossy finish but requires more maintenance. Shellac is great for a warm, natural look and is easier to repair but is less durable.
Application Methods
Once you’ve selected your finish, it’s time to apply it. Proper application ensures a smooth, even coat that lasts.
Start with a clean, sanded surface. Dust and debris can ruin the finish. Use a tack cloth to remove any fine particles.
You can apply the finish using a brush, cloth, or spray. Brushes are great for detailed work. Cloth application works well for oils and stains, providing a smooth, thin layer.
Spraying is efficient for larger pieces, offering even coverage but requires more equipment. Make sure to apply thin coats. Thick layers can lead to drips and uneven drying.
Allow each coat to dry fully before sanding lightly with fine-grit sandpaper. This helps the next coat adhere better. Typically, 2-3 coats provide a good finish, but always follow the manufacturer’s instructions.
Have you tried applying a finish before? What method worked best for you? Share your thoughts and let’s perfect our techniques together.

Credit: www.youtube.com
Drying And Curing Time
Drying and curing time is crucial when repairing a sticky wood finish. Proper drying ensures the finish sets well, preventing future stickiness. Understanding the optimal conditions and common pitfalls can make the process smoother and more effective.
Optimal Conditions
For the best results, work in a room with moderate humidity. Too much moisture can delay drying. Keep the temperature around 70°F (21°C) for optimal curing. Ensure there is good ventilation. Fresh air helps the finish dry evenly and faster.
Avoiding Common Mistakes
Avoid applying thick layers of finish. Thin layers dry faster and more evenly. Do not rush the process by using heat sources. Heat can cause the finish to crack. Always allow each coat to dry fully before applying the next one. Skipping this step can lead to a sticky surface.
Do not ignore the manufacturer’s instructions. They provide specific drying times and conditions. Using the wrong type of finish can also cause issues. Ensure the finish is suitable for the type of wood and the existing finish. Proper preparation and patience are key to a smooth, durable finish.
Final Touches And Polishing
After repairing a sticky wood finish, the final steps are crucial. These steps ensure the surface looks beautiful and stays protected. The final touches and polishing process involves buffing the surface and adding protective coats.
Buffing The Surface
Begin by gently buffing the wood surface with a soft cloth. This removes any remaining residue and smoothens the finish. Use circular motions to cover the entire area evenly. Applying light pressure helps avoid scratches. Buffing brings out the natural shine of the wood.
If the surface still feels sticky, use a bit of mineral spirits. Dampen the cloth with the spirits and continue buffing. Ensure the room is well-ventilated. Mineral spirits help dissolve the sticky residue without damaging the wood. Always test on a small area first.
Adding Protective Coats
Once the surface is smooth and shiny, apply a protective coat. Choose a high-quality wood polish or wax. This adds a layer of protection against future damage. Apply the polish or wax using a clean, soft cloth. Work in small sections, using gentle, circular motions.
Allow the protective coat to dry completely. This can take several hours or overnight. Once dry, buff the surface again with a clean cloth. This ensures the protective coat is evenly distributed and enhances the wood’s natural beauty. Regular maintenance keeps the finish looking new.
Maintaining Wood Finish
Maintaining a wood finish is essential for keeping your furniture looking its best. A well-maintained wood finish not only enhances the beauty but also extends the life of your wooden items. Regular cleaning and taking preventative measures can help you avoid sticky wood finish issues. Let’s explore some practical tips to keep your wood finish in top condition.
Regular Cleaning
Regular cleaning is crucial to maintaining the wood finish. Dust your wooden furniture frequently using a soft, dry cloth. This prevents dirt buildup, which can cause the finish to become sticky. For deeper cleaning, use a damp cloth with mild soap. Avoid harsh chemicals that can damage the finish. Always dry the wood thoroughly after cleaning.
Preventative Measures
Preventative measures can save you a lot of trouble. Always use coasters and placemats to protect the wood surface from spills. Avoid placing hot items directly on the wood. Heat can cause the finish to become sticky. Keep your wooden furniture away from direct sunlight and moisture. These elements can damage the finish over time. Regularly apply a good quality wood polish or wax to protect the finish. This creates a barrier against dirt and grime.

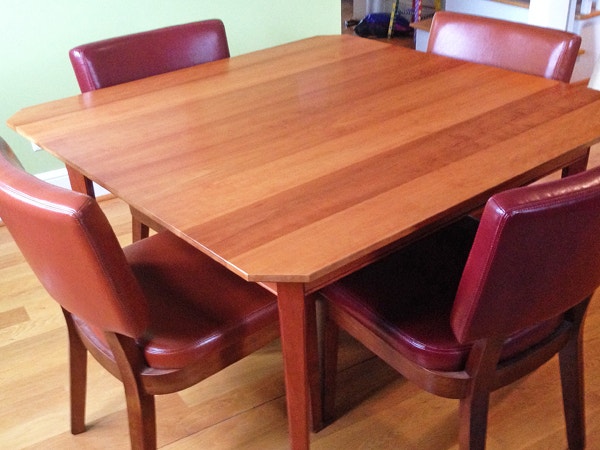
Credit: www.reddit.com
Frequently Asked Questions
How Do You Fix Sticky Wood Finish?
Clean the sticky wood surface with a damp cloth. Allow it to dry completely. Apply a thin layer of wax or furniture polish, then buff it with a soft cloth.
How To Fix Sticky Varnish On Wood Without Sanding?
Use a mixture of equal parts vinegar and water. Apply it with a cloth to dissolve sticky varnish. Wipe clean.
How To Get Sticky Residue Off Finished Wood?
Use a mixture of mild dish soap and warm water. Gently scrub the residue with a soft cloth. Dry the area thoroughly with a clean towel.
How To Remove Sticky Polyurethane From Wood Without Sanding?
Use a cloth soaked in mineral spirits to rub the sticky polyurethane. Wipe clean with a dry cloth.
Conclusion
Repairing a sticky wood finish can be simple with the right steps. Always clean the surface first. Then, use gentle sanding for stubborn spots. Reapply a fresh coat of finish for a smooth touch. Regular care keeps wood looking new.
With these tips, your wood items can stay beautiful and functional. Enjoy your refreshed furniture and the satisfaction of doing it yourself.