
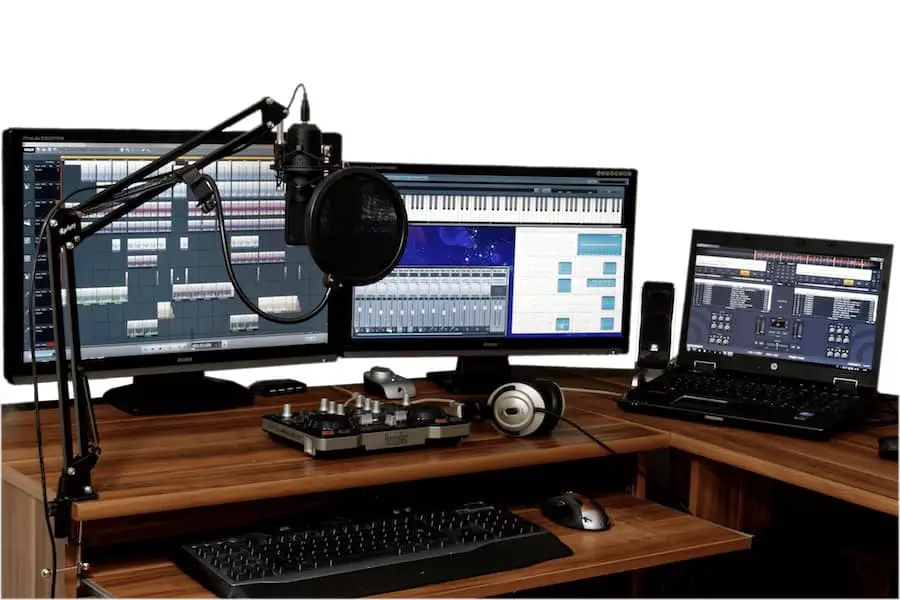
How to setup condenser mic to pc?: To set up a condenser mic to a PC, you will need an audio interface with phantom power. Connect the mic to the audio interface XLR input. Then, connect the audio interface to the PC via USB.
Finally, open your recording software and select the audio interface as your input device.
- Plug the condenser mic into an XLR cable, and then plug the other end of the XLR cable into the audio interface
- Turn on the power to the condenser mic
- Adjust the input level on the audio interface so that it’s not too low or too high
- You can do this by turning the “Gain” knob on the interface clockwise or counterclockwise
- Open your recording software (like Audacity) and create a new project file
- Then, go to Settings > Devices and choose your audio interface as both the input and output device
- Click on the track name in your project file and make sure it’s set to record in mono mode rather than stereo mode
- This is important because most condenser mics are designed for mono recording only
- Now you’re ready to start recording! Press record in your software and speak or sing into the mic while monitoring your levels carefully to avoid clipping (distortion)
Table of Contents
How to Connect Condenser Mic to Pc Without Phantom Power
If you’re looking to connect a condenser microphone to your PC without phantom power, there are a few things you need to know.
First, most condenser microphones will require phantom power in order to work properly. However, there are a few models that don’t require phantom power, so it’s worth checking before you make your purchase.
Second, if your condenser microphone does require phantom power, you’ll need to use an interface that provides it. The most common type of interface is a USB interface, but there are also XLR interfaces that can provide phantom power.
Finally, once you have your interface and microphone set up, you’ll need to configure your software to recognize the new hardware.
This process will vary depending on the software you’re using, but it’s usually pretty straightforward. Once everything is set up and working properly, you’ll be able to record high-quality audio with your condenser microphone!
How to Connect Condenser Mic to Audio Interface
In order to connect a condenser microphone to an audio interface, you will need the following:
-XLR cable
-Audio interface with phantom power supply
-Condenser microphone
1. Connect the XLR cable from the microphone to the audio interface.
2. Make sure that your audio interface has a phantom power supply. If it does not, you will not be able to use your condenser microphone with it.
3. Turn on the phantom power supply on your audio interface.
4. Start recording!
Bm-800 Microphone Setup Windows 10
Are you looking for a guide on how to set up your BM-800 microphone on Windows 10? If so, you’ve come to the right place! In this article, we’ll walk you through the entire process step-by-step.
Before we get started, there are a few things you’ll need to make sure you have:
1. A BM-800 microphone
2. A Windows 10 computer
3. A 3.5mm audio cable
4. An audio interface (optional)
5. Headphones (optional)
6. Cakewalk by BandLab or another DAW (optional) Now that you have everything you need, let’s get started!
1) Connect your BM-800 microphone to your Windows 10 computer using the 3.5mm audio cable.
If you’re using an audio interface, connect it to your computer as well.
2) Open Control Panel and go to Sound > Recording tab > Set Default Device > Select your BM-800 microphone from the list and click “Set Default.”
3) Go back to the Recording tab and double-click on your BM-800 microphone to open its properties window > go to the Levels tab > move the Microphone Boost slider all the way up (>30dB).
Click “Apply” and then “OK.”
4) Now it’s time to test your BM – 800microphone! Launch Cakewalk by Bandlab or another DAW of your choice and create a new project/track.
Select your BM – 800microphone as the input device and begin recording yourself speaking or singing into the mic . Once you’re done, play back the track to see how it sounds . If it sounds good , then congrats – you’ve successfully set up your BM – 800microphoneon Windows 10 !
How to Connect Condenser Mic to Amplifier
If you’re looking to connect a condenser mic to an amplifier, there are a few things you’ll need to take into account.
First, most condenser mics require phantom power in order to operate properly. This means that you’ll need an amplifier that provides this power, or else you’ll need to use a separate phantom power supply.
Second, you’ll need to make sure that your amplifier has enough gain to properly amplify the signal from the mic – otherwise you won’t be able to get a strong enough signal.
Finally, it’s always a good idea to use a microphone cable with XLR connectors (the standard for professional audio equipment) rather than using a regular instrument cable. This will help ensure that your signal is as clean as possible and avoid any interference issues.
Assuming you have all of the necessary equipment, connecting your condenser mic to an amplifier is actually quite simple. Just follow these steps:
1) Connect the XLR cable from the mic to the input on the amplifier. If your amp doesn’t have an XLR input, you can use an adapter.
2) Turn on phantom power on the amplifier (if it has this feature). Many amplifiers have a switch or button specifically for this purpose – just consult your manual if you’re unsure where it is.
3) Adjust the gain on the amplifier until you get a strong but not distorted signal coming through when speaking or singing into the mic.
4) That’s it! You should now be ready to start using your condenser mic with your amplifier.
How to Use Condenser Mic Without Phantom Power
If you’re looking to use a condenser mic without phantom power, there are a few things you’ll need to do.
First, make sure your condenser mic is properly plugged into an XLR input on your mixer or audio interface.
Next, take a look at the level controls on your mixer or audio interface and turn up the gain until you see the signal coming through on the meters.
Once you have a signal coming through, you can adjust the levels as needed.
Finally, if you’re using an external preamp with your condenser mic, make sure it’s turned on and set to the proper level. With these simple tips, you should be able to get great sound from your condenser mic without phantom power!
Credit: mynewmicrophone.com
How Do I Connect My Condenser Microphone to My Computer?
If you want to connect a condenser microphone to your computer, you’ll need to have an audio interface. This will allow you to plug in the microphone and record the audio into your computer. Many computers have a built-in audio interface, but if yours doesn’t, you can purchase one separately.
Once you have your audio interface, follow these steps:
1. Plug the XLR cable from the microphone into the XLR input on the audio interface.
2. Connect the USB cable from the audio interface to an available USB port on your computer.
3. Launch your recording software of choice and create a new project or track.
4. Select the audio interface as your input device and choose the appropriate input (usually labeled “mic”).
5. Adjust your recording levels until they’re peaking around -12dBFS and hit record!
How Do I Setup a Condenser Microphone on Windows 10?
If you want to get the most out of your condenser microphone, it’s important to set it up correctly. Here’s how to do it on Windows 10:
1. Connect your microphone to your computer using the appropriate cable. If you’re using an XLR microphone, you’ll need an XLR-to-USB adapter.
2. Open the sound settings menu by going to Start > Settings > System > Sound.
3. Under “Input,” select your condenser microphone from the drop-down menu and click “Apply.”
4. Go back to the main sound settings menu and click on “Recording Devices.” This will open up a new window with a list of all of your connected audio devices.
5. Right-click on your condenser microphone and select “Properties.”
6. In the properties window, go to the “Levels” tab and make sure that the volume is turned up all the way. You can also adjust the Bass boost and Treble boost levels here if desired.
7. Click “OK” when you’re finished making changes.
How Do You Set Up a Condenser Mic?
If you’re looking to set up a condenser mic, there are a few things you’ll need to do in order to get started.
First, it’s important to understand that condenser mics are generally more sensitive than other types of microphones, which means they require phantom power in order to function properly.
Additionally, condenser mics typically have a larger diaphragm than other microphone types, which allows them to capture more detailed audio.
In terms of setting up your condenser mic, you’ll first need to connect it to an audio interface or preamplifier that can provide phantom power.
Once your mic is connected, you’ll need to position it appropriately for the sound source you’re trying to capture. For example, if you’re recording vocals, you’ll want to position the mic so that it’s directly in front of the singer’s mouth.
Once your mic is positioned correctly, simply turn on the phantom power and begin recording!
How Do I Connect My Condenser Mic to My Computer Without Phantom Power?
If you’re looking to connect a condenser mic to your computer without phantom power, there are a few things you’ll need to take into account.
First, most condenser mics will require some form of 48V phantom power in order to function properly. This can either be provided by an external power supply, or by using a special XLR cable that has phantom power built-in.
Second, you’ll need to make sure that your audio interface or sound card has enough gain (or “preamp” as it’s sometimes called) to properly amplify the signal from the mic. If not, you may need to invest in a standalone preamp that can provide enough gain for the mic. Once you have all of that sorted out, connecting the mic is relatively simple.
Just run an XLR cable from the mic to the appropriate input on your audio interface or sound card. If everything is working properly, you should now be able to record with your condenser mic!
V8 Sound Card and BM-800 Condenser setting up in Windows 10 PC!!!
Conclusion
If you’re planning on doing any kind of audio recording, then you’ll need a good quality microphone. A condenser mic is ideal for capturing high-quality audio, and in this article we’ll show you how to set one up to work with your PC. First, you’ll need to connect the mic to your PC’s audio input port.
You can do this using a standard 3.5mm audio cable. Once the mic is connected, open up your sound control panel and ensure that the mic is selected as your default input device. Next, launch your preferred recording software and create a new project.
Once you’ve done this, open up the settings for your microphone and adjust the levels so that they’re suitably low. If you’re not sure what levels to use, start with the gain at around 50% and increase it until you get a good signal-to-noise ratio. Finally, hit record and start speaking into the microphone!
When you’re done, stop the recording and save your project. That’s all there is to setting up a condenser mic to work with your PC – now go out there and capture some great sounding audio!
Relevant Post:
Are Condenser Mics Good for Streaming?
How to Connect Condenser Mic to Bluetooth Speaker?
How to Connect Condenser Mic to Mac?
How to Connect Condenser Mic to Speaker?
How to Connect a Condenser Mic to a Pc?
Are you a user of a condenser mic?
How to use condenser mic on tiktok?
Can you record guitar with a condenser mic?

Williams Kane is a blogger and writer. He’s passionate about writing and connecting with the community, especially when it comes to sharing his ideas through writing.
I am a versatile author with a passion for exploring a wide range of topics on our multi-niche website. With a background in research and a love for writing, I bring a unique blend of expertise to our platform.
My journey began in the world of science, where I earned a degree in biology and developed a deep fascination for the natural world. This background enables me to delve into topics related to ecology, environmental conservation, and the wonders of the animal kingdom.
However, my curiosity knows no bounds, and I have ventured into various other niches as well. From technology trends and digital innovations to health and wellness tips, I strive to provide well-researched and engaging content that informs and entertains our diverse audience.
Furthermore, my dedication to staying current with the latest developments in each niche ensures that our readers receive up-to-date and reliable information. Whether it’s deciphering complex scientific concepts or simplifying tech jargon, I take pride in making complex subjects accessible to all.
Join me on our multi-niche journey, where we explore the depths of knowledge and share insights on a multitude of topics to inspire, educate, and entertain.
Related posts:
 Condenser Microphone Problems and Solution!
 Does a Condenser Mic Need Phantom Power? Find Out Here!
 How Do I Connect My Microphone to My Tv?
Karaoke System With Wireless Microphones
Blue Yeti Firmware: Enhance Your Recording Experience
Best Microphone for iPhone 13: Upgrade Your Audio Game
How Do I Connect My Microphone to My Tv?
Karaoke System With Wireless Microphones
Blue Yeti Firmware: Enhance Your Recording Experience
Best Microphone for iPhone 13: Upgrade Your Audio Game
 How to Easily Connect Microphone to Computer: The Ultimate Guide
Top 5 Best USB Microphone for Streaming: Unleash Your Streaming Potential
How to Easily Connect Microphone to Computer: The Ultimate Guide
Top 5 Best USB Microphone for Streaming: Unleash Your Streaming Potential