
If you want to use a mixing console with stereo channels, you need to make sure you have the right equipment and what to use with mixing console stereo channels. This includes speakers, an amplifier, and a mixer. You will also need cables to connect everything together.
Once you have all of your equipment, you can begin setting up your mixing console.
When it comes to mixing console stereo channels, there are a few different options out there. Here’s a quick rundown of some of the most popular choices:
1. Analog Mixers – These mixers are the traditional choice for many professional studios. They offer great sound quality and a wide range of features.
2. Digital Mixers – These mixers are becoming more popular in recent years. They offer similar sound quality to analog mixers but often come with more built-in features and flexibility.
3. Software Mixers – These mixers allow you to control your audio using software on your computer. They’re often very affordable and can be used in conjunction with other audio hardware or software.
Also Read: Best Mixing Console For Recording Studio
Table of Contents
How to Use Stereo Inputs on a Mixer
If you’re running a professional audio setup, chances are you’re going to need more than one input. That’s where stereo inputs come in handy. Stereo inputs provide two channels of audio, which can be used to connect two separate sources (like a left and right channel).
Most mixers will have at least a few stereo input pairs, although the number of inputs will vary depending on the size and capabilities of the mixer.
In order to use stereo inputs, you’ll need to connect your source(s) to the appropriate input(s) on the mixer.
Once your sources are connected, you can then adjust the levels for each individual input using the faders or knobs on the mixer.
This will allow you to fine-tune the balance between your different audio sources. Stereo inputs can be extremely useful when setting up a professional audio system. By connecting multiple sources and adjusting their levels individually, you can create a well-rounded mix that sounds great no matter what situation you’re using it in.
How Do You Use Stereo Channels on a Mixer?
If you’re new to the world of mixing, understanding how stereo channels work is essential. A stereo channel on a mixer allows you to control the left and right sides of a stereo signal independently. This gives you the ability to create unique stereo effects and widen or narrow the overall soundscape.
Here’s a quick rundown of how to use stereo channels on your mixer:
1. Connect your audio source(s) to the appropriate input(s) on your mixer. If you’re using microphones, make sure they’re connected to XLR inputs; if you’re using line-level sources (like keyboards or CD players), connect them to TRS or RCA inputs.
2. Once everything is plugged in, turn up the gain on each input until you see an LED light up near the top of the channel strip. The level of gain you need will vary depending on the source; for example, dynamic microphones will require less gain than condenser microphones.
3. Now it’s time to adjust the EQ settings for each input. Start by boosting or cutting frequencies that are causing problems; for example, if a vocalist sounds muffled, try boosting some highs. Then fine-tune the EQ until everything sounds balanced and clear.
4. Next, set the panning for each input using the knob at the center of each channel strip. For most mixing applications, you’ll want all instruments and vocals centered in the mix; however, there may be times when you want certain elements panned to one side or another (for example, a keyboard solo might sound cool coming out of just one speaker). Experiment with different panning positions until you find something that sounds good to your ears.
5. Finally, set levels using either faders or rotary knobs (depending on which type of mixer you have). Make sure all channels are audible in the mix; otherwise, it will sound unbalanced and unfinished .
As always , take care not to overdo it – too much volume can cause clipping , which will result in distortion .
What Cables Should I Use With My Mixer?
When it comes to mixers, there are a variety of cables that can be used. Depending on the mixer and the application, different cables may be better suited. Below is a rundown of some of the most common types of cables used with mixers:
XLR Cables: XLR cables are typically used to connect microphones to mixers. They can also be used to connect other line-level audio sources, such as keyboards or guitars.
TRS Cables: TRS (Tip-Ring-Sleeve) cables are another type of cable often used with mixers. They can be used for connecting line-level audio sources, or for connecting balanced mono or stereo signals.
Speaker Cables: Speaker cables are typically used to connect powered speakers to a mixer’s output jacks. These cables usually have two conductors (positive and negative) and are terminated with Speakon connectors or banana plugs.
RCA Cables: RCA cables are commonly used for connecting unbalanced stereo signals, such as from an MP3 player or CD player, to a mixer’s input jacks.
How Do You Hook Up a Mixing Console?
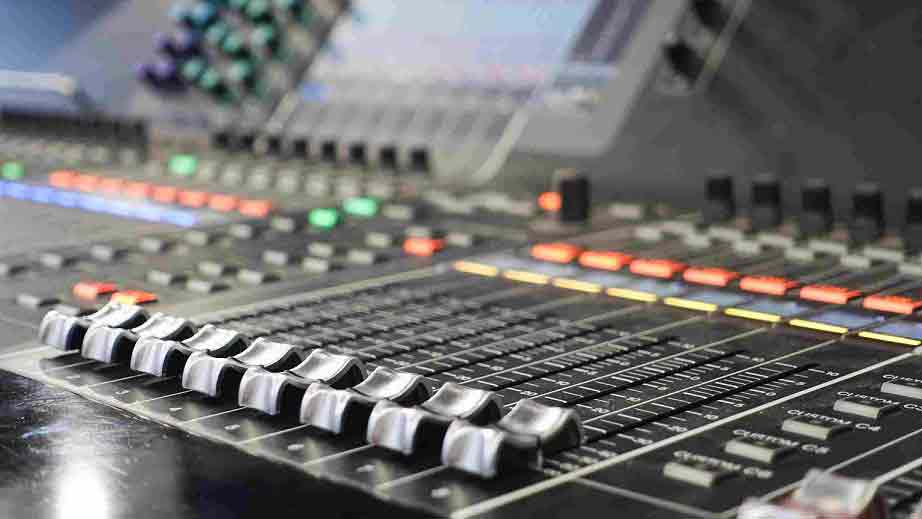
A mixing console is a piece of audio equipment that allows the user to control the levels of multiple audio signals at once. By adjusting the levels of each signal, the mixer can create a desired balance between them. This is useful for creating a mix of sounds that is pleasing to the ear or for isolating specific sounds in order to make adjustments.
There are several ways to hook up a mixing console, depending on what type of equipment you are using and what your specific needs are. The most basic way to connect a mixing console is to simply plug it into an AC outlet and then connect all of your audio sources (such as microphones, instruments, etc.) into the appropriate input jacks on the mixer. Once everything is plugged in, you can begin adjusting levels and creating your mix.
If you need more flexibility or want to be able to save your mixes, you may want to consider connecting your mixing console to a computer. This can be done using either an analog or digital connection.
Analog connections use standard audio cables (such as XLR or RCA) while digital connections usually utilize USB or Firewire.
If you go this route, you will also need some type of software application in order to record and edit your mixes on the computer.
What Signal We Use to Synchronize a Console With a Daw?
There are a few different ways that you can synchronize a console with a DAW. One way is to use an audio interface that has MIDI I/O. You can then use a MIDI cable to connect the interface to the MIDI input on the console.
Another way is to use an analog clock signal. This can be generated from either the DAW or the console. The signal is then sent through an audio cable and into the other device.
Finally, you can also use word clock synchronization. This uses a BNC cable to connect the two devices together.
Insert Channels for Multitrack Output from an Audio Mixer
Conclusion
If you’re wondering what to use with your mixing console’s stereo channels, the answer is simple: anything you want! There are some general guidelines though, which we’ve detailed in our article on what to use with mixing console stereo channels. We hope you understand how to use mixing console stereo channels.

Williams Kane is a blogger and writer. He’s passionate about writing and connecting with the community, especially when it comes to sharing his ideas through writing.
I am a versatile author with a passion for exploring a wide range of topics on our multi-niche website. With a background in research and a love for writing, I bring a unique blend of expertise to our platform.
My journey began in the world of science, where I earned a degree in biology and developed a deep fascination for the natural world. This background enables me to delve into topics related to ecology, environmental conservation, and the wonders of the animal kingdom.
However, my curiosity knows no bounds, and I have ventured into various other niches as well. From technology trends and digital innovations to health and wellness tips, I strive to provide well-researched and engaging content that informs and entertains our diverse audience.
Furthermore, my dedication to staying current with the latest developments in each niche ensures that our readers receive up-to-date and reliable information. Whether it’s deciphering complex scientific concepts or simplifying tech jargon, I take pride in making complex subjects accessible to all.
Join me on our multi-niche journey, where we explore the depths of knowledge and share insights on a multitude of topics to inspire, educate, and entertain.
Related posts:
 Top 10 Best Mixing Console For Recording Studio: For All Budget!
 Best Mixing Desk for a Recording Studio: A Comprehensive Guide
 How to Fix Dead Channels on a Mixer? Troubleshooting Guide
 What Does a Mixing Console Do? You Should Know In Details !
 How Does a Mixing Console Work? Should You Know Everything’s
 How to Connect Mixing Console to Computer? In The Simplest Way!
 What is a Pad on a Mixing Console? Know in Details
What is a Line Level on Mixing Console?
What is a Pad on a Mixing Console? Know in Details
What is a Line Level on Mixing Console?