
Nowadays computers are used everywhere. Because of the use of computers, our daily work has become much easier. So now computers are used in every recording studio. However, you need to know how to connect mixing console to computer. It’s a bit complicated but doesn’t worry, this article will give you a complete idea of how to connect mixing console to computer.
To connect a mixing console to a computer, you will need to use an audio interface. The audio interface will convert the analog audio signals from the mixing console into digital audio that can be processed by the computer. You will then need to use software to record or process the digital audio.
- If you want to connect your mixing console to a computer, you will need to use an audio interface
- Connect the audio interface to your computer using a USB or Firewire cable
- Connect the main output of the mixing console to the left and right input channels of the audio interface
- If you want to record multitrack audio, you will need to connect each individual channel on the mixing console to a separate input channel on the audio interface
- Once everything is connected, you can launch your recording software and begin recording!
Also Read: Best Mixing Console For Recording studio
Table of Contents
How to Connect Mixing Console to Computer for Live Streaming
Are you a content creator who wants to take your live streaming to the next level? If so, you may be wondering how to connect Mixer to your computer. Luckily, connecting Mixer to your PC is a relatively straightforward process.
In this article, we’ll show you how to do it step-by-step. Before we get started, there are a few things you’ll need: – A Microsoft account (this is required in order to create a Mixer account)
– A webcam – A microphone – Streaming software (like OBS Studio or Xsplit Broadcaster)
Now that you have everything you need, let’s get started!
1) First, you’ll need to create a Microsoft account if you don’t already have one. You can do this by going to https://account.microsoft.com/ and following the instructions on the screen.
2) Once you have a Microsoft account, head over to https://mixer.com/ and click “Sign In” in the top right corner of the screen. Then, sign in with your Microsoft account credentials.
3) After signing in, click on your avatar in the top right corner of the screen and select “Dashboard” from the drop down menu that appears.
4) On your Dashboard page, scroll down until you see the “Stream Key” section. Click “Show Key” and copy your stream key – you’ll need this later when setting up your broadcasting software.
5) Now it’s time to set up your broadcasting software! We’ll be using OBS Studio for this example, but any similar software will work just as well.
6) Open OBS Studio and click “+” under “Sources.” Then select “Video Capture Device” from the list of options that appears.
7) A new window will pop up – select your webcam from the “Device” drop down menu and click “OK.” Your webcam feed should now appear in OBS Studio!
8) Next, let’s add our microphone into the mix so our viewers can hear us clearly. Click “+” under Sources again and select “Audio Input Capture” this time around.
9) In the new window that pops up, make sure “Create New” is selected and give your audio input source a name (like “Mic”). Then select your microphone from the drop down menu next to “Device.”
How Do I Connect My Mixer to My Laptop?
There are a few things you need to take into account when connecting a mixer to your laptop.
The first is the type of input and output ports that your devices have. The most common type of input port on a mixer is an XLR port, while the most common type of output port on a laptop is a 3.5mm mini-jack. You will need an adapter to connect these two types of ports.
The second thing you need to consider is the power requirements of both your devices. Most mixers require an AC power source, while laptops typically run off DC power. You will need to use a AC/DC converter to connect your mixer to your laptop’s DC power supply.
Finally, you need to make sure that both your devices are properly grounded. Mixers can produce a lot of electrical noise, which can interfere with the audio signal from your laptop.
To avoid this, make sure that both devices are connected to a proper grounding source before connecting them together.
How Do I Connect My Mix Console?
Assuming you would like a blog post discussing how to connect a mixing console: There are several ways to connect a mixing console. The most common way is to use an XLR cable, which is a type of balanced audio cable.
Other options include using an unbalanced audio cable or a digital audio interface.
The first step is to determine what kind of input the mixing console has. Most consoles have either XLR or 1/4″ inputs. If the console has XLR inputs, then it is best to use an XLR cable. If the console has 1/4″ inputs, then an unbalanced audio cable can be used.
Next, determine what kind of output the mixing console has. The three most common outputs are balanced 1/4″, unbalanced 1/4″, and digital (optical or coaxial). If the output is balanced 1/4″, then an XLR cable can be used. If the output is unbalanced 1/4″, then an unbalanced audio cable can be used.
If the output is digital, then a digital audio interface can be used.
Once all of this information has been gathered, connecting the mixing console is relatively straightforward.
First, plug one end of the appropriate cables into the mixer’s input(s).
Then, plug the other end of the cables into the source device’s output(s).
Finally, turn on both devices and adjust the levels as needed.
How Do I Connect My Mixer to My Computer?
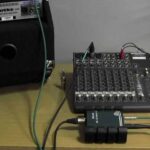
Assuming you’re talking about a audio mixer: There are a few ways to do this, depending on what type of mixer you have and what type of inputs/outputs your computer has. The most common way is to use an 1/8″ mini TRS cable to connect the two devices.
1. Start by finding the “Line Out” or “Record Out” jack on your mixer. This is usually located on the back of the device.
2. Plug one end of the cable into this jack, then plug the other end into the corresponding input on your computer. This is typically a stereo input, so make sure that you insert the cable fully until you hear it click in place.
3. Once everything is plugged in, open up your audio software of choice (this could be something like Garage band, Audacity, Pro Tools, etc.)
4. In your software’s preferences, look for an option that says “Input.”
You should see your mixer listed as an option here – select it and hit “OK.”
5. Now when you play back audio from your computer, it should come through your mixer!
How Do I Connect My Obs Mixer to My Computer?
If you’re looking to connect your OBS mixer to your computer, there are a few things you’ll need to do first. Make sure you have the correct cables and adapters for your specific mixer. Once you have everything you need, follow these steps:
1. Connect one end of the cable to the “Main Out” port on your mixer.
2. Connect the other end of the cable to an available input port on your sound card. This is typically a 3.5mm mini jack or a 1/4″ TRS (tip-ring-sleeve) jack.
3. Launch OBS and open up the Settings menu by clicking File > Settings (or pressing CTRL + P).
4. Navigate to the “Audio” tab in settings and make sure that both “Input device” and “Output device” are set correctly for your sound card. The input should be set to “Stereo Mix” or something similar, while the output can be set to whatever speakers or headphones you’re using.
That’s it!
Also Read: How to Use a Digital Mixing Console?
6 Ways To Connect An Audio Mixer To A Computer (Mac or PC)
Conclusion
Finally, we can hope now you can understand how to connect mixing console to computer. This is a very easy way, you just have to follow our instructions. Only then you can control your recording work with the help of a computer. So start now without delay.

Williams Kane is a blogger and writer. He’s passionate about writing and connecting with the community, especially when it comes to sharing his ideas through writing.
I am a versatile author with a passion for exploring a wide range of topics on our multi-niche website. With a background in research and a love for writing, I bring a unique blend of expertise to our platform.
My journey began in the world of science, where I earned a degree in biology and developed a deep fascination for the natural world. This background enables me to delve into topics related to ecology, environmental conservation, and the wonders of the animal kingdom.
However, my curiosity knows no bounds, and I have ventured into various other niches as well. From technology trends and digital innovations to health and wellness tips, I strive to provide well-researched and engaging content that informs and entertains our diverse audience.
Furthermore, my dedication to staying current with the latest developments in each niche ensures that our readers receive up-to-date and reliable information. Whether it’s deciphering complex scientific concepts or simplifying tech jargon, I take pride in making complex subjects accessible to all.
Join me on our multi-niche journey, where we explore the depths of knowledge and share insights on a multitude of topics to inspire, educate, and entertain.
Related posts:
 Top 6 Best Budget Audio Mixer for Home Studio In 2022
 Mixing Console Troubleshooting Checklist!
 How to Clean a Mixing Console? Should Know To Get Better
 What You Need to Know About Live Mixing Consoles?
 How to Connect Amplifier to Mixing Console?
What is a Mixing Console? An Ultimate Guide
How to Connect Amplifier to Mixing Console?
What is a Mixing Console? An Ultimate Guide
 What is a Mixing Console Used for
 Types of Mixing Console ! To know Which Is The Best For You