
One of the most common and biggest problems that people face when using a mixer is the issue of dead channels. This problem occurs in the direst of times. And if you are facing this issue and wondering how to fix dead channels on a mixer, then we have got you covered.
In this article, we will go through everything regarding what dead channels are, how you can diagnose them, and how to fix the dead channels on your mixer. The process is quite simple.
Just follow the steps in this article appropriately, and we can guarantee that you learn an easy way to fix dead channels on a mixer in no time!
So, let’s dive into the details without further ado, shall we?
Table of Contents
What Is a Mixer?
Before looking at how one can fix dead channels on a mixer, you need to understand what a mixer is and why you have to use it.

Read the full review article best budget audio mixer & best mixing console for recording studio.
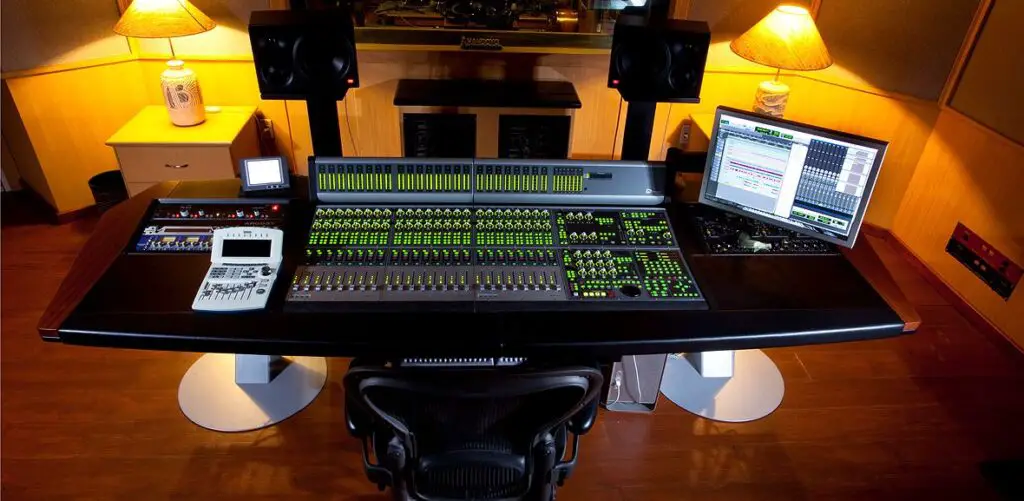
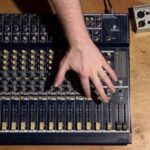
Audio mixers, more commonly known as the mixer, are electric devices capable of mixing, balancing, and executing various sounds & audio signals. A mixer is often used for live concerts, recording & broadcasting, as well as TV & movie sound effects.
The channels play the most significant role in mixing sounds. Basically, if your mixer is connected to a speaker, a channel will take input from other devices and provide output through the speaker.
A channel is labeled dead if it can’t take any input or give any output. This is extremely troublesome if you encounter this problem during live performances.
Determining If Dead Channels Are the Problem on Your Mixers!
Now, before you can say that your mixer is facing dead channel issues, you need to determine whether that is true or not. Mixers can have other problems similar to that of a dead channel.
Follow this troubleshooting checklist to ensure you are facing a dead channel problem on your mixer and nothing else:
Check the Connections
9 out of 10 times, this is the issue behind your mixer not taking any input or providing any output. If your plugs aren’t correctly connected to your mixer, you obviously won’t be getting any results.
Check every wire and make sure they are connected properly. Unplug them and then plug them back on to check if your issue is solved.
Wrong wiring is also a common issue for not getting any response from a mixer. Many people end up plugging in wires in the wrong or bad sockets, thus making the mixer irresponsive. You can take the help of a user guide or an instruction manual that comes with the mixer and check which cables are for which sockets.
Check the Quality & Condition of the Audio Devices
If the devices connected to the audio mixer are faulty, then you will face input and output issues. You can plug each audio device into a different mixer to check its condition.
Faulty wiring on the guitar, mic, or speaker’s end can be why you do not get an output. You can solve this issue by changing the cables.
Take a Look at the Volume Keys
In some cases, the reason for not getting output is faulty volume keys. So, make sure that the ones located in your mixer are working correctly and aren’t stuck at 0.
Check the Power
Another issue behind an unresponsive mixer can be not getting the proper power to perform. This is a rare case as most of the time, you won’t be in a situation where your mixer is not getting the power it needs to start working. So, check the power requirements of your mixer and ensure it is getting that required amount.
If you don’t find any of the mentioned issues with your mixer, you can be sure that your audio mixer has a dead channel problem.
Steps to Follow for Fixing Dead Channels!
Once you are sure that your mixer is having dead channel problems. Here are the steps that you will need to follow to fix the issue on your mixer:
Step 1: Take Out the Circuit Board
Turn off the mixer and start unplugging every wire connected to it. Ensure that you are not forcing out the cables as they might get damaged.
Once all the wires are disconnected, take a screwdriver and take apart the mixer. This process can be different depending on your mixer’s model and brand.
But generally, you should start by taking the side panels off and then proceed to work on the base plates. You will need nothing but the help of a screwdriver in this case.
After that, you will have to go through a very long process of taking the washers off the board. You will need to use a wrench for this process. After that, you will need to undo a few more screws, and the circuit board will come off.
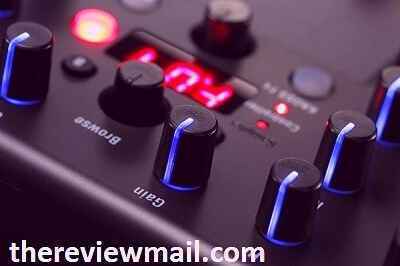
Step 2: Use Contact Cleaner on the Potentiometers
Now, you just need to spray the potentiometers with any electrical contact cleaner. Take the keys out so that you can spray inside the potentiometers as well. Don’t be afraid to overdo it during the cleaning process.
You might find that some keys are wobbling; tighten them up with a bit of force and proceed to spray on them.
Step 3: Put Everything Back
Once you are done spraying, trace back your steps and put everything back together. You should now be able to use the channels you are having trouble with without any issues.
But if the problem continues, you will need to get help from an expert.
How To Reduce Echo On Mixer
Reducing echo on a mixer involves several steps to address different potential causes. Here are some common techniques to reduce or eliminate echo:
- Check your mixer settings: Make sure your mixer settings are configured correctly. Ensure that your input levels are set appropriately and that any effects like reverb or delay are not excessively high.
- Use headphones: When monitoring your audio, use headphones instead of relying solely on speakers. This prevents the sound from being picked up by the microphone and creating echo.
- Adjust microphone placement: Position your microphone away from reflective surfaces such as walls, windows, or hard floors to minimize the amount of sound that can bounce back into the microphone.
- Use acoustic treatment: If possible, treat your recording space with acoustic panels or other sound-absorbing materials to reduce reflections and echo in the room.
- Use a noise gate: A noise gate can help reduce echo by automatically muting the microphone when it’s not in use, preventing background noise and echo from being picked up.
- Check for hardware issues: Ensure that all your equipment, including cables and connectors, is functioning properly and not causing any interference or signal degradation that could contribute to echo.
- Use a mixer with built-in echo cancellation: Some mixers come with built-in echo cancellation features that can help reduce echo caused by feedback or other factors.
- Consider digital signal processing (DSP): If your mixer supports DSP, you can use it to apply effects like echo cancellation or noise reduction to your audio signal.
By following these steps and troubleshooting any specific issues with your setup, you can effectively reduce or eliminate echo on your mixer.
Also read: Mixing Console Troubleshooting Checklist!
How do you troubleshoot a mixer?
Troubleshooting a mixer can be a bit challenging, but here are some steps you can follow to identify and fix common issues:
Check Power Supply:
- Ensure that the mixer is properly plugged into a working electrical outlet.
- Verify that the power switch is in the “on” position.
Inspect Cables and Connections:
- Examine all cables and connectors for any visible damage or loose connections.
- Make sure all cables are securely plugged into their respective inputs and outputs.
Test with Different Cables and Inputs:
- If you suspect a cable is faulty, try using a different cable to connect your mixer to the audio source (e.g., microphone, instrument).
- Test with different input sources to see if the issue is specific to one input or source.
Check Input Gain and Levels:
- Ensure that the input gain controls for each channel are set correctly. Too much gain can lead to distortion, while too little can result in low volume.
- Check that channel faders and master fader are at an appropriate level.
Verify Equalization (EQ):
- Check if any EQ settings (e.g., bass, mid, treble) are causing the issue. Reset EQ settings to neutral and gradually adjust as needed.
Phantom Power:
- If you’re using condenser microphones, make sure phantom power is enabled for the respective channels, if required.
Mute and Solo Buttons:
- Ensure that no channels are accidentally muted or soloed.
Panning and Routing:
- Check the panning settings to ensure audio is being sent to the appropriate left/right channels.
- Verify routing settings for effects and auxiliary sends.
Testing with Headphones:
- Plug headphones into the mixer’s headphone jack to listen directly to the mixer’s output. This can help isolate issues.
Monitor Speakers and Amplifiers:
- Check your monitor speakers and amplifiers to ensure they are functioning correctly. Connect them directly to the mixer’s output to test.
Inspect for Physical Damage:
- Visually inspect the mixer for any physical damage or signs of wear and tear.
Firmware and Software Updates:
- If your mixer has digital components, such as digital effects or built-in processors, check for firmware or software updates from the manufacturer.
Consult the Manual:
- Refer to the mixer’s user manual for troubleshooting tips specific to your model.
Professional Service:
- If you’ve tried all of the above steps and the problem persists, consider consulting a professional technician or contacting the manufacturer’s customer support for further assistance or repairs.
Remember to approach troubleshooting systematically, starting with the most basic and common issues before moving on to more complex ones. Identifying the source of the problem step by step can help you pinpoint and resolve mixer issues effectively.
How do I save a mixer channel?
The process of saving a mixer channel can vary depending on the specific digital audio workstation (DAW) or mixer you are using. I’ll provide a general guide, but keep in mind that the exact steps may differ based on the software you’re using. I’ll use a generic DAW as an example:
Select the Channel:
Identify the mixer channel that you want to save. This is typically done by clicking on or selecting the channel in your mixer view.
Save Channel Settings:
Look for a “Save” or “Store” option in the mixer channel settings or on the mixer console. This option may be in the form of a button, menu item, or a right-click context menu.
Name and Choose Location:
- After selecting the save option, you may be prompted to enter a name for the channel setting or preset. Type in a descriptive name that will help you identify the settings later.
- Choose a location or category where you want to save the preset. Some DAWs allow you to organize presets into folders or banks.
Save:
Once you’ve entered the name and chosen a location, click “Save” or a similar button to save the mixer channel preset.
Loading the Preset:
In the future, if you want to recall the saved mixer channel settings, look for a “Load” or “Recall” option in the mixer channel settings. Select the saved preset from the list, and the channel settings should be restored.
Remember, the exact steps can vary between different DAWs, so consult the user manual or help documentation for your specific software if you encounter any difficulties. Additionally, if you provide the name of the DAW or mixer you’re using, I can give more precise instructions.
What is an unpowered mixer?
An unpowered mixer, also known as a passive mixer, is a type of audio mixer that does not require external power or electricity to operate. It is designed to combine and adjust the levels of audio signals from various sources, such as microphones, instruments, or other audio devices.
Unlike powered or active mixers, which include built-in amplifiers and signal processing capabilities, unpowered mixers rely solely on passive components like resistors, capacitors, and transformers to perform basic signal mixing functions. They do not provide any signal amplification or equalization on their own. Instead, they simply route and adjust the levels of incoming audio signals, allowing users to control the balance and volume of each source.
Unpowered mixers are often used in situations where simplicity and portability are essential. They are commonly found in small live sound setups, home recording studios, and situations where a minimalistic approach to audio mixing is sufficient. However, for more complex audio processing and signal enhancement, powered mixers or digital mixers with built-in processing capabilities are usually preferred.
How do I reset my mixer channel?
Resetting a mixer channel typically involves returning all of its settings to their default or initial state. Here are the general steps to reset a mixer channel:
Select the Mixer Channel:
In your audio mixing software or hardware mixer, locate and select the channel you want to reset. This could be a physical knob, fader, or a virtual channel in your software.
Reset Volume and Pan Controls:
- Volume: Set the channel’s volume fader or knob to its default position, often marked as 0 dB or the midpoint.
- Pan: If your mixer channel has a pan control, set it to the center position (usually marked as “C” or “0”).
Reset Equalization (EQ):
If you’ve adjusted the EQ settings (e.g., bass, midrange, treble), reset them by either setting all the EQ knobs to their center position or disabling any EQ effects applied to the channel.
Reset Effects:
If you’ve added any effects (e.g., reverb, delay, compression) to the channel, turn them off or reset their parameters to their default settings.
Reset Sends and Returns:
If your mixer allows for auxiliary sends and returns, make sure they are set to their default or desired levels. Usually, sending a channel to an auxiliary bus should be set to zero initially.
Reset Solo and Mute:
If you’ve soloed or muted the channel, ensure that it’s neither soloed nor muted.
Reset Channel Routing:
If the channel is routed to specific outputs or buses, make sure it’s set to its default routing or the desired destination.
Save the Preset (Optional):
Some mixing software allows you to save channel presets. If you want to keep a copy of your channel settings before resetting, save a preset with your current settings.
Confirm Reset:
Double-check that all the settings are back to their default or desired positions. Make sure you haven’t missed any parameters.
Save Your Work:
If you’re working on a project, save your work to ensure you don’t lose any changes you want to keep.
Remember that the specific steps and terminology may vary depending on the mixer or software you’re using, so consult the user manual or help documentation for your specific equipment or software if you encounter any difficulties.
What removes a channel’s signal from the main output in a mixer?
In a mixer, a channel’s signal can be removed from the main output by using the following methods:
- Mute Button: Most mixers have a mute button or switch for each channel. When you engage the mute button for a specific channel, it silences that channel’s signal, preventing it from reaching the main output. This is useful for temporarily silencing a microphone or instrument without disconnecting it.
- Fader or Level Knob: Lowering the fader or level knob for a particular channel all the way down to its minimum position will effectively remove that channel’s signal from the main output. This reduces the volume of the channel to zero.
- Routing or Assigning Channels: On more advanced mixers, you may have the option to route or assign channels to different buses or outputs. By reassigning a channel to a different output or bus other than the main output, you effectively remove its signal from the main mix while sending it elsewhere.
- Solo Button: Some mixers have a solo button or switch for each channel. When you engage the solo button for a specific channel, it isolates that channel’s signal and removes all other channels from the main output. This is useful for soloing a specific instrument or microphone to hear it in isolation.
- Auxiliary Sends: Mixers often have auxiliary (aux) sends that allow you to send a channel’s signal to external effects processors, monitor mixes, or separate outputs. By turning down the aux send level for a channel, you can reduce or remove its signal from the main mix while still sending it to other destinations.
The specific method you use will depend on the mixer’s features and your intended purpose for removing a channel’s signal from the main output.
How do you clean a fader audio mixer?
Cleaning a fader on an audio mixer is essential to maintain the equipment’s performance and prevent audio issues. Faders can accumulate dust, dirt, and debris over time, which can affect the signal quality and overall functionality. Here’s a step-by-step guide on how to clean a fader on an audio mixer:
Note: Before you begin, make sure to turn off the audio mixer and unplug it from the power source to avoid electrical hazards.
Materials you’ll need:
- Isopropyl alcohol (at least 90% concentration)
- A small, soft-bristle brush (e.g., a paintbrush or a clean makeup brush)
- Compressed air can (optional)
- Cotton swabs (optional)
- Screwdriver (if necessary to access the fader)
Steps:
- Access the Fader: Depending on your mixer’s design, you may need to remove the mixer’s casing or faceplate to access the fader. This typically involves removing screws or clips. Consult your mixer’s manual for specific instructions on accessing the fader.
- Remove Debris: Use a small, soft-bristle brush to gently sweep away any loose dust and debris from the fader’s surface. Be careful not to press too hard or use a brush with stiff bristles, as this could damage the fader.
- Compressed Air (Optional): If there are hard-to-reach areas or stubborn debris, you can use a can of compressed air to blow away dust and dirt. Hold the can upright and use short bursts of air to avoid pushing debris further into the fader.
- Clean the Fader Track: Dip a cotton swab in isopropyl alcohol (at least 90% concentration) and gently clean the fader track. The fader track is the part of the fader that the slider moves along. Do not saturate the swab; it should be damp, not dripping.
- Move the Fader: Move the fader slider from its lowest to its highest position several times. This helps distribute the alcohol and clean the entire track. You may hear some crackling or noise initially as the alcohol cleans the contacts.
- Let it Dry: Allow the fader to air dry for a few minutes. Ensure that no alcohol remains on the fader track before reassembling the mixer.
- Reassemble the Mixer: If you had to disassemble the mixer to access the fader, carefully reassemble it following the manufacturer’s instructions.
- Test the Mixer: Plug the mixer back in, turn it on, and test the fader’s functionality. Move the fader up and down to ensure smooth and noise-free operation.
- Regular Maintenance: To prevent the fader from getting dirty again, perform routine maintenance. Keep the mixer covered when not in use and regularly dust the surface. Avoid eating or drinking near the mixer to minimize the risk of spills and debris.
Remember that cleaning the fader should be done carefully to avoid damaging sensitive components. If you’re unsure about the process or if the fader is not working correctly after cleaning, it’s advisable to consult a professional technician or the mixer’s manufacturer for further assistance.
FAQ of How to Fix Dead Channels on a Mixer
Here’s a frequently asked questions (FAQ) guide on how to fix dead channels on a mixer:
Q1: What does it mean when a channel on my mixer is “dead”?
A dead channel on a mixer refers to a channel that is not producing any sound or is significantly quieter than expected. It can be caused by various issues, including hardware problems or incorrect settings.
Q2: What are the common causes of dead channels on a mixer?
Dead channels can be caused by:
- Loose or damaged cables: Check all cables, connectors, and jacks for damage or loose connections.
- Faulty channel strip: Internal components of a mixer channel strip can wear out or become damaged over time.
- Muted or low-level settings: Ensure that the channel is not muted and that the gain and volume controls are set appropriately.
- Power issues: Make sure the mixer is receiving power and that it’s functioning correctly.
- Internal mixer issues: More complex problems may require professional repair.
Q3: How can I troubleshoot a dead channel on my mixer?
- Check cables: Swap the cables with a working channel to see if the issue follows the cable. If it does, replace the cable.
- Inspect connectors: Ensure all connectors (XLR, TRS, etc.) are securely plugged in.
- Verify settings: Confirm that the channel isn’t muted, the gain is appropriately set, and the EQ settings are normal.
- Test with a different input source: Plug a known working source (microphone, instrument) into the channel to check if the problem persists.
- Try a different channel: If possible, test if the issue occurs on other channels to narrow down the problem.
Q4: What if the issue persists after troubleshooting?
If the problem remains unresolved after troubleshooting, consider the following options:
- Consult the mixer manual: Review the manufacturer’s manual for specific troubleshooting steps.
- Contact customer support: Reach out to the mixer manufacturer’s customer support for guidance or repair options.
- Professional repair: If it’s a hardware issue, consult a professional audio technician or a service center for repairs.
Q5: Can I fix a dead channel myself if I’m experienced with electronics?
If you have experience with electronics and soldering, you may attempt to diagnose and repair the issue yourself. However, keep in mind that opening the mixer may void warranties, and complex repairs are best left to professionals if you’re not confident in your skills.
Q6: How can I prevent dead channels in the future?
Regularly maintain your equipment by cleaning connectors, storing cables properly, and avoiding overloading channels with excessive signal levels. Additionally, use surge protectors to prevent electrical damage.
Q7: Should I perform regular maintenance on my mixer to prevent dead channels?
Yes, regular maintenance can extend the lifespan of your mixer. Clean connectors and faders, inspect cables, and keep the mixer in a clean, dust-free environment to reduce the chances of issues.
Q8: How do mixer channels work?
Mixer channels are components of audio mixing consoles or software used to control and manipulate individual audio signals. Each channel typically represents one audio source, such as a microphone or instrument.
Channels include controls for adjusting volume, panning (left or right placement in the stereo field), and equalization (treble, midrange, bass). Additionally, they often feature auxiliary sends for routing signals to external effects processors or monitors.
The mixer combines and balances multiple channels into a final mix that can be sent to speakers or recorded. Channels may also have features like solo, mute, and phase inversion to refine the sound. Understanding and managing these parameters on each channel allows for precise control over the overall audio mix in live sound reinforcement or studio recording environments.
Remember that safety is crucial when troubleshooting or repairing electronic equipment. If you’re unsure about any step, consult a professional technician to avoid causing further damage.
Fix Your Dead Channel Now!
Knowing how to fix dead channels on a mixer can save a lot of trouble and time, especially during live shows. We are confident that if you follow our guide and there’s no major problem with your mixer, you can instantly fix the dead channel issue. So, best of luck!

Williams Kane is a blogger and writer. He’s passionate about writing and connecting with the community, especially when it comes to sharing his ideas through writing.
I am a versatile author with a passion for exploring a wide range of topics on our multi-niche website. With a background in research and a love for writing, I bring a unique blend of expertise to our platform.
My journey began in the world of science, where I earned a degree in biology and developed a deep fascination for the natural world. This background enables me to delve into topics related to ecology, environmental conservation, and the wonders of the animal kingdom.
However, my curiosity knows no bounds, and I have ventured into various other niches as well. From technology trends and digital innovations to health and wellness tips, I strive to provide well-researched and engaging content that informs and entertains our diverse audience.
Furthermore, my dedication to staying current with the latest developments in each niche ensures that our readers receive up-to-date and reliable information. Whether it’s deciphering complex scientific concepts or simplifying tech jargon, I take pride in making complex subjects accessible to all.
Join me on our multi-niche journey, where we explore the depths of knowledge and share insights on a multitude of topics to inspire, educate, and entertain.
Related posts:
 Top 10 Best Mixing Console For Recording Studio: For All Budget!
 How Does a Mixing Console Work? Should You Know Everything’s
 How to Connect Mixing Console to Computer? In The Simplest Way!
 How to Use a Mixing Console? A Complete Guide
 How to Use a Digital Mixing Console? Should You Know !
 What is a Line Level on Mixing Console?
What is a Sound Mixing Console?
What is a Line Level on Mixing Console?
What is a Sound Mixing Console?
 How to Build a Mixing Console?