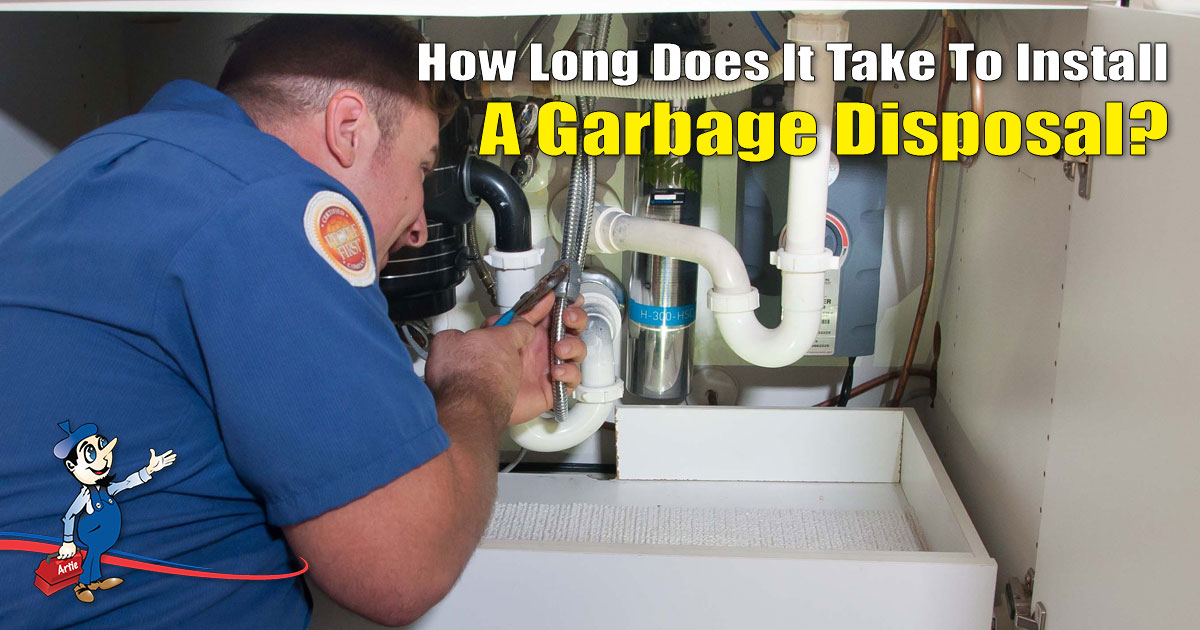
Replacing a garbage disposal usually takes around 1-2 hours. Upgrading your garbage disposal can greatly improve the functionality of your kitchen plumbing system.
Whether you’re experiencing a malfunctioning unit or simply upgrading to a more efficient model, knowing how long the replacement process takes can help you plan accordingly. In this guide, we will explore the typical timeline for replacing a garbage disposal and provide some tips for a smooth and hassle-free installation.
By following these steps, you can quickly and easily replace your garbage disposal without any unnecessary delays or complications. So, let’s dive in and get started on this DIY project.
Credit: www.artplumbingandac.com
Table of Contents
Factors Affecting The Replacement Time
Replacing a garbage disposal unit may seem like a simple task, but several factors can affect the time it takes to complete the job. From the skill level of the person performing the replacement to the type and model of the unit, each factor plays a role in determining how long the process will take. In this section, we will explore these factors in more detail to give you a better understanding of the time it might take to replace your garbage disposal.
Skill Level Of The Person Performing The Replacement
The skill level of the person performing the replacement is one of the primary factors that influence how long it takes to replace a garbage disposal. A person with experience and knowledge in plumbing or appliance installation will likely complete the task more quickly and efficiently.
On the other hand, someone attempting the replacement for the first time may require more time to understand the process and ensure a proper installation.
Type And Model Of The Garbage Disposal Unit
The type and model of the garbage disposal unit also play a significant role in the replacement time. Different units may have varying installation requirements, such as the number of mounting bolts or the type of electrical connections needed. Additionally, more advanced units with additional features or complex designs may require extra time for installation and troubleshooting.
Condition Of The Existing Plumbing Connections
The condition of the existing plumbing connections can impact the replacement time. If the plumbing connections are in good condition and aligned properly, the replacement process can proceed smoothly.
However, if there are any leaks, corrosion, or misalignments, additional time may be needed to repair or replace these connections before installing the new garbage disposal.
Availability Of Necessary Tools And Materials
Having the necessary tools and materials readily available is important for a fast and efficient replacement process. If the person performing the replacement has to search for tools or make multiple trips to the hardware store, it can significantly delay the overall time. Properly preparing beforehand and ensuring all required tools and materials are easily accessible can help streamline the replacement process.
Accessibility Of The Installation Area
The accessibility of the installation area is another factor that affects the replacement time. A cramped or hard-to-reach location can make it challenging to maneuver and properly install the garbage disposal unit. On the other hand, an open and easily accessible space allows for quicker removal of the old unit and installation of the new one.
By considering these factors, you can better estimate the time it might take to replace your garbage disposal unit. Remember that every situation is unique, and individual circumstances may differ. Having an understanding of these factors can help you plan accordingly and ensure a smooth and efficient replacement process.
Preparation And Planning (5-7 Words)
Gathering Required Tools And Materials
Before you begin replacing your garbage disposal, it is essential to gather all the necessary tools and materials. Having everything on hand will save you time and prevent any unnecessary interruptions during the installation process.
Here is a list of the items you’ll need:
– Adjustable wrench – Screwdriver (Phillips and flathead)
– Plumber’s putty
– Plunger
– Bucket or tray to catch water
– Replacement garbage disposal unit
– Electrician’s tape Be sure to have these items readily available before starting the replacement process. This will make the task smoother and more efficient.
Turning Off Power And Water Supply
Safety should always be a priority when working with any electrical appliance. To guarantee your well-being, it’s crucial to turn off both the power and water supply before replacing your garbage disposal.
Follow these steps:
1. Locate the circuit breaker in your electrical panel, and flip the switch that controls the power to your garbage disposal. This will ensure that no electricity is running through the unit during the replacement process.
2. After shutting off the power, turn off the water supply to the garbage disposal. Typically, you can find a valve located under the sink. Twist the valve clockwise to shut off the water.
By completing these steps, you minimize the risk of electrical shocks and potential water leaks during the replacement procedure.
Removing Items Under The Sink
To make your garbage disposal replacement process smoother, it’s important to remove any items stored under the sink. This will provide you with ample space to work and prevent any accidental damage to your belongings.
Follow these steps:
1. Clear out the cabinet under the sink, taking out any cleaning supplies, buckets, or other objects that may obstruct your workspace.
2. Set up a bucket or tray beneath the sink to catch any water or debris that may spill during the removal process. This will help keep your surroundings clean and minimize the need for additional cleaning after the replacement.
3. Ensure there is enough light under the sink to allow for proper visibility during the replacement. Consider using a flashlight or other additional lighting if needed.
Removing items under the sink and creating a clutter-free workspace will make it easier to access the garbage disposal and ensure a seamless replacement process.
Removal Of Old Garbage Disposal Unit (5-7 Words)
When it comes to replacing your garbage disposal, the first step is to remove the old unit. This process involves several essential tasks, including disconnecting the power and water supply, detaching the disposal unit from the mounting ring, and finally removing the old unit from underneath the sink. Let’s take a closer look at each of these steps to gain a better understanding of how long it takes to replace a garbage disposal.
Disconnecting Power And Water Supply
To safely remove the old garbage disposal unit, it is crucial to disconnect both the power and water supply. This ensures your safety and prevents any unwanted accidents during the replacement process.
Start by locating the power cord that connects the unit to the electrical outlet.
Carefully unplug it, and if necessary, switch off the electrical circuit that powers the unit.
Next, turn off the water supply by locating the shut-off valve underneath the sink.
Close the valve to prevent any water from flowing into the disposal unit.
Detaching The Disposal Unit From The Mounting Ring
Once the power and water supply have been properly disconnected, you can proceed to detach the disposal unit from the mounting ring.
Underneath the sink, locate the mounting ring that holds the unit in place. Using a screwdriver or wrench, loosen the screws securing the disposal unit to the ring.
Carefully disconnect any remaining connections between the disposal unit and the sink drain, ensuring that no parts are damaged or broken during this process.
Once all connections have been detached, gently lift the disposal unit off the mounting ring.
Removing The Old Unit From Underneath The Sink
With the disposal unit successfully detached from the mounting ring, the next step is to remove it from underneath the sink. Position a bucket or container beneath the unit to catch any excess water or debris that may be present.
Slowly lower the unit into the bucket, being cautious not to spill any water. Once the old disposal unit has been completely removed, inspect the area for any remaining debris or particles that need to be cleaned before installing the new unit.
In conclusion, the process of removing the old garbage disposal unit involves disconnecting the power and water supply, detaching the unit from the mounting ring, and finally removing the unit from underneath the sink. The time it takes to complete these steps may vary depending on your level of experience and the specific conditions of your installation. Nonetheless, by following these instructions carefully, you can efficiently replace your garbage disposal without any complications or delay.
Installation Of New Garbage Disposal Unit (5-7 Words)
If you’re wondering how long it takes to replace a garbage disposal, the answer depends on several factors. One crucial step in the process is the installation of the new garbage disposal unit.
In this section, we will walk you through the key steps involved in assembling, mounting, and connecting the power and water supply for your new disposal unit.
In Html Syntax: H3assembling The New Disposal Unit/h3
Assembling the new garbage disposal unit is the first step in the installation process. Before you start, make sure you have read the manufacturer’s instructions carefully. This will help ensure a smooth and hassle-free assembly.
- Start by gathering all the necessary components and tools. These may include a mounting bracket, a flange, a rubber gasket, a dishwasher connector, and mounting hardware.
- Place the rubber gasket onto the flange and position it on the sink’s drain opening.
- Secure the flange in place by using the mounting bracket and screws provided. Make sure it is tight and properly aligned.
- Follow the manufacturer’s instructions to attach the garbage disposal unit to the mounting bracket. This usually involves twisting it onto the bracket until it locks into place.
In Html Syntax: H3mounting The Unit Onto The Sink/h3
After assembling the new disposal unit, the next step is to mount it onto the sink. This process involves securing the unit in place, ensuring stability and proper alignment.
- Adjust the position of the disposal unit so that it is centered under the sink.
- Use a screwdriver or wrench to secure the mounting collar to the sink’s mounting assembly. Make sure it is firmly tightened to prevent any movement or leaks.
- Double-check the alignment of the disposal unit to ensure it is straight and level.
- Tighten any remaining screws or bolts to secure the unit in place.
In Html Syntax: H3connecting The Power And Water Supply/h3
Once the new garbage disposal unit is securely mounted onto the sink, it’s time to connect the power and water supply. This step finalizes the installation process and ensures your disposal unit is ready to be used.
- Locate the power cord of the disposal unit and connect it to an electrical outlet. Make sure the outlet is grounded and has the appropriate voltage.
- For units that require a direct wiring connection, follow the manufacturer’s instructions or consult a professional electrician.
- Connect the dishwasher drain hose to the disposal unit if you have a dishwasher. This typically involves using a hose clamp to secure the connection.
- Check the water supply connections and ensure that they are tight and leak-free.
By following these steps, you can successfully install your new garbage disposal unit. Keep in mind that the time it takes to complete this process may vary depending on your level of experience and the specific model you are working with. If you encounter any difficulties, it’s always recommended to consult the manufacturer’s instructions or seek professional assistance.
Testing And Final Steps (5-7 Words)
Once you have successfully replaced your garbage disposal unit, it’s important to perform some essential testing and final steps to ensure everything is in proper working order.
This includes checking for leaks and proper functioning, testing the disposal unit, and cleaning up the work area. Let’s take a closer look at each of these steps to complete the installation process.
Checking For Leaks And Proper Functioning
After installing a new garbage disposal unit, it’s crucial to check for any potential leaks or malfunctions. Here are the steps to follow for this important task:
- Begin by visually inspecting the unit and the surrounding pipes for any signs of leaks or loose connections.
- Once the visual check is complete, run water through the disposal unit and inspect carefully for any leaks or drips.
- Next, turn on the disposal and listen for any unusual noises or vibrations. If you notice anything out of the ordinary, it may be necessary to troubleshoot and make adjustments as needed.
- Lastly, test the disposal’s functionality by grinding some food waste. Ensure that it processes the waste efficiently and doesn’t get clogged or jammed.
By thoroughly checking for leaks and proper functioning, you can prevent potential water damage and ensure that your new garbage disposal unit is working effectively.
Testing The Disposal Unit
Testing the disposal unit is a crucial step to ensure it is installed correctly and ready for use. Follow these steps to perform the necessary testing:
- Start by turning off the power to the garbage disposal unit at the circuit breaker.
- Next, remove any tools or objects that were used during the installation process from the disposal unit.
- Once everything is clear, restore power to the unit and turn on the water faucet.
- With the water running, flip the switch to turn on the disposal unit.
- Observe the unit’s performance as it grinds food waste. Pay attention to any unusual noises, vibrations, or signs of clogging.
- If the unit operates smoothly without any issues, you can consider the testing successful.
By following these steps, you can ensure that your new garbage disposal unit is functioning properly before putting it to regular use in your kitchen.
Cleaning Up The Work Area
Once the testing is complete and you are satisfied with the functionality of your new garbage disposal unit, it’s time to clean up the work area. Here’s what you need to do:
- Dispose of any debris or leftover materials from the installation in a proper waste container.
- Wipe down the area around the garbage disposal unit using a damp cloth.
- Check the surrounding pipes and connections for any loose screws or fittings. Tighten them if necessary.
- Lastly, remove any protective coverings or tapes used during the installation process.
Taking the time to clean up the work area not only ensures a tidy and organized space but also allows for proper maintenance of your garbage disposal unit going forward.
By following these testing and final steps after replacing your garbage disposal unit, you can ensure its proper functionality, prevent leaks, and maintain a clean and efficient kitchen space.
Frequently Asked Questions For How Long Does It Take To Replace Garbage Disposal
How Long Does It Take To Replace A Garbage Disposal?
Replacing a garbage disposal typically takes around one to two hours. However, the actual time may vary depending on factors such as the type of disposal, the condition of the plumbing, and the skill level of the person performing the replacement.
Hiring a professional can ensure a quicker and more efficient installation.
Can I Replace A Garbage Disposal Myself?
Yes, you can replace a garbage disposal yourself if you have the necessary tools and knowledge. However, it is important to remember that working with plumbing and electrical components can be dangerous if not done correctly. If you are unsure, it is recommended to hire a professional for the installation to ensure safety and avoid any potential issues.
What Tools Do I Need To Replace A Garbage Disposal?
To replace a garbage disposal, you will typically need a screwdriver, adjustable wrench, plumber’s tape, bucket, and possibly a hammer. These tools will help you disconnect the old disposal, remove it, and install the new one properly. It is important to have the right tools to make the installation process easier and more efficient.
Conclusion
To wrap it up, replacing a garbage disposal can be a straightforward task with the right knowledge and tools. While the time it takes may vary based on factors such as experience and the specific model being installed, generally it can be completed within a couple of hours.
By following the steps outlined in this guide and taking necessary safety precautions, homeowners can successfully replace their garbage disposal and get back to a properly functioning kitchen in no time.

Williams Kane is a blogger and writer. He’s passionate about writing and connecting with the community, especially when it comes to sharing his ideas through writing.
I am a versatile author with a passion for exploring a wide range of topics on our multi-niche website. With a background in research and a love for writing, I bring a unique blend of expertise to our platform.
My journey began in the world of science, where I earned a degree in biology and developed a deep fascination for the natural world. This background enables me to delve into topics related to ecology, environmental conservation, and the wonders of the animal kingdom.
However, my curiosity knows no bounds, and I have ventured into various other niches as well. From technology trends and digital innovations to health and wellness tips, I strive to provide well-researched and engaging content that informs and entertains our diverse audience.
Furthermore, my dedication to staying current with the latest developments in each niche ensures that our readers receive up-to-date and reliable information. Whether it’s deciphering complex scientific concepts or simplifying tech jargon, I take pride in making complex subjects accessible to all.
Join me on our multi-niche journey, where we explore the depths of knowledge and share insights on a multitude of topics to inspire, educate, and entertain.