
To connect a Bluetooth microphone to a smart TV, you will need the following items:
1) A compatible Bluetooth microphone.
2) An external audio adapter with two 3.5mm jacks (one for input and one for output).
3) An HDMI cable. First, plug the external audio adapter into your TV’s HDMI port. Then plug the microphone into the input jack of the adapter and use an HDMI cable to connect it to your TV’s output port.
Next, open up your smart TVs settings menu and look for “Bluetooth” or “Wireless Audio Settings” under “Network & Internet” or another relevant section. Select that option and then choose “Add Device” from within that menu so that it can detect any nearby Bluetooth devices. Once it detects your device, select it by name and then enter in its password if prompted to do so before accepting connection requests on both ends of the link between them until they register as paired successfully with each other at which point you should be able to hear sound coming through from that device when using apps such as YouTube on your Smart TV!
Table of Contents
How to connect Bluetooth Mic to your TV – Videoke Karaoke
- Locate the Bluetooth settings menu on your Smart TV
- This setting is usually located in the settings or network section of your TV’s main menu
- Turn on your Bluetooth microphone and make sure that it is discoverable by other devices (Bluetooth pairing mode)
- Refer to manufacturer instructions for details on how to do this as each device may vary slightly
- On your Smart TV, select “Search for Devices” from the Bluetooth Settings menu and wait a few moments while it scans for nearby devices
- Select your Bluetooth microphone from the list of found devices once it appears onscreen and follow any additional prompts if needed (i
- , enter a PIN code)
- Your Smart TV should now be connected with your Bluetooth microphone!
How to Connect Wireless Microphone to Smart Tv
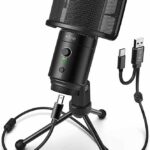
Bluetooth Microphone for Smart Tv
A Bluetooth microphone for Smart TV is an ideal solution if you want to make the most of your home theater setup. It allows you to connect a wireless microphone directly to your TV, allowing you to easily stream audio from the microphone into your entertainment system without having to use wires or adapters. The Bluetooth connection also ensures that there is no interference with other nearby devices.
With this type of microphone, you can enjoy clear sound quality even when streaming music or watching movies in high definition.
How to Connect Wireless Microphone to Tv for Karaoke
Connecting a wireless microphone to your TV for karaoke is easy! You’ll need the right type of cable, depending on your TV model. Connect one end of the cable to the “Audio Out” port on your TV and the other end to an amplifier or speaker with a 3.5mm jack input; this will allow you to hear sound from both the microphone and TV speakers.
Lastly, attach a wireless receiver directly into the amp/speaker (or use adapters if needed) and turn it on. If all goes well, you should now be able to sing karaoke wirelessly through your television!
How to Connect Wired Mic to Smart Tv
Connecting a wired microphone to a Smart TV is an easy process. First, connect the 3.5mm audio cable from the microphone into the audio input port on your television. Next, select “Audio Input” or “Mic” as your source in the sound settings menu of your TV and make sure that it is turned on.
Finally, press and hold down the microphone’s power button for five seconds to activate it and you should be ready to go!
Wireless Microphone for Smart Tv
Using a wireless microphone for Smart TV offers convenience, portability and improved sound quality. With a wireless microphone, you can move around the room without having to worry about cables getting tangled up or tripping over them. The improved sound quality with this type of microphone also means that your audio will be much clearer than it was before.
Wireless microphones are easy to set up and compatible with most Smart TVs, making them an ideal choice for anyone looking to upgrade their home entertainment experience.

Credit: www.soundtown.com
Can We Connect Bluetooth Mic to Smart Tv?
Yes, it is possible to connect a Bluetooth microphone to a smart TV. The first step is to make sure that both the Bluetooth mic and the TV support Bluetooth technology. This can usually be done by checking for an icon or label on each device.
If both devices are compatible with Bluetooth, you will need to pair them together so that they can communicate with one another. Once paired, your TV should recognize the external microphone as an available audio source and allow you to use it when watching movies or shows on your television.
Can I Connect a Microphone to My Smart Tv?
Yes, you can connect a microphone to your smart TV. Depending on the make and model of your TV, there are several different ways to do this. You could use an analog audio input or output port if available, or use a USB connection with an adapter cable.
If neither of these options are available then you might need to get an external audio mixer that offers both analog and digital connections for hooking up microphones. Once connected, you should be able to adjust the volume levels for better sound quality control as needed.
How Do I Connect My Bluetooth Wireless Microphone?
Connecting a Bluetooth wireless microphone is an easy process. First, locate the power switch and turn it on. Then press the pairing button, usually located near the power switch or along the side of the device.
Next, go to your Bluetooth settings on your computer or other device you want to connect to and search for available devices. Select your microphone from the list of detected devices and enter any required passcodes if prompted. Once connected, you should be able to use your Bluetooth wireless microphone as normal!
Can I Connect a Microphone Via Bluetooth?
Yes, you can connect a microphone via Bluetooth. Many wireless microphones are equipped with Bluetooth technology so they can be connected to audio devices easily and without the need for any additional cables or wires. Additionally, some existing wired microphones may also have options available to allow them to be used as wireless headsets using Bluetooth connection.
Once connected, the microphone should be able to transmit sound signals wirelessly from your device directly into other compatible receivers or speakers.
How Do I Connect Karaoke to My Tv?
To connect karaoke to your TV, you’ll need an audio-video receiver (AVR) with a digital coaxial or optical input. Depending on the type of karaoke machine you have, you may also need an HDMI converter or adapter cable. Once the connections are made, set up the AVR and turn it on.
Select the video source that corresponds to your karaoke device and then adjust the volume accordingly. Finally, make sure both devices are powered on for optimal sound quality before beginning your singing session!
How Do I Connect My Microphone to My Android Tv?
Connecting a microphone to your Android TV is quite straightforward. You’ll need an adapter that provides both audio and video inputs, as well as the appropriate cables for connecting your microphone. The first step is to plug the adapter into one of the HDMI ports on your TV and then connect one end of the audio cable to the output port on the adapter and plug in your microphone at the other end.
Next, you’ll want to connect one end of a USB-C or Micro-USB cable depending on what type of device you’re using (some newer TVs may require an additional power source) from either port on the adapter into a compatible port on your Android TV box. Finally, launch any apps or games that require voice input and set up settings according to their instructions – if everything was connected properly you should now be able to use your external mic with ease!
FAQ
Q: Can I connect any Bluetooth microphone to my smart TV?
A: Not all smart TVs support Bluetooth microphone connections. Check your TV’s specifications in the user manual or online to confirm if it has Bluetooth capability.
Q: How do I know if my smart TV has Bluetooth?
A: Check your TV’s user manual or settings menu. Look for terms like “Bluetooth,” “Wireless & Networks,” or “Connections” in the menu. If your TV supports Bluetooth, it should be mentioned in one of these sections.
Q: Where is the Bluetooth setting on my smart TV?
A: Navigate to the TV settings menu. Look for a section related to connectivity or network settings. Within this section, you should find Bluetooth settings.
Q: How do I turn on Bluetooth on my smart TV?
A: Once you’re in the Bluetooth settings, there should be an option to turn Bluetooth on or off. Toggle it to the “On” position.
Q: How do I make my Bluetooth microphone discoverable?
A: Refer to your microphone’s manual for instructions on how to make it discoverable. Typically, you’ll need to press and hold a button on the microphone until a light starts flashing, indicating that it’s ready to pair.
Q: How do I pair my Bluetooth microphone with the smart TV?
A: In the Bluetooth settings on your TV, there should be an option to “Search” or “Scan” for devices. Select this option, and your TV will discover available Bluetooth devices, including your microphone. Once your microphone appears on the list, select it to initiate the pairing process.
Q: What is the pairing code for my Bluetooth microphone? A: Most Bluetooth devices, including microphones, use a default pairing code like “0000” or “1234.” Check your microphone’s manual to confirm the default pairing code. If prompted, enter the code on your TV.
Q: My Bluetooth microphone is connected, but I don’t hear any audio. What should I do? A: Ensure that the microphone’s battery is charged and that it is turned on. Check the TV’s audio settings to make sure the output is set to the Bluetooth microphone. Additionally, verify that the microphone is within the effective range of the TV.
Q: Can I use my Bluetooth microphone for all audio on the smart TV? A: Depending on your TV model, you may need to specifically select the Bluetooth microphone as the audio input device. Check the TV settings or audio settings to make sure the microphone is set as the preferred input.
Remember, these steps are general guidelines, and your specific TV and microphone may have unique instructions. Always consult the user manuals for both devices for the most accurate information.
Conclusion
In conclusion, connecting a Bluetooth microphone to your smart TV is not as difficult as it may seem. All you need is the right equipment and knowledge of the process. Once these two things are in place, you can quickly get your microphone up and running with your Smart TV.
With this guide, you should have no problem getting set up with a Bluetooth microphone for your Smart TV in no time!

Williams Kane is a blogger and writer. He’s passionate about writing and connecting with the community, especially when it comes to sharing his ideas through writing.
I am a versatile author with a passion for exploring a wide range of topics on our multi-niche website. With a background in research and a love for writing, I bring a unique blend of expertise to our platform.
My journey began in the world of science, where I earned a degree in biology and developed a deep fascination for the natural world. This background enables me to delve into topics related to ecology, environmental conservation, and the wonders of the animal kingdom.
However, my curiosity knows no bounds, and I have ventured into various other niches as well. From technology trends and digital innovations to health and wellness tips, I strive to provide well-researched and engaging content that informs and entertains our diverse audience.
Furthermore, my dedication to staying current with the latest developments in each niche ensures that our readers receive up-to-date and reliable information. Whether it’s deciphering complex scientific concepts or simplifying tech jargon, I take pride in making complex subjects accessible to all.
Join me on our multi-niche journey, where we explore the depths of knowledge and share insights on a multitude of topics to inspire, educate, and entertain.
Related posts:
 How to Connect Condenser Mic to Speaker?
 How to Connect Condenser Mic to Mac?
 Can You Record Guitar With a Condenser Mic?
 How to Setup Condenser Mic to PC? Simple Steps
 How to Connect Mic to Android Tv | Simple Few Steps
Usb Microphone for Smart Tv | Choose The Best One And Know How to Connect
Microphone Setting Windows 10: Master Your Sound Quality
How to Connect Mic to Android Tv | Simple Few Steps
Usb Microphone for Smart Tv | Choose The Best One And Know How to Connect
Microphone Setting Windows 10: Master Your Sound Quality
 Imac Microphone Not Working: Quick Fixes and Troubleshooting Tips