
Welcome to the era of limitless entertainment possibilities, where your Android TV can do more than just stream your favorite shows and movies. Have you ever wondered if you could take your TV experience to the next level by connecting a microphone? Imagine being able to sing along to your favorite tunes, host a karaoke night, or even use voice commands to control your TV – the possibilities are endless!
In this comprehensive guide, we will walk you through the step-by-step process of connecting a microphone to your Android TV. Whether you’re an aspiring singer, a karaoke enthusiast, or just someone who wants to add a touch of convenience to their TV experience, you’re in the right place.
But why would you want to connect a microphone to your Android TV in the first place? Well, imagine being able to search for your favorite content, adjust the volume, or even navigate through apps using voice commands. It’s not just about entertainment; it’s about making your TV experience more interactive and personalized.
So, if you’ve got a microphone collecting dust or if you’re thinking of investing in one, join us on this journey as we explore the seamless integration of audio input with your Android TV. Get ready to amplify your entertainment experience, break out into song, and make your TV truly your own!
In the upcoming sections, we’ll cover the essential steps, compatible microphones, and troubleshooting tips to ensure a smooth connection process. Whether you’re a tech-savvy individual or a casual user, we’ve got you covered. Let’s dive in and unlock the full potential of your Android TV!
Table of Contents
Tools You Need To Connect Mic To Android Tv
To connect a microphone to an Android TV, you may need the following tools and accessories. Keep in mind that the compatibility may vary depending on your specific TV model and microphone type:
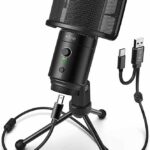
- Microphone: Choose a microphone that is compatible with Android devices. USB or Bluetooth microphones are commonly used for this purpose.
- USB Cable (if using a USB microphone): If your microphone has a USB connection, you’ll need a USB cable to connect it to the USB port on your Android TV.
- Bluetooth Adapter (if using a wired microphone without Bluetooth): If your microphone is not Bluetooth-enabled but you want to use it wirelessly, you may need a Bluetooth adapter that can be connected to your TV’s USB port.
- Bluetooth Connection: If your microphone is Bluetooth-enabled, ensure that Bluetooth is enabled on your Android TV. You may need to go to the TV settings to pair the microphone with the TV.
- OTG Adapter (if required): Some Android TVs may require an OTG (On-The-Go) adapter if you’re connecting a USB microphone. This adapter allows USB devices to connect to the TV.
- Microphone Stand or Holder: Depending on your setup, you might need a stand or holder to keep the microphone in place.
- Power Source (if applicable): Some microphones may require a power source. Ensure you have the necessary power supply or batteries if your microphone needs them.
- Check TV Compatibility: Make sure your Android TV supports external microphones. Some TVs may not have the necessary hardware or software to work with microphones.
Always refer to the user manuals of your specific microphone and Android TV for detailed instructions and compatibility information. Additionally, check for any firmware or software updates for your TV that might improve microphone compatibility.
How to connect your Microphone in Android TV
Android Tv Microphone Not Working
If the microphone on your Android TV is not working, there are several potential reasons for this issue. Here are some steps you can take to troubleshoot and resolve the problem:
1. Check the Microphone Hardware:
Make sure that your Android TV device has a built-in microphone or that an external microphone is properly connected if required.
2. Verify Microphone Permissions:
- Go to the settings on your Android TV.
- Navigate to “Device Preferences” or a similar section.
- Find and select “Google Assistant” or any app that uses the microphone.
- Make sure that the microphone permission is enabled for the relevant apps.
3. Restart Your Android TV:
Sometimes, a simple restart can solve various issues. Power off your Android TV, wait for a few seconds, and then turn it back on.
4. Check for Software Updates:
Ensure that your Android TV’s operating system and all relevant apps are up to date. Updates may include bug fixes that could resolve microphone issues.
5. Google Assistant Settings:
- If you are using Google Assistant, check its settings.
- Open the Google Assistant settings and ensure that the microphone is turned on.
- You may also want to retrain your voice model if the issue persists.
6. Factory Reset:
- As a last resort, you can perform a factory reset on your Android TV. This will erase all data on the device, so make sure to back up important information first.
- To do a factory reset, go to the settings, select “Device Preferences,” then “Reset,” and choose “Factory data reset.”
7. Check for Hardware Issues:
If the problem persists, there may be a hardware issue with the microphone. In this case, you may need to contact the manufacturer’s support for further assistance or consider getting the device repaired or replaced.
8. Test with Another Microphone:
If possible, test your Android TV with a different microphone to determine if the issue is with the microphone itself or the TV.
If none of the above steps resolve the problem, it’s recommended to contact the customer support of your Android TV’s manufacturer for more specific assistance. They may be able to provide additional guidance or arrange for repairs if necessary.
Wireless Mic for Smart Tv
Wireless mics are a great way to get sound onto your Smart TV without having to run any cables and can provide crystal-clear audio. They connect directly to the TV using Bluetooth technology, making them easy to install and use. With wireless mics for Smart TVs, you can enjoy movies, shows and sports without worrying about wires getting in the way or causing interference with other electronics.
How to Connect Wired Mic to Tv
Connecting a wired microphone to a TV typically involves using an audio input on the TV. Here are general steps you can follow, but keep in mind that the specific steps may vary based on the type of TV and microphone you have:
1. Check Your TV Inputs:
Look at the back or side of your TV to find the available audio inputs. Common inputs include RCA (red and white) audio jacks, a 3.5mm audio jack, or HDMI ports.
2. Select the Right Cable:
Depending on the TV’s available inputs and the microphone’s output, you might need different cables. For example:
- If your TV has RCA audio inputs, you might need a cable with a 1/4-inch or XLR connector on one end (matching your microphone) and RCA connectors on the other end.
- If your TV has a 3.5mm audio input, you might need a cable with a 1/4-inch or XLR connector on one end and a 3.5mm stereo jack on the other end.
3. Connect the Microphone:
Plug one end of the cable into the microphone and the other end into the corresponding audio input on the TV.
4. Adjust TV Settings:
Turn on your TV and navigate to the audio settings. You may need to select the input source corresponding to the port where you connected the microphone.
5. Test the Microphone:
Speak into the microphone and check if the TV is picking up the audio. You may need to adjust the volume settings on both the microphone (if it has volume controls) and the TV.
Use an Audio Interface (Optional):
If your microphone requires phantom power or if you’re using a professional-grade microphone, you might need an audio interface. In this case, connect the microphone to the audio interface and then connect the interface to the TV using an appropriate cable.
Check Microphone Compatibility:
Ensure that the microphone you’re using is compatible with the TV. Some microphones may require additional equipment or adapters to work with certain devices.
Remember that the specific steps can vary based on the make and model of your TV and microphone. Refer to the user manuals for both your TV and microphone for detailed instructions. If you encounter difficulties, consider reaching out to the manufacturers’ support or checking online forums for guidance specific to your equipment.

Credit: thehometheaterdiy.com
How to Connect Bluetooth Mic to Tv
Connecting a Bluetooth microphone to a TV can vary depending on the TV model and its Bluetooth capabilities. Here is a general guide that should work for most modern smart TVs:
- Check TV Compatibility: Ensure that your TV has built-in Bluetooth capability. Not all TVs have Bluetooth, especially older models. Check your TV’s user manual or settings menu to confirm if it supports Bluetooth.
- Turn on Bluetooth on the TV: If your TV has Bluetooth, you’ll need to enable it. This is usually done through the TV’s settings menu. Navigate to the settings, find the Bluetooth option, and turn it on.
- Put the Bluetooth Microphone in Pairing Mode: Follow the instructions that came with your Bluetooth microphone to put it into pairing mode. Typically, this involves holding down a button on the microphone until a light starts flashing, indicating it’s ready to pair.
- Pair the Devices: On your TV, navigate to the Bluetooth settings and look for an option to “Add a Device,” “Pair Device,” or something similar. Your TV should detect the Bluetooth microphone in pairing mode. Select the microphone to complete the pairing process.
- Configure Audio Settings: Once paired, you may need to go into your TV’s audio settings to specify that audio should be sent to the Bluetooth microphone. This setting might be found in the sound or audio settings of your TV.
- Test the Connection: Speak into the Bluetooth microphone, and check if the TV is receiving the audio. You may need to adjust volume levels and other audio settings to ensure everything is working correctly.
Remember, the specific steps can vary based on the brand and model of your TV and Bluetooth microphone. If you encounter difficulties, refer to the user manuals for both your TV and Bluetooth microphone for detailed instructions. If your TV doesn’t have built-in Bluetooth, you might need an external Bluetooth transmitter that connects to your TV’s audio output.
How To Connect Microphone To Tv For Karaoke
Can Android Tv Connect With Microphone?
Yes, Android TV can be connected with a microphone. This is possible through the use of an external USB or Bluetooth microphone which can be plugged into your device’s audio port. With this setup, you’ll be able to record voice memos and even give voice commands to the Google Assistant on your Android TV.
The connection is simple and easy to set up, allowing you to enjoy all the features that come with using a microphone for enhanced convenience and control over your television experience!
How Do I Use an External Microphone on My Android Tv?
Using an external microphone on your Android TV is a great way to improve the sound quality of your streaming services, podcasts and other audio content. To use an external microphone with your Android TV, you’ll need to connect it directly to the HDMI port on your device. Once connected, go into the settings menu for the specific app you’re using and look for an option that allows you to select what type of mic or audio source you wish to use – usually labeled as ‘External Microphone’ or similar.
Select this option and then test out how well your external mic works with any audio input that requires voice recognition or output.
How Do I Connect My Microphone Directly to My Tv?
If you want to connect your microphone directly to your TV, you’ll need an audio interface with a 3.5mm (1/8″) stereo input jack that can be connected to the headphone or line-out port of your television. Your TV may also have an RCA input option available depending on its model and age. Once this is done, plug the mic into the audio interface’s input and then use either an HDMI cable or two RCA cables to connect it to the TV’s output ports.
Finally, check in the settings menu of your TV for any necessary adjustments such as volume control or equalization options and make sure they are set correctly before using your microphone.
How Do I Plug a Microphone into My Android?
Using a microphone with your Android device is an easy process. First, you’ll need to make sure that the microphone has either a USB or 3.5mm audio plug included.
Then, connect this plug into the corresponding port on your phone or tablet; most newer models will have a 3.5mm audio jack located near the charging port while some older devices may require an adapter to accommodate larger plugs.
Once connected, open up your preferred voice application and make sure that it has been configured to recognize the external mic as its source of input information.
After doing so, start speaking and you should notice that sound from your mic appears in real time within the app!
FAQ
Q1: Can I connect any microphone to my Android TV?
A1: Most Android TVs support USB or Bluetooth microphones. Ensure your microphone is compatible with your TV model.
Q2: How do I connect a USB microphone to my Android TV?
A2:
- Check Compatibility: Ensure your TV supports USB microphones.
- USB Port: Plug the USB connector of your microphone into an available USB port on your TV.
- Recognition: Your TV should recognize the microphone. If not, check TV settings for audio input sources.
Q3: Can I connect a Bluetooth microphone to my Android TV?
A3:
- Bluetooth Settings: Go to the TV’s settings.
- Bluetooth Devices: Look for the Bluetooth section and pair your microphone.
- Pairing: Put your microphone in pairing mode, search for devices on your TV, and select your microphone.
Q4: How do I check if the microphone is connected?
A4:
- Settings: Navigate to TV settings.
- Sound or Audio Settings: Look for an option related to audio input devices.
- Microphone: Ensure your microphone is selected as the input device.
Q5: What if my microphone is not working after connecting?
A5:
- Check Connection: Ensure the microphone is properly connected.
- Settings: Verify microphone settings in TV settings.
- Compatibility: Confirm your microphone is compatible with your TV model.
- Update Firmware: Check for firmware updates for your TV.
Q6: Can I use a wireless microphone with a USB dongle?
A6:
- USB Dongle: Plug the dongle into an available USB port on your TV.
- Pairing: Follow the microphone’s instructions to pair it with the USB dongle.
Q7: What apps support microphone input on Android TV?
A7: Apps like Google Duo, Zoom, or other communication apps often support microphone input. Check individual app settings.
Q8: Can I use the TV’s built-in microphone for voice commands?
A8: Yes, many Android TVs come with built-in microphones for voice commands. Enable the voice search feature in your TV settings.
Conclusion
In conclusion, connecting a microphone to your Android TV is an easy process. With the right adapter and cables, you can easily get your mic up and running with no problems. It’s also worth noting that having a microphone connected to your Android TV will allow you to interact more effectively with voice-enabled applications such as Google Assistant or Alexa.
If you’re looking for an easy way to make use of a microphone on your Android TV, then following this guide will help ensure that you have everything setup correctly in just minutes.

Williams Kane is a blogger and writer. He’s passionate about writing and connecting with the community, especially when it comes to sharing his ideas through writing.
I am a versatile author with a passion for exploring a wide range of topics on our multi-niche website. With a background in research and a love for writing, I bring a unique blend of expertise to our platform.
My journey began in the world of science, where I earned a degree in biology and developed a deep fascination for the natural world. This background enables me to delve into topics related to ecology, environmental conservation, and the wonders of the animal kingdom.
However, my curiosity knows no bounds, and I have ventured into various other niches as well. From technology trends and digital innovations to health and wellness tips, I strive to provide well-researched and engaging content that informs and entertains our diverse audience.
Furthermore, my dedication to staying current with the latest developments in each niche ensures that our readers receive up-to-date and reliable information. Whether it’s deciphering complex scientific concepts or simplifying tech jargon, I take pride in making complex subjects accessible to all.
Join me on our multi-niche journey, where we explore the depths of knowledge and share insights on a multitude of topics to inspire, educate, and entertain.
Related posts:
 How to Connect Condenser Mic to Speaker?
 How to Connect Condenser Mic to Mac?
 Can You Record Guitar With a Condenser Mic?
 How to Setup Condenser Mic to PC? Simple Steps
 Usb Microphone for Smart Tv | Choose The Best One And Know How to Connect
 How Do I Connect My Microphone to My Portable Speaker?
Microphone Setting Windows 10: Master Your Sound Quality
How Do I Connect My Microphone to My Portable Speaker?
Microphone Setting Windows 10: Master Your Sound Quality
 Imac Microphone Not Working: Quick Fixes and Troubleshooting Tips