
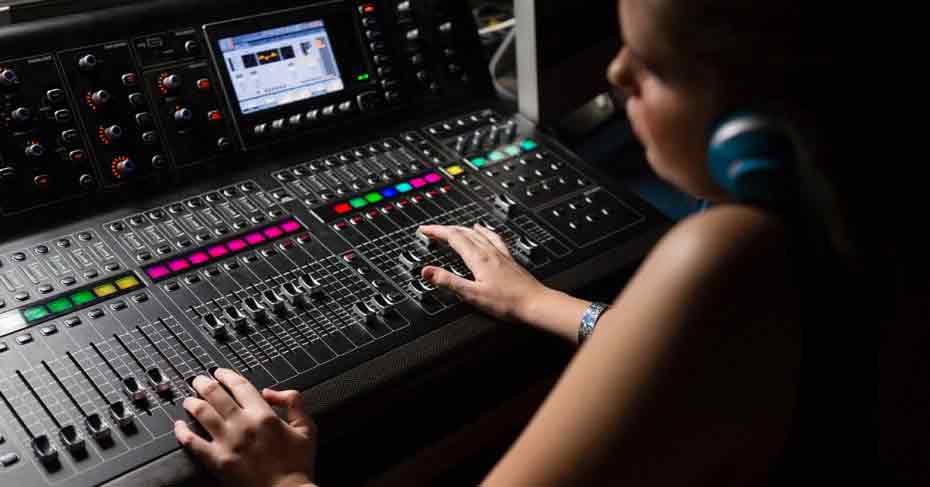
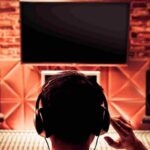
The mixing console is most important for perfect sound recording when it comes to live streaming. But you need to know, How to Record Sound from Mixing Console for Live Streaming?
It is very easy to set up. You will know how to do it very easily from this article.
To record sound from a mixing console, you will need to connect the output of the console to the input of a recording device. This can be done using a variety of cables, depending on the type of output and input jacks on the devices. Once the connection is made, you will need to set the levels on both the mixer and recorder so that the signal is not too hot or too low.
If everything is properly connected and set up, you should be able to start recording your live stream.
- Connect the main output of the mixing console to the audio input of your computer using a cable with XLR connectors on each end
- Launch your audio recording software on your computer
- Select the audio input from the mixing console as the input source in your recording software
- Set the levels in your recording software so that the sound is being recorded at an appropriate level, without clipping or distortion
- Start recording in your software, and then start playing music through the mixing console to be recorded
Also Read: Best Mixing Console For Recording Studio
Table of Contents
How to Connect Mixer to Computer for Live Streaming
If you’re looking to get started with live streaming, one of the first things you’ll need to do is figure out how to connect your Mixer to your computer. In this article, we’ll walk you through the process step-by-step so that you can get up and running in no time.
The first thing you’ll need to do is make sure that your Mixer is properly connected to your computer.
If you’re using an HDMI cable, simply plug it into the HDMI port on your Mixer and then connect the other end to the HDMI port on your computer. If you’re using an Ethernet cable, plug it into the Ethernet port on your Mixer and then connect the other end to an available Ethernet port on your router.
Once your Mixer is properly connected to your computer, open up OBS Studio or XSplit Broadcaster (these are two popular live streaming software programs).
In either program, create a new scene and then add a new source by selecting “Mixer” from the list of options. This will bring up a new window where you’ll need to select which Mixer input you want to use for your live stream. For most people, the “Game” input will be fine.
Next, click on the “Settings” cog in OBS Studio or XSplit Broadcaster and then go to the “Stream” tab. Here, you’ll need to select “Mixer” as your service and then enter in your Stream Key (this can be found in your Mixer dashboard). Once everything is entered correctly, hit “Apply” and then “OK”.
You should now be all set up and ready to start live streaming! Just hit the “Start Streaming” button in OBS Studio or XSplit Broadcaster and start playing whatever game or activity you want to share with others.
How Do I Record Live Audio from My Mixer?
Assuming you would like to record a live audio performance: There are a few things you need in order to record a live audio performance from your mixer. You will need some type of recording device (computer, portable recorder, etc.), as well as an audio interface that can connect the two.
The audio interface will act as the middleman between your mixer and your recording device. It will take the signal from your mixer and convert it into a format that your recording device can understand.
Once you have all of the necessary equipment, you will need to set up your recording environment.
This means finding a quiet place with minimal ambient noise.
Once you have found a suitable location, set up your mixer and recording device so that they are both easily accessible. If everything is properly plugged in, you should be able to hit the “record” button on your recorder and start capturing live audio from your mixer.
How Do I Get Audio from My Mixer to Obs?
There are a few ways that you can get audio from your mixer to OBS, and which one you use will depend on your specific setup. If you have a digital mixer, then the simplest way is to connect it directly to your computer via USB. This will allow OBS to directly access the audio stream from the mixer, and you won’t need any additional equipment.
However, if you’re using an analog mixer, then you’ll need to use an audio interface in order to convert the signal into something that OBS can understand. The good news is that there are plenty of great audio interfaces on the market, so you should be able to find one that fits your needs and budget.
Once you have your audio interface connected to both your mixer and computer, you’ll just need to set up OBS to use it as an input source.
This process will vary depending on which software you’re using, but in general, it’s just a matter of adding a new input source and selecting your audio interface as the source. With that said, let’s take a more detailed look at each of these methods for getting audio from your mixer into OBS.
If you have a digital mixer, then connecting it directly to your computer via USB is generally the easiest way to get audio into OBS.
Most digital mixers these days come with built-in USB ports, so all you’ll need is a standard USB cable. Once connected, open up OBS and go into the settings menu. Under ‘Input Devices’, select ‘USB Audio Device’ as your input source.
You may also need top change the ‘Channels’ setting under ‘Advanced Audio Properties’ depending on how many channels your mixer is outputting (e.g., mono vs stereo). That’s all there is too it! Your digital mixer should now be sending its live audio stream directly into OBS for broadcasting or recording purposes.
If you’re using an analog mixer (i.e., one without USB connectivity), then things are going to be a little bit more complicated since we’ll need to use an external audio interface in order to translate the signal into something that OBS can understand.
How Do I Set Up an Audio Mixer for Streaming?
When it comes to streaming, having a good audio mixer can make all the difference in the world. Not only will it allow you to have greater control over your audio quality, but it will also make it easier to manage multiple audio sources at once. In this article, we’ll show you how to set up an audio mixer for streaming purposes.
The first thing you’ll need to do is determine what type of audio mixer you need. There are two main types of mixers: digital and analog. If you’re just starting out, an analog mixer may be all you need.
However, if you plan on doing any serious mixing, a digital mixer will give you much more flexibility and control.
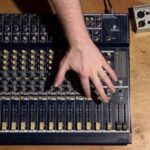
Once you’ve decided on the type of mixer you need, the next step is to connect all of your audio sources to it. This includes any microphones, instruments, or other sound sources that you’ll be using in your stream.
Most mixers will have multiple input channels, so each source can be assigned its own channel. Now that everything is connected, it’s time to start adjusting the levels. Each input channel on your mixer will have its own level control knob (or faders).
Start with all of the levels set at their minimum settings and slowly turn them up until they’re at a comfortable listening level. You may also want to use the EQ controls on each channel to further shape the sound of each individual source. Once everything sounds good at your end, it’s time to start streaming!
Make sure that your chosen streaming software is set up to use your mixer as its primary audio source and then hit “go live.” With a little practice, YOU’LL be able TO create professional-sounding streams in no time!
How Do I Connect My Mixer to My Computer for Recording?
It’s a common question with a few different answers. The most basic answer is that you need to connect the main output of your mixer to the line input of your computer sound card using a standard 1/4″ TRS cable, like this:
Once that’s done, open up your recording software (Pro Tools, Garage band, Audacity, etc.) and set the input source to “line in.”
You should now be able to record whatever is coming out of your mixer. However, there are a few things to keep in mind.
First, make sure you set your mixer’s main output level correctly. If it’s too low you’ll get a weak signal and if it’s too high you’ll get distortion.
Second, some mixers have an “alt 3-4” output which is specifically designed for sending audio to a computer. It may give you better results than the main output.
Finally, if you’re getting latency (a delay between when something is played and when it’s heard through the computer) try increasing the buffer size in your recording software.
Overall connecting a mixer to a computer for recording is pretty simple as long as you have the right cables and know which settings to adjust. With a little trial and error you should be able to get great results in no time!
How I use a mixer for live streaming and recording
Conclusion
If you’re looking to record sound from a mixing console for live streaming, then you must know, how to record sound from mixing console for live streaming? We can hope you can understand now how to do it. In this article, we tried to discuss clearly how to do it. Thank you very much to read this article.
Related Post:
How Does a Mixing Console Work?
What Does a Mixing Console Do?
How to Use a Digital Mixing Console?
What You Need to Know About Live Mixing Consoles?
How to Connect Mixing Console to Computer?
Are Condenser Mics Good for Live Performance?

Williams Kane is a blogger and writer. He’s passionate about writing and connecting with the community, especially when it comes to sharing his ideas through writing.
I am a versatile author with a passion for exploring a wide range of topics on our multi-niche website. With a background in research and a love for writing, I bring a unique blend of expertise to our platform.
My journey began in the world of science, where I earned a degree in biology and developed a deep fascination for the natural world. This background enables me to delve into topics related to ecology, environmental conservation, and the wonders of the animal kingdom.
However, my curiosity knows no bounds, and I have ventured into various other niches as well. From technology trends and digital innovations to health and wellness tips, I strive to provide well-researched and engaging content that informs and entertains our diverse audience.
Furthermore, my dedication to staying current with the latest developments in each niche ensures that our readers receive up-to-date and reliable information. Whether it’s deciphering complex scientific concepts or simplifying tech jargon, I take pride in making complex subjects accessible to all.
Join me on our multi-niche journey, where we explore the depths of knowledge and share insights on a multitude of topics to inspire, educate, and entertain.
Related posts:
 Top 10 Best Mixing Console For Recording Studio: For All Budget!
 How to Fix Dead Channels on a Mixer? Troubleshooting Guide
 How Does a Mixing Console Work? Should You Know Everything’s
 How to Connect Mixing Console to Computer? In The Simplest Way!
 How to Use a Mixing Console? A Complete Guide
 How to Use a Digital Mixing Console? Should You Know !
 What is a Sound Mixing Console?
 How to Build a Mixing Console?