
In the era of virtual communication, the ability to seamlessly use your camera and microphone on your Mac is essential for video conferences, online meetings, and various multimedia applications. Whether you’re participating in a Zoom call, recording a video message, or engaging in a FaceTime conversation, ensuring your camera and microphone are properly activated is crucial. This guide will walk you through the simple steps to turn on your camera and microphone on a Mac, allowing you to effortlessly connect with others and enhance your digital communication experience. Let’s dive into the straightforward process of enabling these essential components on your Mac device.
Table of Contents
How To Turn On Camera And Microphone On Mac Step By Stem Guide
Enabling the camera and microphone on a Mac involves navigating through system preferences and settings. Below is a step-by-step guide:
Turning On Camera:
- Open System Preferences:
- Click on the Apple logo in the top-left corner of the screen.
- Select “System Preferences” from the drop-down menu.
- Go to Security & Privacy:
- In the System Preferences window, click on “Security & Privacy.”
- Select Privacy Tab:
- Within the Security & Privacy window, navigate to the “Privacy” tab.
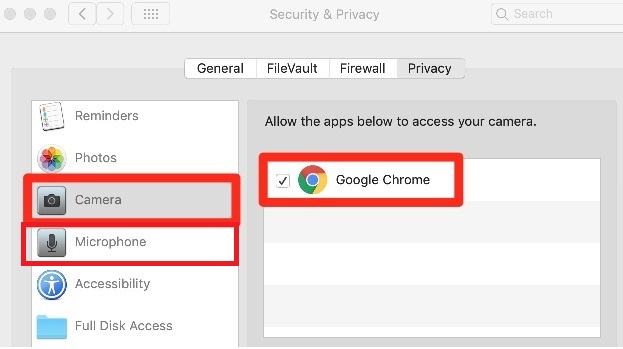
- Grant Camera Access:
- On the left sidebar, select “Camera.”
- Check the box next to the application or applications that you want to grant access to the camera.
- Close System Preferences:
- Close the System Preferences window.
Turning On Microphone:
- Open System Preferences:
- Click on the Apple logo in the top-left corner of the screen.
- Select “System Preferences” from the drop-down menu.
- Go to Security & Privacy:
- In the System Preferences window, click on “Security & Privacy.”
- Select Privacy Tab:
- Within the Security & Privacy window, navigate to the “Privacy” tab.
- Grant Microphone Access:
- On the left sidebar, select “Microphone.”
- Check the box next to the application or applications that you want to grant access to the microphone.
- Close System Preferences:
- Close the System Preferences window.
Additional Notes:
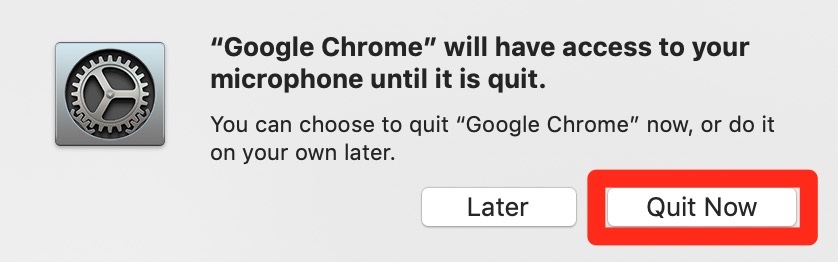
- If an application requests camera or microphone access, you may be prompted to grant permission at that time. Follow the on-screen instructions.
- Keep your operating system and applications updated to benefit from the latest security features and improvements.
The information provided here is based on general knowledge of macOS. If there are any changes in the user interface or settings after this date, you may want to refer to the official Apple support documentation or resources for the most up-to-date information.

How To Turn On Camera And Microphone In Mac System Preferences
On a Mac, you can control the settings for your camera and microphone through the System Preferences. Here’s how you can turn on the camera and microphone:
- Click on the Apple logo: In the top-left corner of your screen, click on the Apple logo to open the Apple menu.
- Select “System Preferences”: From the Apple menu, choose “System Preferences.”
- Open “Security & Privacy”: In the System Preferences window, click on “Security & Privacy.”
- Navigate to the “Privacy” tab: In the Security & Privacy window, you’ll see several tabs at the top. Click on the “Privacy” tab.
- Select “Camera” or “Microphone”: On the left side of the Privacy tab, you will see a list of privacy settings. Choose either “Camera” or “Microphone” from the list.
- Unlock the settings: At the bottom of the window, you may need to click the lock icon and enter your administrator password to make changes.
- Check the box next to the app: In the main part of the window, you’ll see a list of applications that have requested access to the camera or microphone. Check the box next to the app that you want to grant access to.
- Close System Preferences: Once you’ve made your selections, you can close the System Preferences window.
How To Turn Off Camera And Microphone On Macbook
On a MacBook, you can disable the camera and microphone through the System Preferences. Here’s how you can do it:
Turning off Camera:
- Open System Preferences:
- Click on the Apple logo in the top-left corner of your screen.
- Select “System Preferences.”
- Go to Security & Privacy:
- In the System Preferences window, click on “Security & Privacy.”
- Navigate to Camera Settings:
- Click on the “Privacy” tab.
- Look for “Camera” in the left sidebar.
- Disable Camera Access:
- Uncheck the box next to the applications that you want to restrict from accessing the camera.
Turning off Microphone:
- Open System Preferences:
- Click on the Apple logo in the top-left corner of your screen.
- Select “System Preferences.”
- Go to Sound Settings:
- In the System Preferences window, click on “Sound.”
- Navigate to Input Settings:
- Click on the “Input” tab.
- Disable Microphone:
- Select “Internal Microphone” from the list of available input devices.
- Set the input volume slider all the way to the left (to the minimum), or click the “Mute” box.
This will prevent applications from accessing your camera and microphone until you re-enable them. Keep in mind that some system features and applications may require access to the camera and microphone, so be mindful of the impact on functionality when disabling these features.
How Do I Turn My Mac Camera On?
Turning on your Mac camera depends on the context in which you want to use it. Here are a few common scenarios:
Using the Camera for FaceTime or Video Calls:
- FaceTime:
- Open the FaceTime app (you can find it in the Applications folder or use Spotlight by pressing Command + Space and typing “FaceTime”).
- Sign in with your Apple ID if prompted.
- Start a new call or select an existing contact to call.
- Other Video Call Apps (e.g., Zoom, Skype):
- Open the application you want to use for video calls (e.g., Zoom, Skype).
- Go to the settings or preferences within the app.
- Look for the video or camera settings and make sure your Mac’s camera is selected.
Taking Photos or Recording Videos:
- Photo Booth:
- Open the Photo Booth app (you can find it in the Applications folder or use Spotlight).
- Click on the red camera icon to take a photo or the video icon to record a video.
Checking the Camera Status:
- System Preferences:
- Click on the Apple logo in the top-left corner of the screen.
- Select “System Preferences.”
- Click on “Security & Privacy.”
- Go to the “Privacy” tab.
- Select “Camera” from the left sidebar.
- Make sure the checkbox next to the app you want to use the camera with is checked.
- Third-Party Apps:
- If you are using a third-party app that requires camera access, check its settings or preferences to ensure that the camera is enabled.
Troubleshooting:
- Restart your Mac:
- Sometimes, a simple restart can resolve issues. Shut down your Mac and then turn it back on.
- Check for Updates:
- Make sure your macOS and the applications you are using are up to date. Updates may include bug fixes that could affect the camera’s functionality.
- Permissions:
- Ensure that the application you are using has permission to access the camera. You can manage this in System Preferences > Security & Privacy > Privacy > Camera.
Remember that some applications may not require explicit permission to access the camera. They might have camera settings within their own preferences or options.
If you provide more details about your specific use case or any error messages you’re encountering, I can offer more targeted assistance.
Why Is My Camera And Microphone Not Working On Mac?
There could be several reasons why your camera and microphone are not working on your Mac. Here are some troubleshooting steps you can try:
1. Check System Preferences:
- Open “System Preferences” from the Apple menu.
- Select “Sound” and then the “Input” tab. Make sure the correct microphone is selected.
- Select “Sound” and then the “Output” tab. Make sure the correct output device is selected.
2. Check Permissions:
- Ensure that the applications you’re using have the necessary permissions to access the camera and microphone. You can check this in “System Preferences” > “Security & Privacy” > “Privacy.” Make sure the relevant apps have access to the camera and microphone.
3. Restart Your Mac:
- Sometimes, a simple restart can resolve hardware or software issues.
4. Check for Software Updates:
- Make sure your macOS and all applications are up to date. Sometimes, bugs are fixed in software updates.
5. Reset SMC and PRAM/NVRAM:
- Resetting the System Management Controller (SMC) and Parameter RAM (PRAM) or Non-Volatile RAM (NVRAM) can sometimes resolve hardware-related issues. The process for resetting these varies depending on the model of your Mac. Refer to Apple’s support documentation for instructions.
6. Check for Application-Specific Issues:
- If the issue is only with a particular application, check the app’s settings and preferences to ensure it is configured to use the correct camera and microphone.
7. Test with Another User Account:
- Create a new user account on your Mac and see if the issue persists. This can help determine if the problem is system-wide or specific to your user account.
8. Hardware Issues:
- If the above steps don’t resolve the issue, there may be a hardware problem with your camera or microphone. In this case, you may need to contact Apple Support or visit an Apple Authorized Service Provider.
If none of these steps resolve the issue, it’s advisable to seek assistance from Apple Support or visit an Apple Store or authorized service provider for further diagnosis and assistance.
How Do I Turn On My Camera And Microphone On My Mac Chrome?

Williams Kane is a blogger and writer. He’s passionate about writing and connecting with the community, especially when it comes to sharing his ideas through writing.
I am a versatile author with a passion for exploring a wide range of topics on our multi-niche website. With a background in research and a love for writing, I bring a unique blend of expertise to our platform.
My journey began in the world of science, where I earned a degree in biology and developed a deep fascination for the natural world. This background enables me to delve into topics related to ecology, environmental conservation, and the wonders of the animal kingdom.
However, my curiosity knows no bounds, and I have ventured into various other niches as well. From technology trends and digital innovations to health and wellness tips, I strive to provide well-researched and engaging content that informs and entertains our diverse audience.
Furthermore, my dedication to staying current with the latest developments in each niche ensures that our readers receive up-to-date and reliable information. Whether it’s deciphering complex scientific concepts or simplifying tech jargon, I take pride in making complex subjects accessible to all.
Join me on our multi-niche journey, where we explore the depths of knowledge and share insights on a multitude of topics to inspire, educate, and entertain.
Related posts:
 Top 7 Best Condenser Mic Under 200 USD ! Top Picks in 2023
 Why is My Condenser Mic Not Working? Lessons from the Pros
 Are Condenser Mics Better Than Dynamic?
 How to Connect Wireless Microphone to Smart Tv?
How Do You Connect a Microphone to a Tv? Simple Way
How Do I Connect My Microphone to My Jbl Speaker?
How Do I Test My Microphone? The Ultimate Guide to Testing Microphone
Surface Pro Microphone Not Working? Troubleshoot and Fix in Minutes
How to Connect Wireless Microphone to Smart Tv?
How Do You Connect a Microphone to a Tv? Simple Way
How Do I Connect My Microphone to My Jbl Speaker?
How Do I Test My Microphone? The Ultimate Guide to Testing Microphone
Surface Pro Microphone Not Working? Troubleshoot and Fix in Minutes