
In the symphony of modern entertainment, where high-definition visuals and immersive audio merge seamlessly, the desire to amplify your TV experience is ever-present. Whether you’re a karaoke enthusiast, a gamer looking to enhance communication, or simply someone who appreciates crystal-clear sound during movie nights, connecting a microphone to your TV can be a game-changer. This blog post is your backstage pass to the world of audio integration, providing step-by-step guidance on how do you connect a microphone to a tv. Get ready to turn up the volume and make your living room the center stage of auditory excellence!
Table of Contents
How Do You Connect a Microphone to a Tv?
How to connect Bluetooth Mic to your TV – Videoke Karaoke
Connecting a microphone to your TV is relatively easy and can be done in just a few steps. To begin, you’ll need an audio input on the back of your TV, as well as an adapter cable that will connect from the microphone to the audio input. Once you have those two pieces of equipment, simply plug them together and turn on both devices.
Your TV should now recognize the microphone and allow you to use it for voice recordings or presentations. With this setup, you’re ready to start using your new mic!
How to Connect Wired Microphone to Tv
Connecting a wired microphone to a TV typically involves using an audio input port on the TV, such as a microphone jack or an auxiliary input. Here are the general steps to connect a wired microphone to a TV:
- Check TV Compatibility: Ensure that your TV has a compatible audio input port for the microphone. Common options include a 3.5mm microphone jack or an auxiliary input.
- Select the Right Cable: Based on the TV’s input port and the microphone’s output port, select the appropriate cable. If the TV has a 3.5mm microphone jack, you’ll likely need a cable with a 3.5mm plug on both ends. If your TV has an auxiliary input (RCA input), you may need a cable with a 3.5mm plug on one end and RCA plugs on the other.
- Turn Off the TV: Before connecting anything, it’s a good idea to turn off the TV to avoid any potential electrical issues.
- Connect the Cable: Plug one end of the cable into the microphone’s output port and the other end into the TV’s microphone or auxiliary input port.
- Power On the TV: Turn on the TV and any other audio equipment you’re using.
- Adjust TV Settings: Access the TV’s settings menu to configure the audio input. Look for options related to external microphones or audio input sources. This may vary depending on the TV brand and model.
- Test the Microphone: Speak into the microphone to check if the audio is coming through the TV speakers. Adjust the microphone’s volume if necessary.
- Microphone Amplifier (if needed): If the microphone’s signal is too weak, you might need a microphone preamplifier to boost the audio signal before it reaches the TV. Connect the microphone to the preamplifier and then connect the preamplifier to the TV.
- Adjust TV Volume: Adjust the TV volume to the desired level for the microphone input.
Keep in mind that not all TVs support external microphone inputs, especially on some newer models. In such cases, you might need additional audio equipment or adapters to achieve your desired setup. Always refer to the user manual of your TV for specific instructions and compatibility information.
How to Connect Wireless Microphone to Smart Tv
Connecting a wireless microphone to a smart TV typically involves a few steps. Here’s a general guide, but keep in mind that the specific steps may vary depending on the make and model of your TV and microphone:
- Check TV Compatibility:
- Ensure that your smart TV has the necessary ports for connecting a wireless microphone. Most wireless microphones use a 3.5mm audio jack or Bluetooth.
- Bluetooth Connection (if applicable):
- If your wireless microphone supports Bluetooth, you can pair it with your smart TV.
- Turn on the Bluetooth feature on your TV. This is usually found in the TV settings or connectivity options.
- Put your wireless microphone into pairing mode. Refer to your microphone’s user manual for instructions on how to do this.
- Once both devices are in pairing mode, the TV should detect the microphone. Follow the on-screen prompts to complete the pairing process.
- If your wireless microphone supports Bluetooth, you can pair it with your smart TV.
- Using an Audio Receiver (if applicable):
- Some wireless microphones come with a dedicated audio receiver that needs to be connected to the TV.
- Connect the audio receiver to your TV using the appropriate cables (e.g., RCA or HDMI).
- Power on the wireless microphone and the audio receiver. They should automatically pair if they are from the same set.
- Some wireless microphones come with a dedicated audio receiver that needs to be connected to the TV.
- Using an Audio Jack:
- If your wireless microphone has a 3.5mm audio jack, you can connect it directly to the TV if it has a corresponding audio input.
- Plug the wireless microphone transmitter into the 3.5mm audio input on your TV.
- Make sure your TV is set to use the external input for audio.
- If your wireless microphone has a 3.5mm audio jack, you can connect it directly to the TV if it has a corresponding audio input.
- Adjust Audio Settings:
- Access your TV’s audio settings to ensure the sound is routed through the wireless microphone. This might involve selecting the correct audio output source.
- Test the Setup:
- Speak into the wireless microphone and check if the audio is coming through the TV speakers.
Remember to consult the user manuals for both your smart TV and wireless microphone for specific instructions related to your devices. If you encounter any issues or if your TV model doesn’t support wireless microphone connections, you might need additional accessories or alternative solutions.
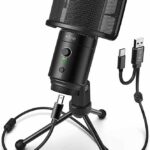
How to Connect Usb Microphone to Tv
Connecting a USB microphone to a TV might not be as straightforward as connecting it to a computer, as many TVs may not have built-in support for USB microphones. However, if your TV has a USB port and supports USB audio input, you can try the following steps:
- Check TV Compatibility: Ensure that your TV supports USB audio input. Look for USB ports on your TV and consult the user manual to see if it mentions support for USB audio devices.
- USB Microphone Compatibility: Some USB microphones may require drivers or specific software to function properly. Check the microphone’s documentation to see if it’s compatible with your TV. If the microphone is plug-and-play (no additional drivers needed), it should be easier to set up.
- Connect the USB Microphone:
- Plug the USB connector of the microphone into an available USB port on your TV.
- If the microphone has an on/off switch, make sure it’s turned on.
- Configure TV Settings:
- Navigate to your TV’s settings menu. This is usually accessible through the remote control.
- Look for the audio settings or input settings. Check if there’s an option to select USB as the audio input source.
- Select the USB Microphone:
- Once you’re in the audio settings, look for an option to choose the audio source. If your TV recognizes the USB microphone, it should appear in the list of available audio sources.
- Select the USB microphone as the input source.
- Test the Microphone:
- Open an app or feature on your TV that uses the microphone, if available. This could be a voice search function or a voice command feature.
- Speak into the microphone to check if the TV is picking up the audio.
- Adjust Microphone Levels:
- Some TVs might have settings to adjust microphone sensitivity or volume. Check the TV settings for any options related to the connected USB microphone and make adjustments as needed.
Keep in mind that not all TVs support USB microphones, and the success of this setup depends on the specific model and features of your TV. If your TV doesn’t support USB microphones, you may need additional equipment, such as an audio interface or a device that converts USB audio to a format compatible with your TV’s audio inputs.
Lg Tv Microphone Input
LG TVs come with a built-in microphone input, allowing you to connect an external microphone to the TV and use it as your audio source. This feature can be useful for home theatre applications or karaoke systems that require better sound quality than the TV’s internal speakers can provide. With the LG TV’s microphone input, you’ll have access to higher quality sound for all of your multimedia entertainment needs.
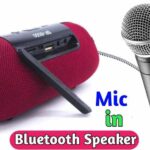
Bluetooth Microphone for Smart Tv
A Bluetooth microphone for Smart TV is an amazing device that allows you to easily connect a microphone to your Smart TV. This makes it easier than ever before to communicate with people over Skype or other voice communication applications. With this device, you can also enjoy better sound quality when watching movies or listening to music on your television.
Additionally, the Bluetooth microphone for Smart TV comes with a range of features such as noise cancellation and echo effect which further enhance the audio experience when using your television.

Credit: thehometheaterdiy.com
Recommended Models:
Here are some considerations and popular options to help you make an informed decision:
- Blue Yeti Nano:
- The Blue Yeti Nano is a popular USB microphone that offers good sound quality. While it’s not Bluetooth, you can connect it to your smart TV using a USB adapter if your TV supports USB connectivity.
- Bose QuietComfort 35 II:
- While primarily designed as headphones, the Bose QuietComfort 35 II also features a built-in microphone. These headphones connect via Bluetooth and may serve your purpose if you’re looking for a dual-function device.
- Jabra Elite 85h:
- Another headphone option, the Jabra Elite 85h, offers excellent sound quality and a built-in microphone. Like the Bose, it connects via Bluetooth.
- Bluetooth Transmitter with Microphone Input:
- Consider a Bluetooth transmitter with a microphone input. Connect your preferred microphone to the transmitter, and then pair the transmitter with your smart TV.
- TV-Specific Wireless Microphones:
- Some manufacturers produce wireless microphones specifically designed for smart TVs. Brands like Avantree and TaoTronics offer Bluetooth transmitters and receivers that can connect to smart TVs.
When choosing a Bluetooth microphone for your smart TV, consider the following:
- Compatibility: Ensure that the microphone is compatible with your specific smart TV model.
- Range: Consider the Bluetooth range to ensure that the microphone works well within the distance you plan to use it.
- Battery Life: If the microphone is rechargeable, check the battery life to ensure it meets your usage requirements.
- Sound Quality: Look for reviews and user feedback regarding the microphone’s sound quality.
Can We Connect Karaoke Mic to Tv?
Yes, you can connect a karaoke mic to your TV. You will need an audio cable with a 3.5mm jack at the end that connects to the microphone, and an RCA connector or composite video adapter for connecting to your TV. The microphone must be compatible with the input of your TV in order for it to work properly.
Once everything is connected you should be able to plug in the mic and start singing right away!
How To Connect Microphone To Tv For Karaoke
How Do I Plug in My Microphone?
Plugging in your microphone is a relatively straightforward process that requires you to make sure your audio interface or sound card has the correct type of input.
The first step is to locate the correct input port on your audio device. This can be either an XLR, 1/4″ jack, or some other type depending on what kind of microphone you have.
Once you have identified the proper connection point, plug in your microphone and tighten it so that it won’t come out easily.
After this, you should check if any additional software needs to be installed for proper functioning of the mic as well as making sure all settings are set properly within Windows itself.
Finally, test out the microphone by speaking into it and listening for playback through headphones or speakers connected to the same device.
How Do I Setup a Wireless Microphone?
Setting up a wireless microphone is relatively simple and requires minimal equipment.
First, you’ll need the wireless receiver and transmitter, plus any necessary cables or adapters to connect them.
Next, plug the receiver into your audio interface, sound system or mixer depending on what type of setup you have. Make sure it’s powered on before turning on the transmitter as well.
Finally, connect the mic itself to its corresponding port in the transmitter and adjust any settings such as gain levels accordingly. Once everything is connected properly, you should be ready to start using your new wireless microphone!
Conclusion
In conclusion, connecting a microphone to a TV is not difficult. With the right cables and components, you can easily connect any type of microphone to your TV for an enhanced audio experience. In addition, this process does not require costly equipment or expensive software, making it an excellent solution for those who want improved sound quality without breaking the bank.

Williams Kane is a blogger and writer. He’s passionate about writing and connecting with the community, especially when it comes to sharing his ideas through writing.
I am a versatile author with a passion for exploring a wide range of topics on our multi-niche website. With a background in research and a love for writing, I bring a unique blend of expertise to our platform.
My journey began in the world of science, where I earned a degree in biology and developed a deep fascination for the natural world. This background enables me to delve into topics related to ecology, environmental conservation, and the wonders of the animal kingdom.
However, my curiosity knows no bounds, and I have ventured into various other niches as well. From technology trends and digital innovations to health and wellness tips, I strive to provide well-researched and engaging content that informs and entertains our diverse audience.
Furthermore, my dedication to staying current with the latest developments in each niche ensures that our readers receive up-to-date and reliable information. Whether it’s deciphering complex scientific concepts or simplifying tech jargon, I take pride in making complex subjects accessible to all.
Join me on our multi-niche journey, where we explore the depths of knowledge and share insights on a multitude of topics to inspire, educate, and entertain.
Related posts:
 How to Connect Condenser Mic to Mac?
 How to Connect Condenser Mic to Bluetooth Speaker?
 How to Setup Condenser Mic to PC? Simple Steps
 Samsung Tv Microphone Input Process ! Simple Guide
Usb Microphone for Smart Tv | Choose The Best One And Know How to Connect
Samsung Tv Microphone Input Process ! Simple Guide
Usb Microphone for Smart Tv | Choose The Best One And Know How to Connect
 How Do I Connect My Microphone to My Portable Speaker?
Background Noise Removal Microphone: Say Goodbye to Distractions!
How Do I Connect My Microphone to My Portable Speaker?
Background Noise Removal Microphone: Say Goodbye to Distractions!
 Imac Microphone Not Working: Quick Fixes and Troubleshooting Tips