
A condenser mic is a device that converts sound waves into electrical signals. It is widely used in various audio recording applications due to its high sensitivity and accuracy.
Microphones are essential tools in the field of audio recording. They capture sound waves and convert them into electrical signals that can be amplified and recorded. One type of microphone commonly used in professional studios and live performances is the condenser mic.
This type of mic operates on the principle of capacitance, where a diaphragm moves in response to incoming sound waves, changing the distance between two plates. This change in distance alters the capacitance and generates an electrical signal that accurately represents the original sound. Condenser mics are known for their high sensitivity, capturing even the faintest of sounds with great accuracy and detail. They are commonly used to record vocals, acoustic instruments, and other delicate sounds. Their precise and transparent sound reproduction makes them a popular choice among professional audio engineers and musicians.

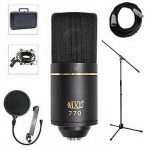
Credit: www.amazon.com
Table of Contents
What Is A Condenser Mic?
Definition And Brief Explanation Of Condenser Microphones
Condenser microphones, also known as capacitor microphones, are highly sensitive audio devices that convert sound waves into electrical signals. These mics are widely used in professional recording studios, broadcasting, and podcasting due to their ability to capture accurate and detailed sound.
Unlike dynamic microphones that use electromagnetic induction, condenser mics work on the principle of variable capacitance. They consist of a thin diaphragm, a metal backplate, and a charged capacitor to pick up and amplify sound signals.
How Condenser Mics Differ From Other Types Of Microphones
Unlike dynamic microphones that are rugged and more suitable for live performances, condenser microphones excel in capturing detailed and high-quality sound. Here are some key differences between condenser mics and other types of microphones:
- Sensitivity: Condenser mics are more sensitive and can capture subtle nuances and low-level sounds accurately.
- Frequency response: These mics have a wider frequency response, allowing them to capture a broader range of frequencies, from deep lows to crystal-clear highs.
- Power requirement: Condenser mics require a power supply known as phantom power to operate, typically provided by an audio interface or a dedicated power source. Dynamic microphones, on the other hand, do not require external power.
- Size and design: Condenser mics are generally more compact and lightweight compared to dynamic mics, making them easier to handle and suitable for applications where portability is a factor.
Key Components And Working Principles Of Condenser Mics
To understand how condenser microphones work, it is important to know about their key components and working principles:
- Diaphragm: The diaphragm, usually made of a thin conductive material such as gold-sputtered mylar, is a crucial component that vibrates in response to sound waves. The movement of the diaphragm generates electrical signals.
- Backplate: Positioned closely behind the diaphragm, the backplate is a conductive plate with an opposite electrical charge. It forms a capacitor with the diaphragm, creating a fluctuating electric field.
- Charged capacitor: The diaphragm and backplate together form a capacitor. By applying a dc voltage or phantom power, the backplate becomes negatively charged, while the diaphragm is positively charged. The voltage difference creates an electric field between the two, and when sound waves hit the diaphragm, the distance between the diaphragm and backplate changes, causing the capacitance to vary.
- Amplification: The varying capacitance, resulting from sound wave-induced movement of the diaphragm, causes the electrical signal to modulate accordingly. This weak electrical signal is then amplified, usually by an external circuit or an integrated preamplifier, to a level suitable for recording or further processing.
Condenser microphones are highly sensitive audio devices that use variable capacitance to convert sound waves into electrical signals. Their design and characteristics set them apart from other types of microphones, making them a popular choice for professional audio applications.
Advantages And Benefits Of Using A Condenser Mic
Superior Sensitivity And Responsiveness For Capturing Details:
- Condenser microphones are known for their superior sensitivity and responsiveness, allowing them to capture even the tiniest of details in sound.
- These mics use a thin diaphragm that vibrates in response to sound waves, converting them into an electrical signal.
- This sensitivity ensures that the microphone accurately captures the nuances and subtleties of vocals, instruments, and ambient sounds, resulting in high-quality recordings.
- With a condenser mic, you can capture the delicate notes of an acoustic guitar or the soft whispers of a singer with unparalleled clarity and precision.
Wide Frequency Range And Accurate Sound Reproduction:
- Another advantage of using a condenser microphone is its wide frequency range.
- These mics can reproduce sounds across a broader spectrum compared to other types of microphones.
- This means that they can accurately capture both low-frequency bass tones and high-frequency treble notes, resulting in a more natural and lifelike sound reproduction.
- Whether you are recording vocals, instruments, or even nature sounds, a condenser mic ensures that every detail is faithfully reproduced, allowing your recordings to shine.
Ideal For Recording Vocals And Acoustic Instruments:
- Condenser microphones are highly regarded for their ability to record vocals and acoustic instruments with exceptional clarity and warmth.
- The sensitive diaphragm of a condenser mic captures the subtle nuances of a singer’s voice, capturing every breath, inflection, and emotion.
- When it comes to recording acoustic instruments like guitars, pianos, or violins, condenser mics excel at capturing the instrument’s natural resonance and harmonic richness.
- Whether you’re a professional musician or an aspiring artist, a condenser mic is your go-to tool for recording professional-grade vocals and acoustic performances.
Versatility And Suitability For Various Recording Environments:
- One of the key advantages of using a condenser microphone is its versatility and suitability for various recording environments.
- Condenser mics come in different sizes and designs, allowing them to adapt to different recording situations.
- Whether you are in a studio, a concert hall, or even a home setup, there is a condenser mic that fits your needs.
- These mics can be mounted on microphone stands or used with shock mounts to reduce handling noise and vibrations, ensuring clean and clear recordings.
- From podcasting and voice overs to music production and field recordings, a condenser mic offers unmatched versatility for all your recording endeavors.
Also Read: Best Condenser Mic Under 200
Different Types Of Condenser Mics
Condenser microphones are popular among audio professionals for their exceptional sound quality and sensitivity. While they all function on the same basic principle of converting sound waves into electrical signals, there are different types of condenser mics available to cater to diverse recording needs.
Let’s explore each type in detail:
Large Diaphragm Condenser Mic:
- Rich low-frequency response
- Ideal for capturing vocals and instruments with warmth and depth
- Provides a smooth and detailed sound
- Commonly used in professional studios for recording vocals, acoustic guitars, and broadcast applications
Small Diaphragm Condenser Mic:
- Compact and versatile design
- Excellent transient response and detailed high-frequency capture
- Suitable for recording acoustic instruments, such as violins, pianos, and drum overheads
- Often used in live sound reinforcement for capturing crisp, clear audio
Tube Condenser Mic:
- Utilizes vacuum tubes for amplification
- Offers a warm, vintage tone with smooth saturation
- Ideal for capturing vocals and instruments with rich harmonics
- Preferred for recording genres like jazz, blues, and classical music
Electret Condenser Mic:
- Contains a permanently charged diaphragm
- Compact and cost-effective option
- Suitable for a wide range of applications, including podcasting, voice-over work, and field recording
- Provides good audio quality with a lower power requirement
So whether you’re a professional recording engineer or a content creator looking to enhance your audio recordings, understanding the different types of condenser microphones available can help you choose the right tool for the job. The large diaphragm, small diaphragm, tube, and electret condenser mics all offer unique sonic characteristics, suited to various recording scenarios.
By selecting the appropriate condenser mic, you can elevate the quality of your recordings and achieve the desired sound.
Understanding Polar Patterns And Their Impact On Sound Capture
A key aspect of understanding what a condenser microphone does involves familiarizing yourself with polar patterns. Polar patterns refer to the microphone’s sensitivity to sound from different directions. Each polar pattern has a unique way of capturing sound, impacting the audio quality and versatility of the mic.
Let’s explore the various polar patterns commonly found in condenser microphones:
Cardioid Polar Pattern
- The cardioid polar pattern resembles a heart shape, with the microphone most sensitive to sound from the front and least sensitive to sound from the rear.
- Ideal for isolating sound sources and minimizing unwanted background noise during recordings.
- Suitable for podcasting, vocal recordings, and studio recordings.
Omnidirectional Polar Pattern
- The omnidirectional polar pattern captures sound equally from all directions.
- Allows for a broader pick-up range, capturing the natural ambiance of a room or environment.
- Great for capturing group conversations, conference recordings, or ambient sound recording.
Figure-8 Polar Pattern
- Also known as a bidirectional polar pattern, the figure-8 pattern captures sound equally from the front and the back of the microphone while rejecting sound from the sides.
- Useful for recording two sound sources facing each other, such as an interview between two people or a duet performance.
Switchable Polar Patterns And Their Uses
- Some condenser microphones offer switchable polar patterns, allowing you to adjust the microphone’s sensitivity to various directions.
- Cardioid, omnidirectional, and figure-8 patterns can often be switched between on these microphones.
- This versatility makes switchable polar pattern mics suitable for a wide range of recording situations where different polar patterns may be required.
Understanding the different polar patterns and their impact on sound capture can help you make informed decisions about which condenser microphone to choose for your specific recording needs. Whether you are a podcaster, vocalist, or professional audio engineer, selecting the right polar pattern can significantly enhance the quality and versatility of your recordings.
Powering A Condenser Mic: Phantom Power And Other Options
Explanation Of Phantom Power And Its Necessity For Condenser Mics:
- Phantom power is an essential requirement for condenser microphones as it provides the necessary voltage to power the mic’s internal circuitry.
- This power is typically supplied through the microphone input of an audio interface or mixing console.
Other Alternatives For Powering Condenser Microphones:
- Battery power: Some condenser microphones have built-in battery compartments, allowing them to be powered independently. This option is useful when a phantom power source is unavailable.
- External power supplies: In some cases, condenser microphones can be powered by external power supplies, which connect to the microphone through a dedicated power cable. This option offers flexibility but requires an additional device.
Factors To Consider When Choosing A Power Source For Your Mic:
- Compatibility: Ensure that your chosen power source is compatible with your specific condenser microphone model. Some microphones may have specific power requirements.
- Convenience: Consider the availability and ease of use of your chosen power source. If using phantom power, ensure that your audio interface or mixing console supports this feature.
- Runtime: If relying on battery power, consider the microphone’s battery life and have backup batteries on hand for longer recording sessions.
- Mobility: If portability is important, choose a power source that enables easy mobility, such as a battery-operated microphone or a compact external power supply.
- Budget: Consider the cost implications when choosing a power source. Some options may be more affordable than others, but be sure to prioritize quality and compatibility over price alone.
Understanding the different ways to power a condenser microphone is crucial for optimal performance. Whether using phantom power, batteries, or external power supplies, consider factors such as compatibility, convenience, runtime, mobility, and budget to ensure a seamless recording experience. So choose wisely and power up your condenser mic for professional-quality audio capture.
Setting Up And Positioning A Condenser Mic For Best Results
Proper Microphone Placement Techniques
Proper microphone placement is essential for achieving the best results with a condenser mic. Whether you’re recording vocals, instruments, or considering the room’s acoustics, here are some techniques to follow:
- Position the microphone at a comfortable height: Ensure the microphone is at an appropriate height, considering your vocal or instrumental performance. This helps capture the sound accurately without strain.
- Maintain the correct distance: Keep a consistent distance between the microphone and the sound source. For vocals, a distance of 6-8 inches is generally ideal. Adjust the distance to achieve the desired balance between the sound source and any background noise.
- Opt for proper angles: Point the microphone directly at the sound source for a focused and clear sound. Avoid placing it at extreme angles that may result in distorted or uneven audio.
- Use a pop filter for vocals: Attach a pop filter to the microphone to reduce plosive sounds (such as “p” and “b” sounds) caused by gusts of air. This helps prevent unwanted bursts of noise and enhances the overall recording quality.
Considerations For Different Recording Scenarios (Vocals, Instruments, Room Acoustics)
When setting up a condenser microphone, it’s crucial to consider the specific recording scenario and make adjustments accordingly:
- Vocal recording: Position the microphone slightly above the singer’s mouth to capture the vocals without blocking the sound by the performer’s hand. Experiment with the microphone’s height and use a shock mount if necessary to minimize any vibrations. Adjust the distance and angle based on the desired tonal characteristics of the voice.
- Instrument recording: For instruments like acoustic guitars or pianos, place the microphone close to the soundhole or the instrument’s sweet spot. Experiment with different microphone positions to capture the instrument’s unique qualities. In the case of drums or percussion, use multiple microphones to capture each element distinctly.
- Room acoustics: Consider the room’s characteristics and adjust the microphone placement accordingly. For rooms with excessive reverberation, move the microphone closer to the sound source to minimize the impact of reflections. In smaller rooms, experiment with microphone placement to achieve a balanced sound.
Avoiding Common Mistakes To Optimize Sound Capture
To optimize sound capture with a condenser mic, it’s important to avoid common mistakes that can compromise audio quality:
- Prevent room reflections: Minimize unwanted room reflections by using acoustic treatment such as absorbers and diffusers. This helps to capture a cleaner and more focused sound.
- Watch out for background noise: Choose a quiet environment for recording to avoid picking up distracting background noise. If noise is unavoidable, consider using a directional microphone to narrow the focus on the desired sound source.
- Mind the microphone cable: Keep the microphone cable away from any potential sources of interference, such as power cables or electronic devices. This helps prevent unwanted noise and interference in the recording.
- Test and adjust levels: Prior to recording, check the microphone levels and adjust them accordingly. Avoid setting levels too high, as it may lead to distortion or clipping. Monitor the recording levels throughout the session to ensure optimal audio quality.
Remember, proper setup and positioning of a condenser microphone are crucial for achieving the best results. Experiment with different techniques and trust your ears to find the optimal placement that suits your specific recording needs.
Tips For Recording With A Condenser Mic
Using A Pop Filter Or Windscreen To Prevent Plosive Sounds
- Plosive sounds, such as “p” and “b” sounds, can cause unpleasant audio distortion when recording with a condenser microphone.
- A pop filter or windscreen is an accessory that can be placed in front of the microphone to reduce these plosive sounds.
- The pop filter or windscreen acts as a barrier, dispersing the force of the plosive sounds and preventing them from hitting the microphone directly.
- By using a pop filter or windscreen, you can achieve cleaner and more professional-sounding recordings.
Managing Proximity Effect For Desired Sound Characteristics
- The proximity effect is a phenomenon that occurs when a sound source is close to the condenser microphone, resulting in an increase in bass frequencies.
- To manage the proximity effect, you can adjust the microphone’s position in relation to the sound source.
- Moving the microphone closer to the sound source will increase the bass response, while moving it farther away will reduce it.
- Experiment with different mic placements to find the desired sound characteristics for your recording.
- By understanding and managing the proximity effect, you can create recordings with the perfect balance of bass frequencies.
Experimenting With Mic Placement And Angles To Achieve Desired Results
- Mic placement and angles play a crucial role in capturing the desired sound.
- Moving the microphone closer to the sound source will result in a more intimate and focused sound, while placing it farther away will create a more ambient and spacious sound.
- Experiment with different distances and angles to find the sweet spot that captures the desired sound accurately.
- Consider the sound source’s directionality and adjust the microphone accordingly to achieve the desired results.
- With some trial and error, you can discover unique and creative ways to use a condenser mic to capture the perfect sound.
Recommendations For Choosing A Condenser Mic
Condenser microphones, also known as condenser mics, are popular choices for recording studios, podcasters, and musicians due to their ability to capture more detailed and sensitive sound. These mics are known for their superior audio quality and versatility, making them a must-have tool for any audio enthusiast.
When it comes to choosing a condenser mic, there are several factors to consider to ensure you make the right choice. In this section, we will explore the key factors to consider when selecting a condenser microphone, popular models, and their unique features, as well as budget-friendly options without compromising sound quality.
Factors To Consider When Selecting A Condenser Microphone:
- Polar patterns: Decide whether you need a mic with a cardioid, omnidirectional, or figure-eight polar pattern, depending on your recording needs.
- Frequency response: Consider the range of frequencies the mic can capture accurately, ensuring it suits the type of audio you will be recording.
- Sensitivity: Determine the mic’s sensitivity level to sound pressure, which affects how well it can capture quiet or loud sounds.
- Self-noise: Look for a condenser mic with low self-noise, as high self-noise can result in unwanted background noise in your recordings.
- Spl handling: Ensure that the microphone can handle the sound pressure level (spl) of your intended application, such as capturing loud instruments or vocals.
- Connectivity options: Check if the mic requires phantom power or if it can connect directly to your recording device via usb.
- Build quality: Assess the durability and build quality of the microphone, especially if you plan on using it frequently or for live performances.
Popular Models And Their Unique Features:
- Neumann u87: Known for its warm and detailed sound, the neumann u87 is a staple in professional studios worldwide. It offers selectable polar patterns and a switchable low-cut filter.
- Audio-technica at2020: With its affordable price point, the at2020 provides a low self-noise and a wide dynamic range. It is suitable for home studios and podcasting.
- Rode nt1: Famous for its extremely low self-noise, the rode nt1 delivers transparent and pristine recordings. It has a wide frequency response and comes with a shock mount.
- Akg c414: This versatile condenser mic offers nine polar patterns, making it suitable for a wide range of recording applications. It has a high spl handling and provides excellent detail.
- Shure sm81: The sm81 is a popular choice for capturing acoustic instruments. It features a flat response and a cardioid polar pattern, ensuring accurate and transparent recordings.
Budget-Friendly Options Without Compromising Sound Quality:
- Audio-technica at2035: Offering solid sound quality at an affordable price, the at2035 features a large diaphragm and a switchable 80 hz high-pass filter.
- Rode nt1-a: Another budget-friendly option, the nt1-a combines low self-noise and a wide dynamic range, making it ideal for vocal and instrumental recordings.
- Mxl 770: This budget condenser mic delivers a balanced sound with a smooth top end and rich midrange. It comes with a shock mount and a carrying case.
- Behringer c-1: With its affordable price tag, the c-1 provides a decent sound quality and features a cardioid polar pattern. It is suitable for beginner musicians and content creators.
When choosing a condenser microphone, it is essential to consider your specific recording needs, budget, and the mic’s technical specifications. By evaluating these factors, you can find the perfect condenser mic that suits your unique requirements and elevates your audio recordings to the next level.
Maintenance And Care Of Condenser Microphones
Condenser microphones are delicate and sensitive instruments that require regular maintenance and proper care to ensure optimal performance and longevity. By following these simple maintenance and care techniques, you can prolong the lifespan of your condenser microphone and enjoy crystal-clear recordings for years to come:
Regular Cleaning And Dust Removal Techniques:
- Gently wipe the microphone’s housing with a soft, lint-free cloth to remove any surface dust or dirt.
- For stubborn stains, lightly dampen the cloth with a mild soap solution and wipe the mic using gentle circular motions.
- Avoid using harsh chemicals or abrasive materials that may damage the microphone’s exterior.
- Pay special attention to the grille and capsule area, as these are the most sensitive parts of the microphone.
- Use a small brush or compressed air to remove dust and debris from the grille without touching the delicate diaphragm.
- Regularly clean the microphone’s shock mount or stand to prevent the accumulation of dust and dirt.
- Keep the microphone away from areas with excessive moisture or humidity, as this can lead to the growth of mold or affect its performance.
Storing And Protecting Your Microphone From Damage:
- Always store the condenser microphone in a clean, dry, and dust-free environment when not in use.
- Use a protective case or pouch specifically designed for condenser microphones to shield it from accidental bumps or falls.
- Avoid exposing the microphone to extreme temperatures or direct sunlight, as this can damage sensitive components.
- If using a microphone stand, ensure it is stable and secure to prevent any accidental knocks or vibrations.
- Unplug the microphone from audio interfaces or mixers when not in use to avoid potential electrical damage.
- When handling the microphone, always hold it by the body or handle, avoiding direct contact with the grille or capsule.
Troubleshooting Common Issues With Condenser Mics:
- If you experience low audio output or distorted sound, check the microphone’s cables and connections for any loose or damaged parts.
- Ensure that phantom power is enabled if using a condenser microphone that requires it.
- If the microphone produces excessive background noise or hum, try using a different xlr cable or plugging it into a different audio interface.
- In case of intermittent audio or signal dropouts, inspect the microphone’s connectors and replace any faulty cables or adapters.
- If you notice a significant decrease in sensitivity, refer to the microphone’s user manual for instructions on cleaning the diaphragm or contact a professional technician.
By following these maintenance and care practices along with the manufacturer’s recommendations, you can keep your condenser microphone in excellent condition, delivering professional-quality audio recordings every time. Remember, proper maintenance is key to maximizing your microphone’s performance and longevity.
Enhancing Your Sound Quality: Accessories And Techniques
Using shock mounts and microphone stands for stability:
- Mic stands: Invest in a sturdy microphone stand to ensure stability during recording sessions. This will prevent unwanted noise caused by accidental bumps or movements. A quality stand also allows for easy adjustments of height and position, giving you optimal sound capture.
- Shock mounts: Shock mounts are essential accessories that isolate the condenser mic from vibrations and mechanical noise. They act as a suspension system, preventing your mic from picking up unwanted sounds when recording. By using a shock mount, you’ll enjoy cleaner, clearer sound quality without any unwanted interference.
Applying proper gain staging and signal processing techniques:
- Gain staging: Proper gain staging is crucial to maintain a balanced and optimal audio signal. Avoid recording levels that are too hot or too low, as it can introduce distortion or cause weak signals. Set your input gain at an appropriate level to achieve the desired quality without clipping or signal degradation.
- Signal processing: Once you’ve recorded your audio, applying signal processing techniques can further enhance your sound quality. Use tools like equalization (eq) to adjust frequencies, compression to control dynamic range, and reverb to add depth and dimension to your recordings. These techniques can help refine your sound and make it more polished and professional.
Exploring advanced recording techniques to maximize sound quality:
- Room acoustics: The environment in which you record plays a significant role in sound quality. Experiment with different room setups, such as adding acoustic panels or foam, to reduce reflections and create a more controlled recording space. This can result in cleaner and more accurate sound capture.
- Stereo miking techniques: For more immersive recordings, explore stereo miking techniques. This involves using multiple microphones strategically placed to capture sound from different angles. It adds depth, spaciousness, and a sense of realism to your recordings, giving your audience a more engaging listening experience.
- Panning and spatial effects: Utilize panning and spatial effects during mixing to create a wider soundstage. By placing different elements of your audio in different positions across the stereo field, you can accurately position instruments and vocals, adding depth and dimension to your recordings.
By incorporating these accessories and techniques into your recording process, you can significantly enhance the sound quality of your recordings and make them stand out from the crowd. Experimenting with different methods and investing in the right equipment can give your audio a professional touch that will resonate with your audience.
So, start incorporating these tools and techniques today and take your sound quality to new heights!
Why would you use a condenser mic?
A condenser microphone, often referred to as a condenser mic, is a type of microphone that uses a diaphragm placed close to a backplate. The diaphragm and backplate are charged with an electric current, and as sound waves hit the diaphragm, the distance between the diaphragm and backplate changes, causing variations in the electric field. This, in turn, produces an electrical current that represents the audio signal.
Here are several reasons why you might choose to use a condenser microphone:
- Sensitivity and Responsiveness: Condenser mics are generally more sensitive than dynamic mics. They can capture a wider range of frequencies and respond more accurately to subtle changes in sound, making them suitable for capturing detailed and nuanced audio.
- High-Quality Audio: Condenser microphones are known for their ability to capture high-fidelity audio. They often have a wider frequency response and a faster transient response, resulting in a more accurate representation of the original sound.
- Low Noise: Condenser microphones typically have a lower self-noise compared to dynamic microphones. This makes them ideal for recording quiet or delicate sounds without introducing unwanted background noise.
- Versatility: Condenser mics are versatile and can be used for a variety of applications. They are commonly used in studios for recording vocals, acoustic instruments, and overhead drum miking. They are also suitable for podcasting, streaming, and voiceover work.
- Phantom Power: Most condenser microphones require phantom power to operate. This is a DC voltage (usually 48 volts) supplied by a mixer or audio interface. Phantom power is necessary for energizing the microphone’s internal electronics and powering the capsule.
- Capturing High Frequencies: Condenser microphones are particularly effective at capturing high-frequency content, making them well-suited for recording vocals, cymbals, and other instruments with extended high-frequency ranges.
It’s worth noting that condenser microphones are generally more fragile than dynamic microphones and can be more sensitive to handling noise. Additionally, they may not be the best choice for high-volume sound sources due to their sensitivity. The choice between a condenser and a dynamic microphone depends on the specific application and the characteristics of the sound source you are recording.
Frequently Asked Questions For What Does A Condenser Mic Do
What Is A Condenser Microphone?
A condenser microphone is a type of microphone that uses a vibrating diaphragm and a metal plate to convert sound into an electrical signal. It is known for its high sensitivity and wide frequency response, making it ideal for capturing vocals and detailed audio recordings.
How Does A Condenser Microphone Work?
A condenser microphone works by utilizing a charged diaphragm that vibrates in response to sound waves. These vibrations cause a change in the distance between the diaphragm and a metal plate, creating an electrical signal. This signal is then amplified to produce the desired audio output.
What Are The Advantages Of Using A Condenser Microphone?
Condenser microphones offer several advantages, including their sensitivity to high frequencies, ability to capture detailed audio, and suitability for recording vocals and acoustic instruments. They also provide a wider dynamic range and lower self-noise compared to other microphone types.
Can A Condenser Microphone Be Used For Live Performances?
Yes, condenser microphones can be used for live performances, but they require external power sources such as batteries or phantom power from an audio interface or mixer. Additionally, their sensitivity and higher risk of feedback make them more suitable for controlled environments like studios rather than loud, live stages.
How Do You Care For A Condenser Microphone?
To care for a condenser microphone, it’s important to handle it gently, avoid exposing it to moisture or extreme temperatures, and store it in a protective case when not in use. Regularly clean the microphone using a soft brush or microfiber cloth, and avoid using harsh chemicals or solvents that could damage the microphone’s components.
Conclusion
A condenser mic is a versatile and high-quality microphone that is widely used in various recording settings. It is highly sensitive and captures sound with exceptional clarity and detail. Its ability to handle a wide frequency range makes it ideal for recording vocals, acoustic instruments, podcasts, and live performances.
Additionally, condenser mics often require phantom power to operate, which can be provided by an audio interface or mixer. They also come in various shapes and sizes, including large-diaphragm and small-diaphragm options, to suit different recording needs. By understanding what a condenser mic does and how it works, you can enhance your recording experience and produce professional-quality audio.
Whether you are a musician, podcaster, or content creator, investing in a condenser mic can greatly improve the sound quality of your recordings. So, go ahead and explore the different options available and find the right condenser mic that suits your specific recording needs.
Start capturing pristine audio and take your recordings to the next level.

Williams Kane is a blogger and writer. He’s passionate about writing and connecting with the community, especially when it comes to sharing his ideas through writing.
I am a versatile author with a passion for exploring a wide range of topics on our multi-niche website. With a background in research and a love for writing, I bring a unique blend of expertise to our platform.
My journey began in the world of science, where I earned a degree in biology and developed a deep fascination for the natural world. This background enables me to delve into topics related to ecology, environmental conservation, and the wonders of the animal kingdom.
However, my curiosity knows no bounds, and I have ventured into various other niches as well. From technology trends and digital innovations to health and wellness tips, I strive to provide well-researched and engaging content that informs and entertains our diverse audience.
Furthermore, my dedication to staying current with the latest developments in each niche ensures that our readers receive up-to-date and reliable information. Whether it’s deciphering complex scientific concepts or simplifying tech jargon, I take pride in making complex subjects accessible to all.
Join me on our multi-niche journey, where we explore the depths of knowledge and share insights on a multitude of topics to inspire, educate, and entertain.
Related posts:
 MXL 770 Review | Best Cardioid Condenser Mic In 2023 !
 How Does a Condenser Microphone Work?
 10 Best Affordable Condenser Mic For Vocals Recording – Premium List!
 A Beginner’s Guide on How to Use Condenser Mic on Tiktok
How Do I Connect My Microphone to My Tv?
Karaoke System With Wireless Microphones
Best Microphone for iPhone 13: Upgrade Your Audio Game
A Beginner’s Guide on How to Use Condenser Mic on Tiktok
How Do I Connect My Microphone to My Tv?
Karaoke System With Wireless Microphones
Best Microphone for iPhone 13: Upgrade Your Audio Game
 Duolingo Microphone Not Working Android: Quick Fixes and Troubleshooting Tips